Removing a heat-sink retention module
To remove a heat-sink retention module, complete the following steps:
1. Read the safety information that begins on page vii and “Installation guidelines”
on page 169.
2. Turn off the server, and disconnect all power cords and external cables.
3. Remove the cover (see “Removing the cover” on page 177).
Attention: In the following step, keep each heat sink paired with its
microprocessor for reinstallation.
4. Remove the applicable air baffle; then, remove the heat sink and
microprocessor. See “Removing a microprocessor and heat sink” on page 238
for instructions; then, continue with step 5.
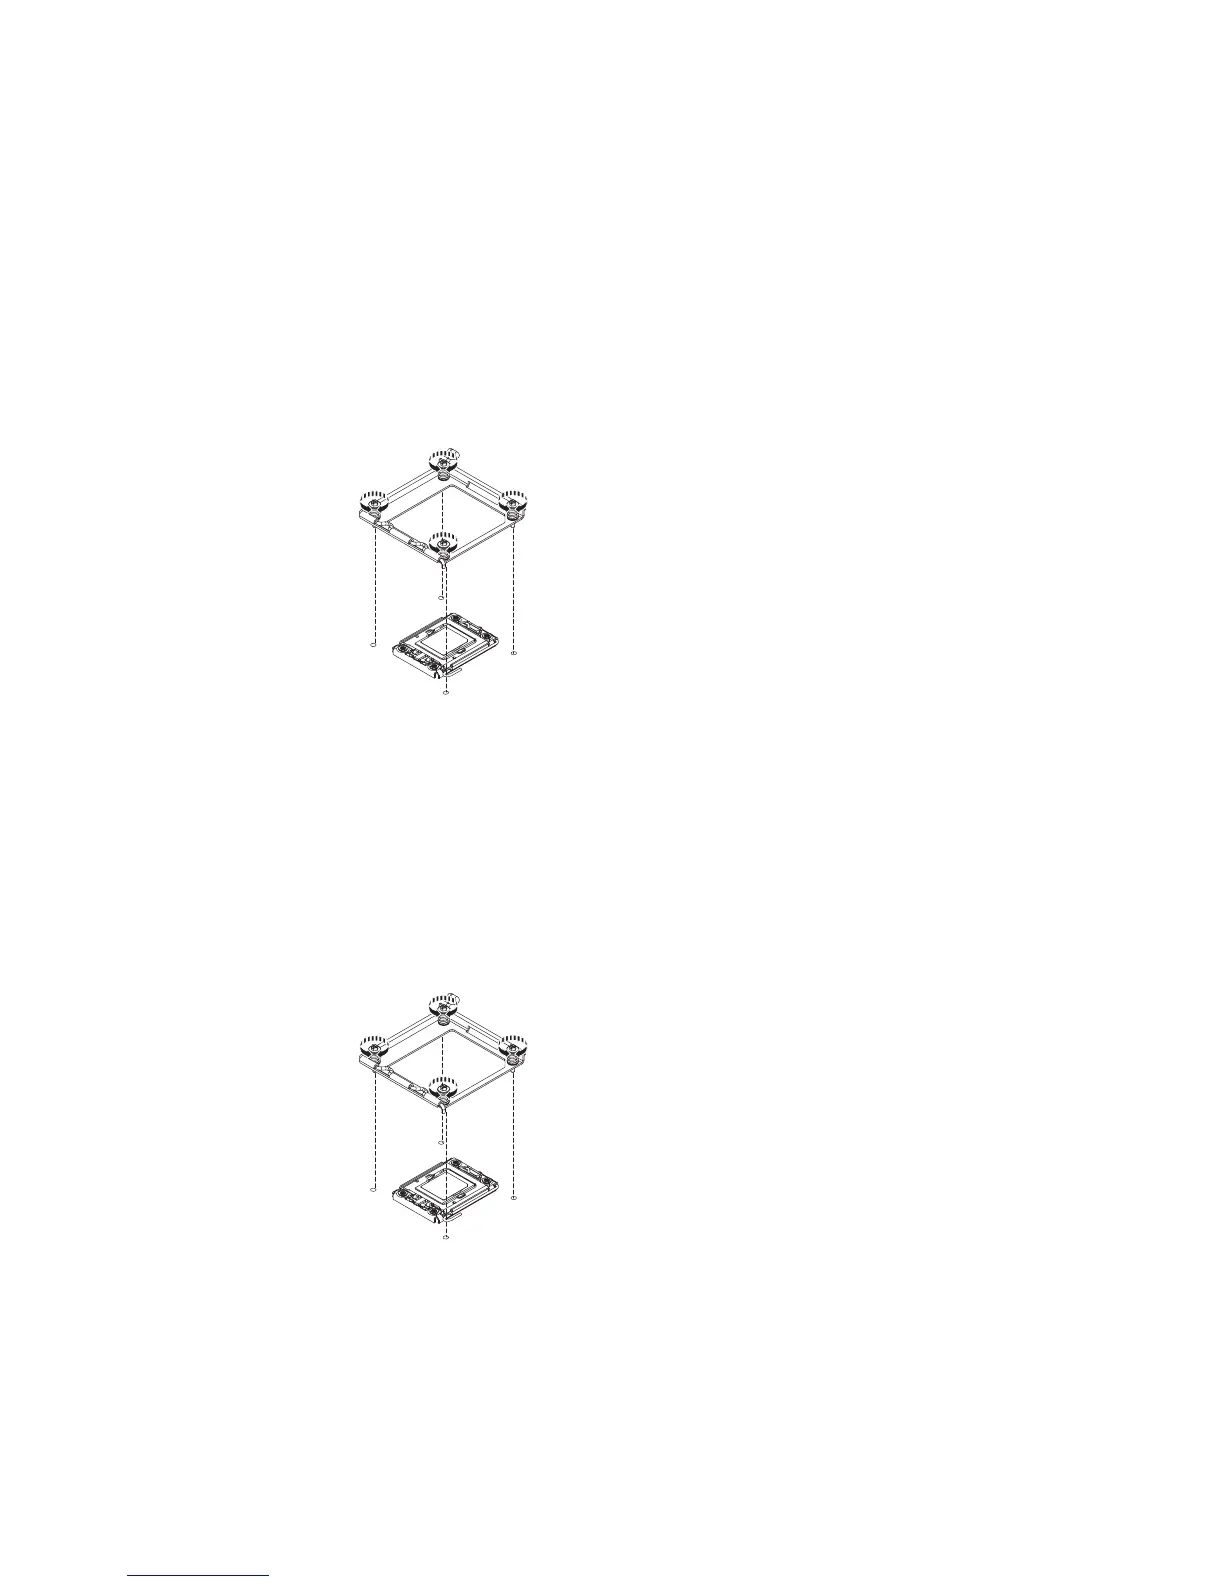
5. Remove the four screws that secure the heat-sink retention module to the
system board; then, lift the heat-sink retention module from the system board.
6. If you are instructed to return the heat-sink retention module, follow all
packaging instructions, and use any packaging materials for shipping that are
supplied to you.
Installing a heat-sink retention module
To install a heat-sink retention module, complete the following steps:
1. Place the heat-sink retention module in the microprocessor location on the
system board.
2. Install the four screws that secure the module to the system board.
Attention: Make sure that you install each heat sink with its paired
microprocessor (see steps 3 and 4).
3. Install the microprocessor, heat sink, and applicable air baffle (see “Installing a
microprocessor and heat sink” on page 240).
4. Install the cover (see “Installing the cover” on page 178).
5. Slide the server into the rack.
246 IBM System x3650 M3 Types 4255, 7945, and 7949: Problem Determination and Service Guide

 Loading...


