Removing a hot-swap hard disk drive
Latch
Handle
Attention: To maintain proper system cooling, do not operate the server for more
than 10 minutes without either a drive or a filler panel installed in each bay.
To remove a hard disk drive from a hot-swap bay, complete the following steps.
1. Read the safety information that begins on page vii, “Handling static-sensitive
devices” on page 171, and “Installation guidelines” on page 169.
2. Press up on the release latch at the top of the drive front.
3. Rotate the handle on the drive downward to the open position.
4. Pull the hot-swap drive assembly out of the bay approximately 25 mm (1 inch).
Wait approximately 45 seconds while the drive spins down before you remove
the drive assembly completely from the bay.
5. If you are instructed to return the hot-swap drive, follow all packaging
instructions, and use any packaging materials for shipping that are supplied to
you.
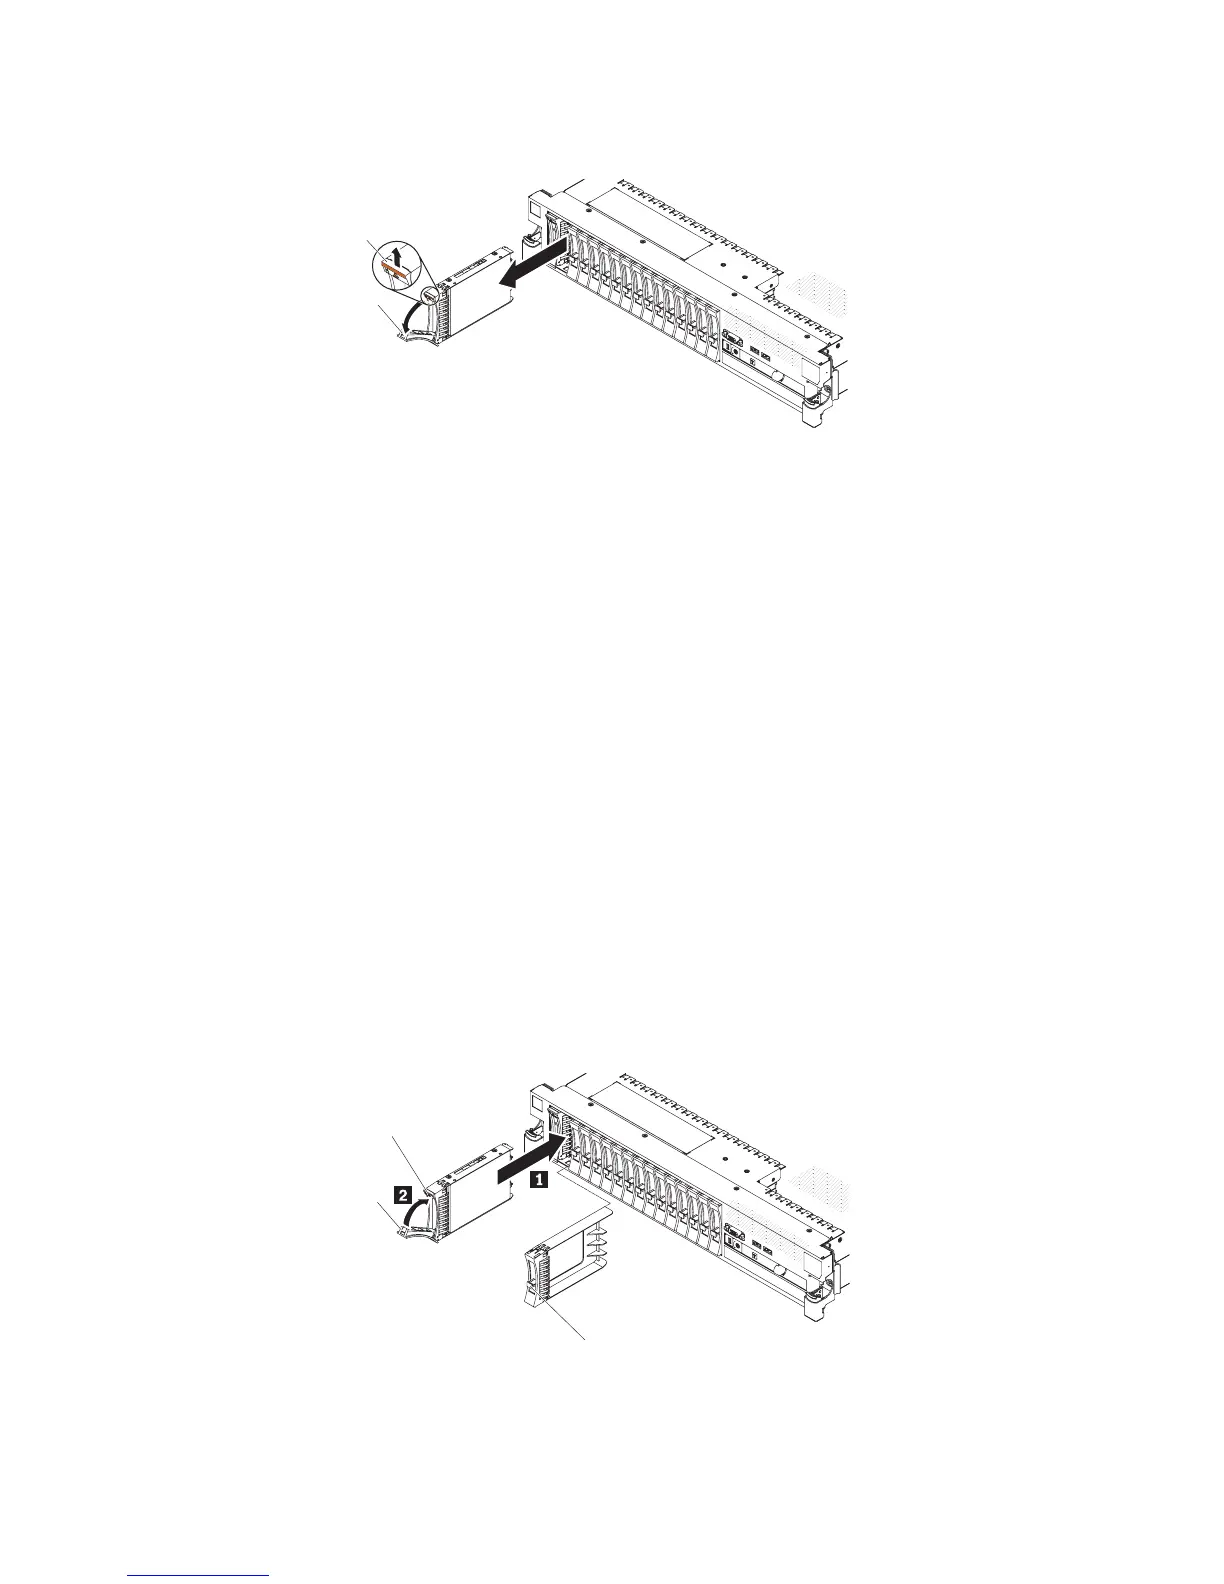
Installing a hot-swap hard disk drive
Locate the documentation that comes with the hard disk drive and follow those
instructions in addition to the instructions in this section.
For information about the type of hard disk drive that the server supports and other
information that you must consider when installing a hard disk drive, see the
Installation and User’s Guide on the IBM Documentation CD.
Important: Do not install a SCSI hard disk drive in this server.
Latch
Handle
Filler panel handle
To install a drive in a hot-swap bay, complete the following steps.
Attention: To maintain proper system cooling, do not operate the server for more
than 10 minutes without either a drive or a filler panel installed in each bay.
210 IBM System x3650 M3 Types 4255, 7945, and 7949: Problem Determination and Service Guide

 Loading...


