Installing a Remote Supervisor Adapter II SlimLine
An optional Remote Supervisor Adapter II SlimLine can be installed only in a
dedicated slot on the system board. See “System-board option connectors” on page
9 for the location of the connector. After the Remote Supervisor Adapter II SlimLine
is installed, the system-management Ethernet port on the rear of the server is
active.
Note: Earlier versions of the Remote Supervisor Adapter II SlimLine might not work
in this server. See http://www.ibm.com/servers/eserver/serverproven/compat/us/ for
the supported Remote Supervisor Adapter II SlimLine.
To install the Remote Supervisor Adapter II SlimLine, complete the following steps.
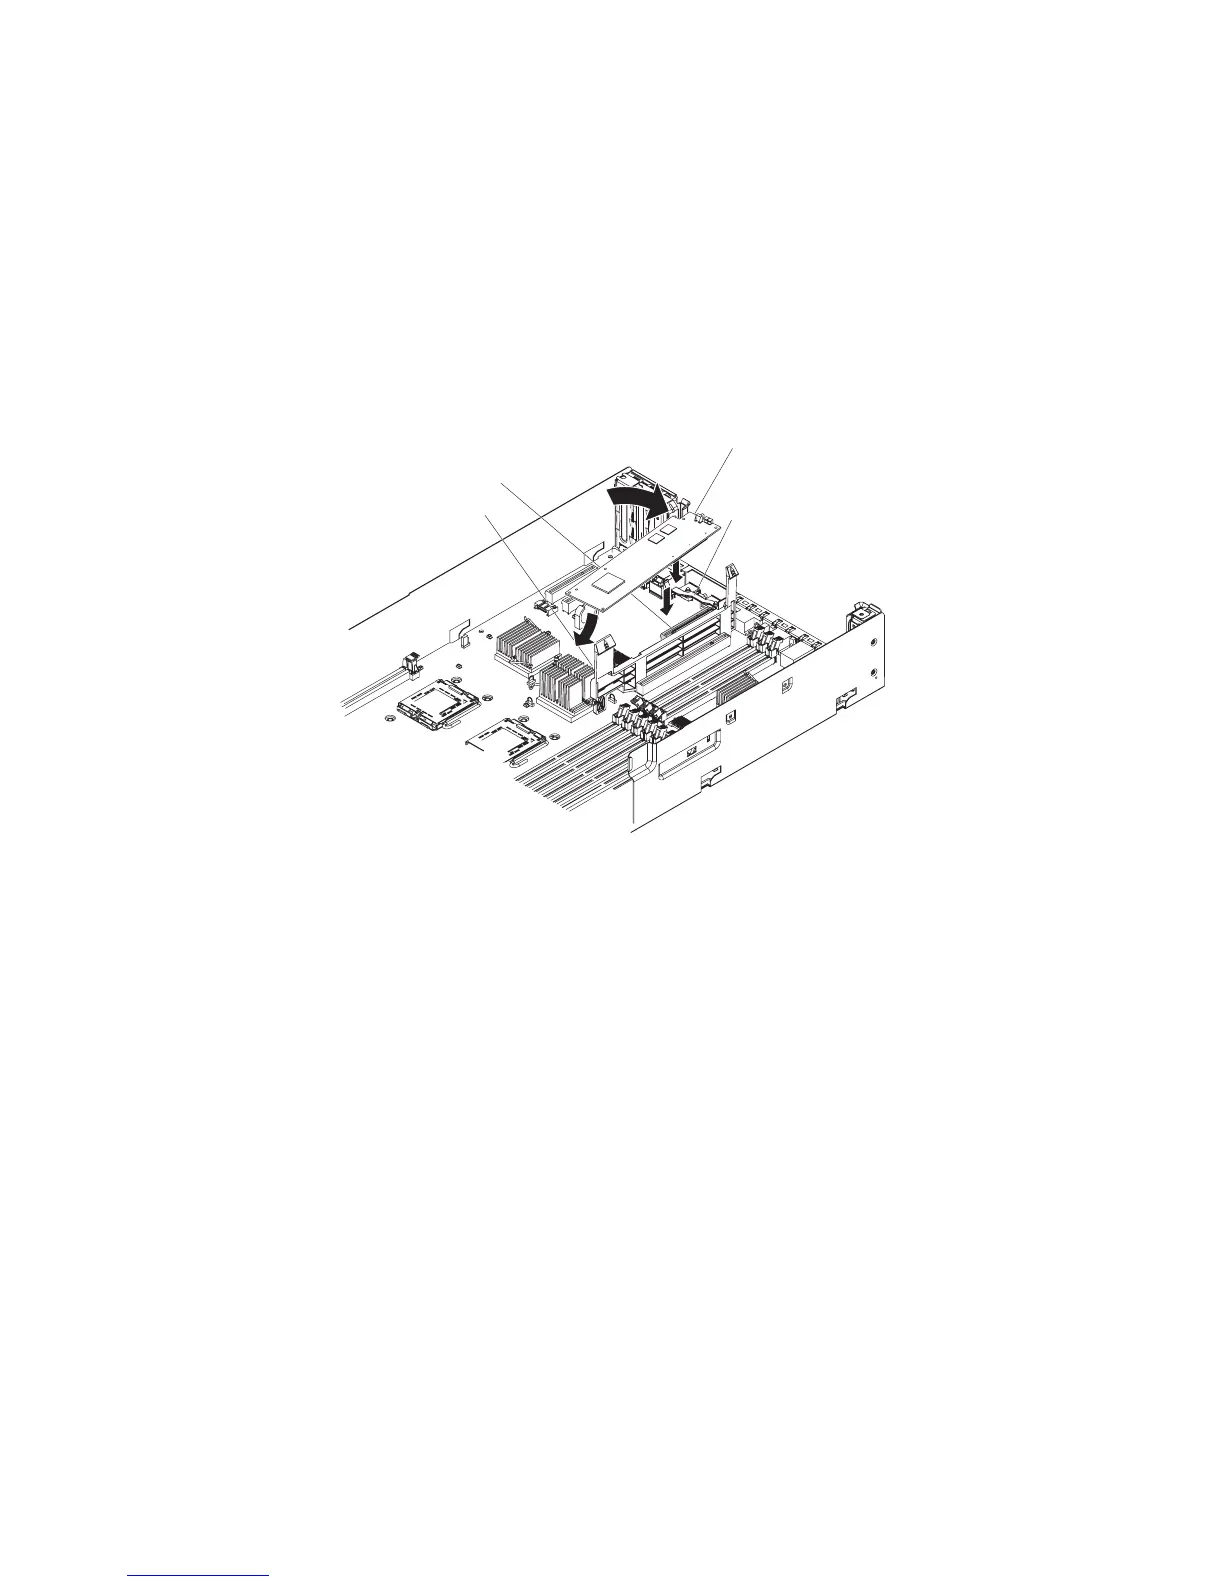
Remote Supervisor
Adapter II SlimLine
Connector
Latch bracket
Retainer bracket
1. Turn the Remote Supervisor Adapter II SlimLine so that the keys on the
connector align correctly with the connector on the system board.
2. Slip the free end of the Remote Supervisor Adapter II SlimLine under the tab on
the retainer bracket, aligning the holes in the adapter with the posts on the
retainer bracket and latch bracket; then, press the adapter into the connector on
the system board and make sure that all tabs on the latch bracket secure the
adapter in place.
3. Replace the PCI riser-card assembly.
4. Install the cover (see “Installing the cover” on page 91).
5. Slide the server into the rack.
6. Reconnect the external cables; then, reconnect the power cords and turn on the
peripheral devices and the server.
Restore
the backup copy of the configuration to the Remote Supervisor Adapter II
SlimLine. If you do not have a backup copy of the configuration, see the
documentation that comes with the Remote Supervisor Adapter II SlimLine for
information about installing the firmware and configuring the option.
Removing the ServeRAID SAS controller
Attention: To avoid breaking the retaining clips or damaging the connectors,
handle the clips gently.
102 IBM System x3650 Type 7979 and 1914: Problem Determination and Service Guide

 Loading...


