7. Slide the blue lock on the USB hypervisor connector forward toward the
hypervisor memory key as far as it will go, to secure the memory key in
position.
Results
If you have other devices to install or remove, do so now. Otherwise, go to
“Completing the installation” on page 154.
Note: You must configure the server to boot from the hypervisor USB drive. See
Chapter 3, “Configuring the server,” on page 157 for information about enabling
the embedded hypervisor.
Removing a USB hypervisor memory key
Use this information to remove a USB hypervisor memory key.
About this task
To remove the USB hypervisor memory key, complete the following steps:
Procedure
1. Read the safety information that begins on page “Safety” on page v and
“Installation guidelines” on page 37.
2. Turn off the server and peripheral devices and disconnect all power cords and
external cables (see “Turning off the server” on page 23).
3. Remove the cover (see “Removing the cover” on page 45).
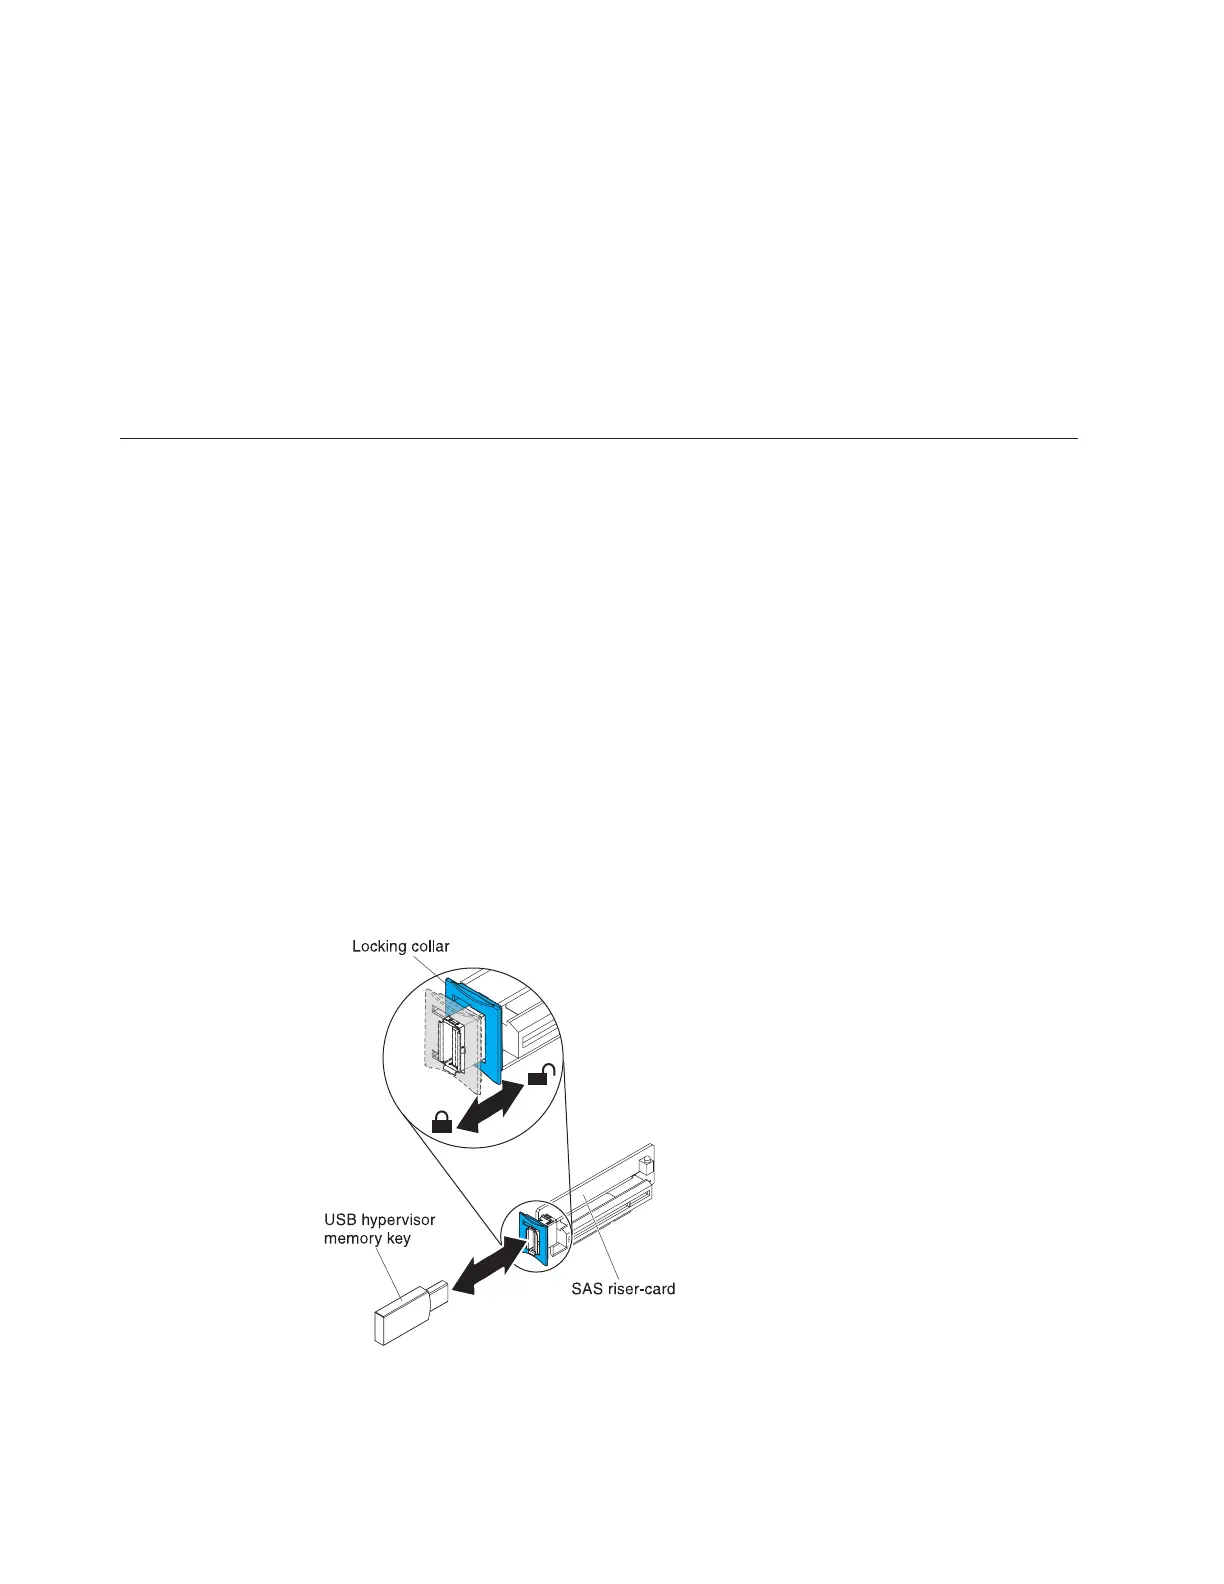
4. Locate the SAS riser-card assembly, which is near the left front corner of the
server.
5. Push the blue locking collar on the USB hypervisor connector back toward the
SAS riser-card to unlock it from the connector.
6. Pull the hypervisor memory key from the USB hypervisor connector.
Figure 156. USB hypervisor memory key removal
148 System x3650 M3 Types 4255, 7945, and 7949: Installation and User’s Guide

 Loading...


