15
171
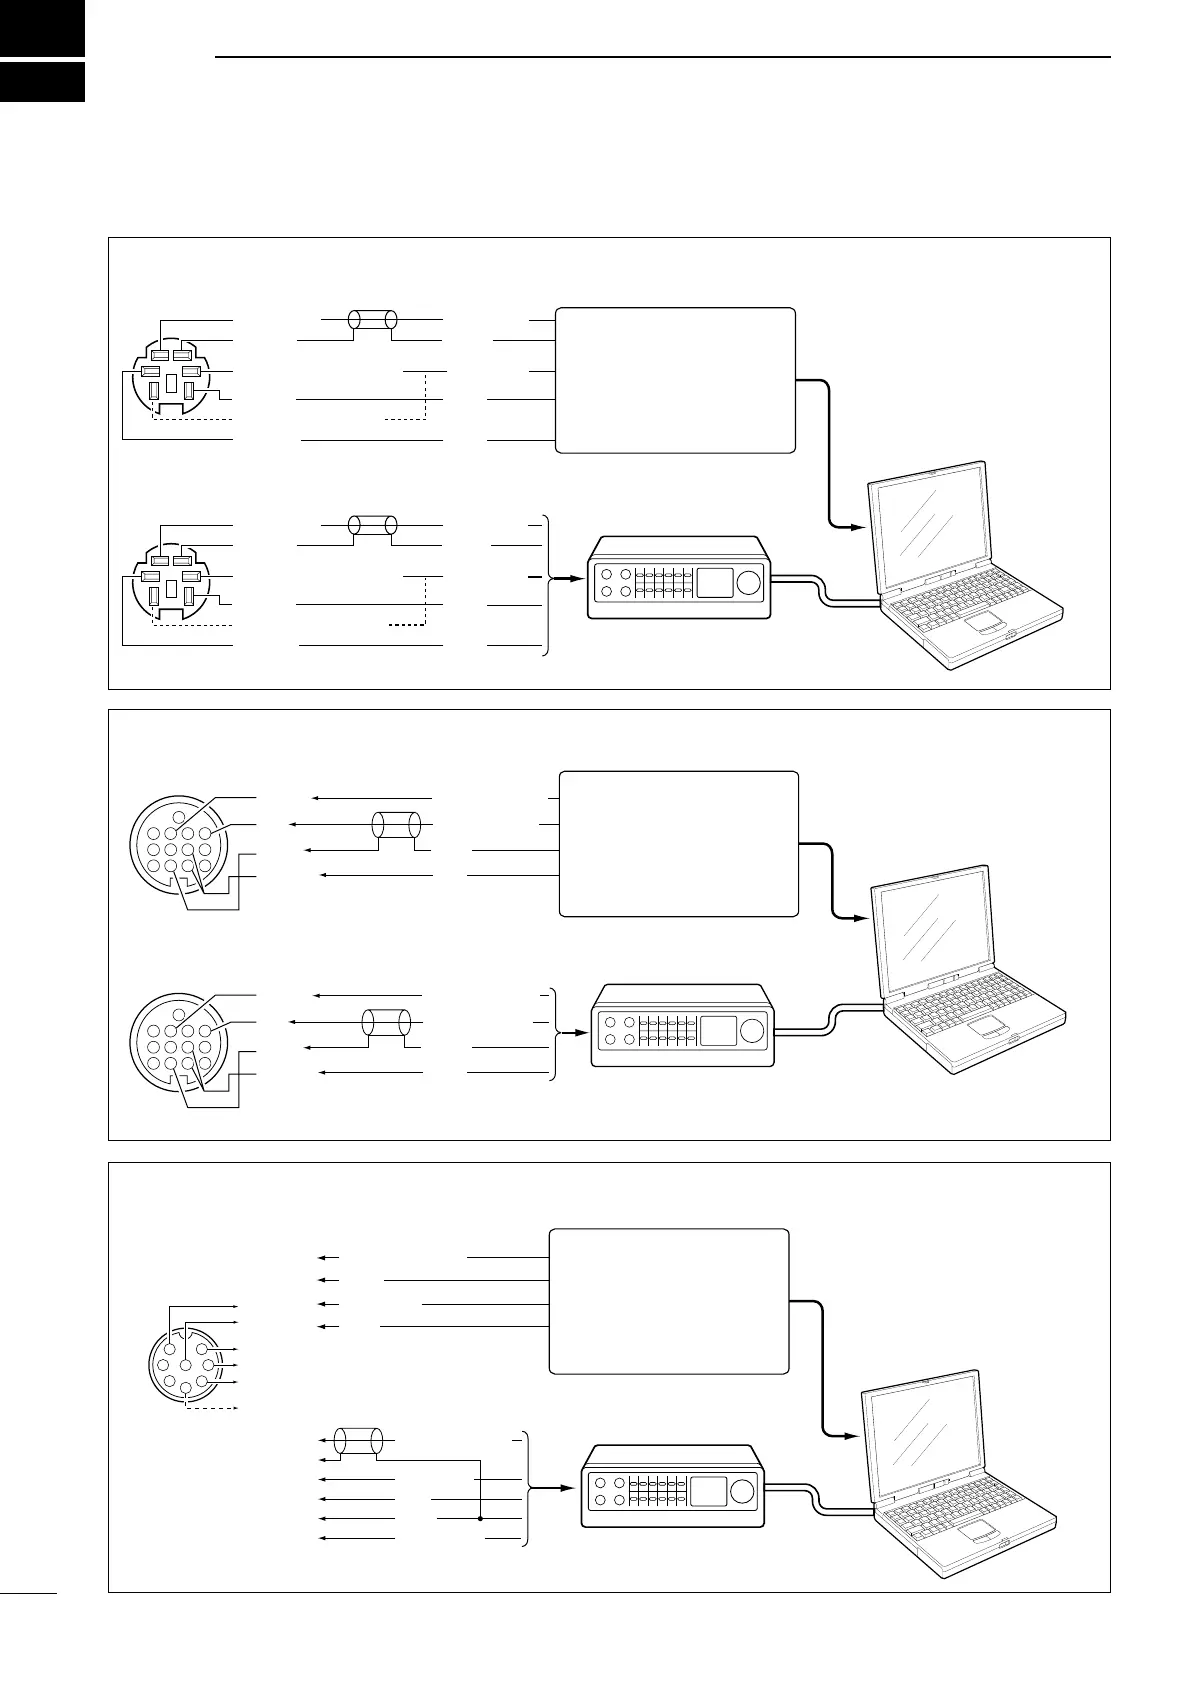
DATA COMMUNICATION
■ Connections
TNC
DATA IN
DATA OUT
(9600bps)
GND
AF OUT
(1200bps)
PTTP
Rear panel view
TX AUDIO
RX AUDIO
PTT
GND
SQL*
q
r
w
t
e
y
SQL
DATA IN
DATA OUT
(9600bps)
GND
AF OUT
(1200bps)
PTTP
TX AUDIO
RX AUDIO
PTT
GND
SQL*
q
r
w
t
e
y
SQL
PC
RS-232C
• When using a TNC
• When using a PC application
• When using a TNC
• When using a PC application
TNC
PC
RS-232C
Rear panel view
4
8
12
123
765
9
10 11
13
RTTY OUTPUT
AUDIO INPUT
PTT
GND
FSKK
AF
SEND*
GND
4
8
12
123
765
9
10 11
13
RTTY OUTPUT
AUDIO INPUT
PTT
GND
FSKK
AF
SEND*
GND
q
u
i
t
r
y
AFSK OUTPUT
AF INPUT
PTT
GND
SQL INPUT
• When using a TNC
• When using a PC application
AUDIO OUTPUT
AF INPUT
PTT
GND
q
u
i
t
1
2
3
4
5
6
7
8
q
u
i
t*
1
y
r*
2
Rear panel view
TNC
PC
RS-232C
* When connecting the squelch
line, consult the necessary
manual (TNC, etc.).
•Selectpin7(VSEND)andpin3(HSEND)outputusageintheSetmode.(p.166)
* e HF/50 MHz : HSEND
u 144/430/1200 MHz : VSEND
*
1
When using the VOX function,
no connection is needed.
Refer to the instruction manual
of the external equipment.
*
2
When connecting the squelch
line, consult the necessary
manual.
Connect to the serial port,
parallel port, speaker jack,
microphone jack and line IN/
OUT jack, etc.
See the instruction manual
of the application for details.
Connect to the serial port,
parallel port, speaker jack,
microphone jack or line IN/
OUT jack, etc.
See the instruction manual
of the application for details.
Connect to the serial port,
parallel port, speaker jack,
microphone jack and line IN/
OUT jack, etc.
See the instruction manual
of the application for details.
D When connecting to [DATA2]
D When connecting to [ACC]
D When connecting to [MIC]
 Loading...