Side 15
Norsk Svenska English
Montering
4/8: Innvendig bakplate
monteres på
Installation
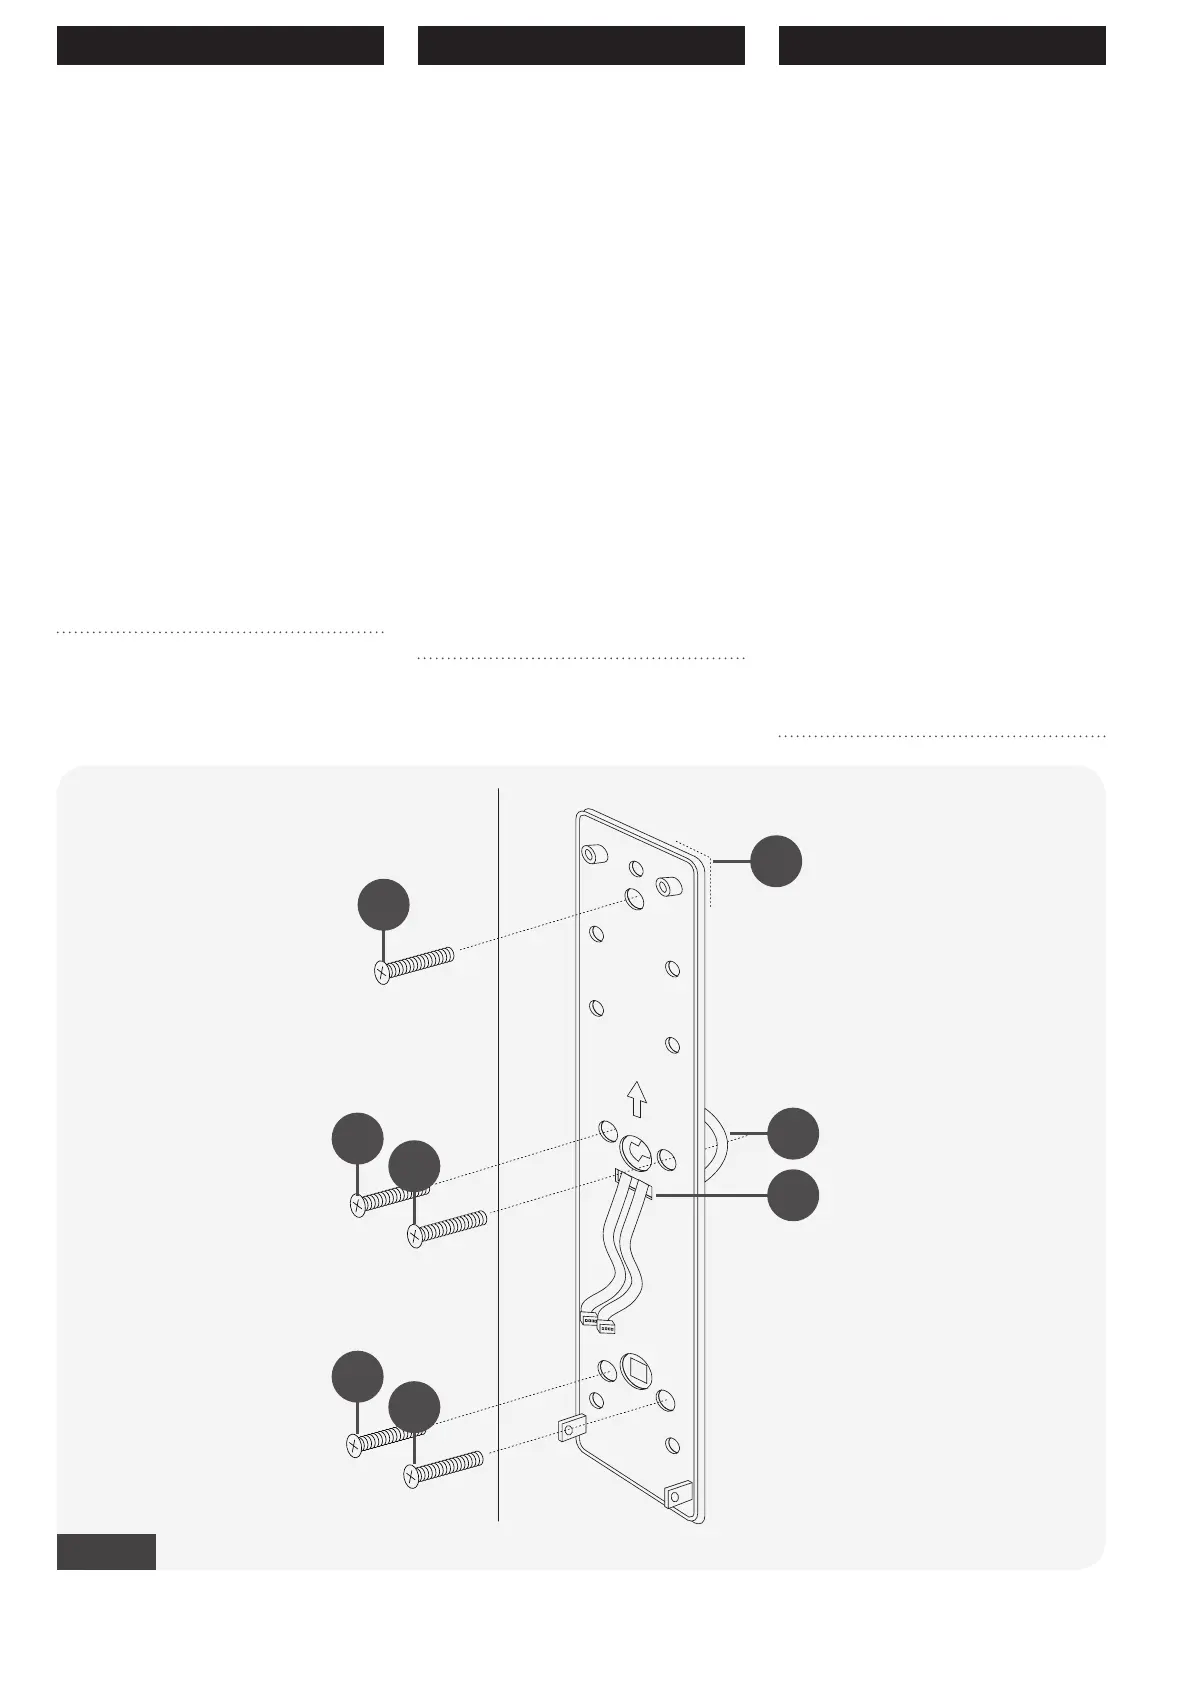
4/8: Interior backing is in-
stalled
6 Bakplate festes til utvendig enhet
som anvist av Fig-12 ( A-G ).
1 Bakplaten settes mot dørbladet i retnin-
gen “oppover” som anvist av pil Fig-12.
2 Ledningene føres gjennom åpningen
merket “CABLE ENTRY” på bakplate.
Område ( G ).
3 Ledningene må legges på utsiden av
Monteringsskruene ( B og C ).
4 Skru til bakplaten med et jevnt fordelt
trykk i rekkefølge ( A - E ).
5 Se til at gummipakningene ligger jevnt
mot dørbladet i alle hjørner ( F ).
6 The backing plate is fitted to the
exterior unit as shown in Fig-12 (
A-G ).
1 The backing plate is held towards the
door leaf with the arrow pointing up-
wards Fig-12.
2 The cables are fed through the opening
marked on the backing plate marked
“CABLE ENTRY” ( G ).
3 The cables must be positioned on the
outside of the fastening columns ( B and
C ).
4 Tighten the backing plate with an even
pressure in using going from ( A - E ).
5 Make sure that the rubber gaskets are
evenly positioned towards the door leaf
in all four corners ( F ).
Fig-12
A
F
G
H
B
D
C
E
Montage
4/8: Inre bakplatta monteras
6 Bakplattan sätts fast på utsidan
enligt Fig 12 ( A-G ).
1 Placera bakplattan mot dörrbladet i rikt-
ningen “uppåt” enligt pilen Fig-12.
2 Ledningarna förs genom öppningen
märkt “CABLE ENTRY” på bakplattan.
Område ( G ).
3 Ledningarna måste läggas på utsidan av
monteringsskruvarna ( B och C ).
4 Skruva på bakplattan med jämnt fördelat
tryck i ordning ( A - E ).
5 Kontrollera att trycket på gummitätning-
arna är jämnt fördelat på dörrbladet i alla
hörn ( F ).