89
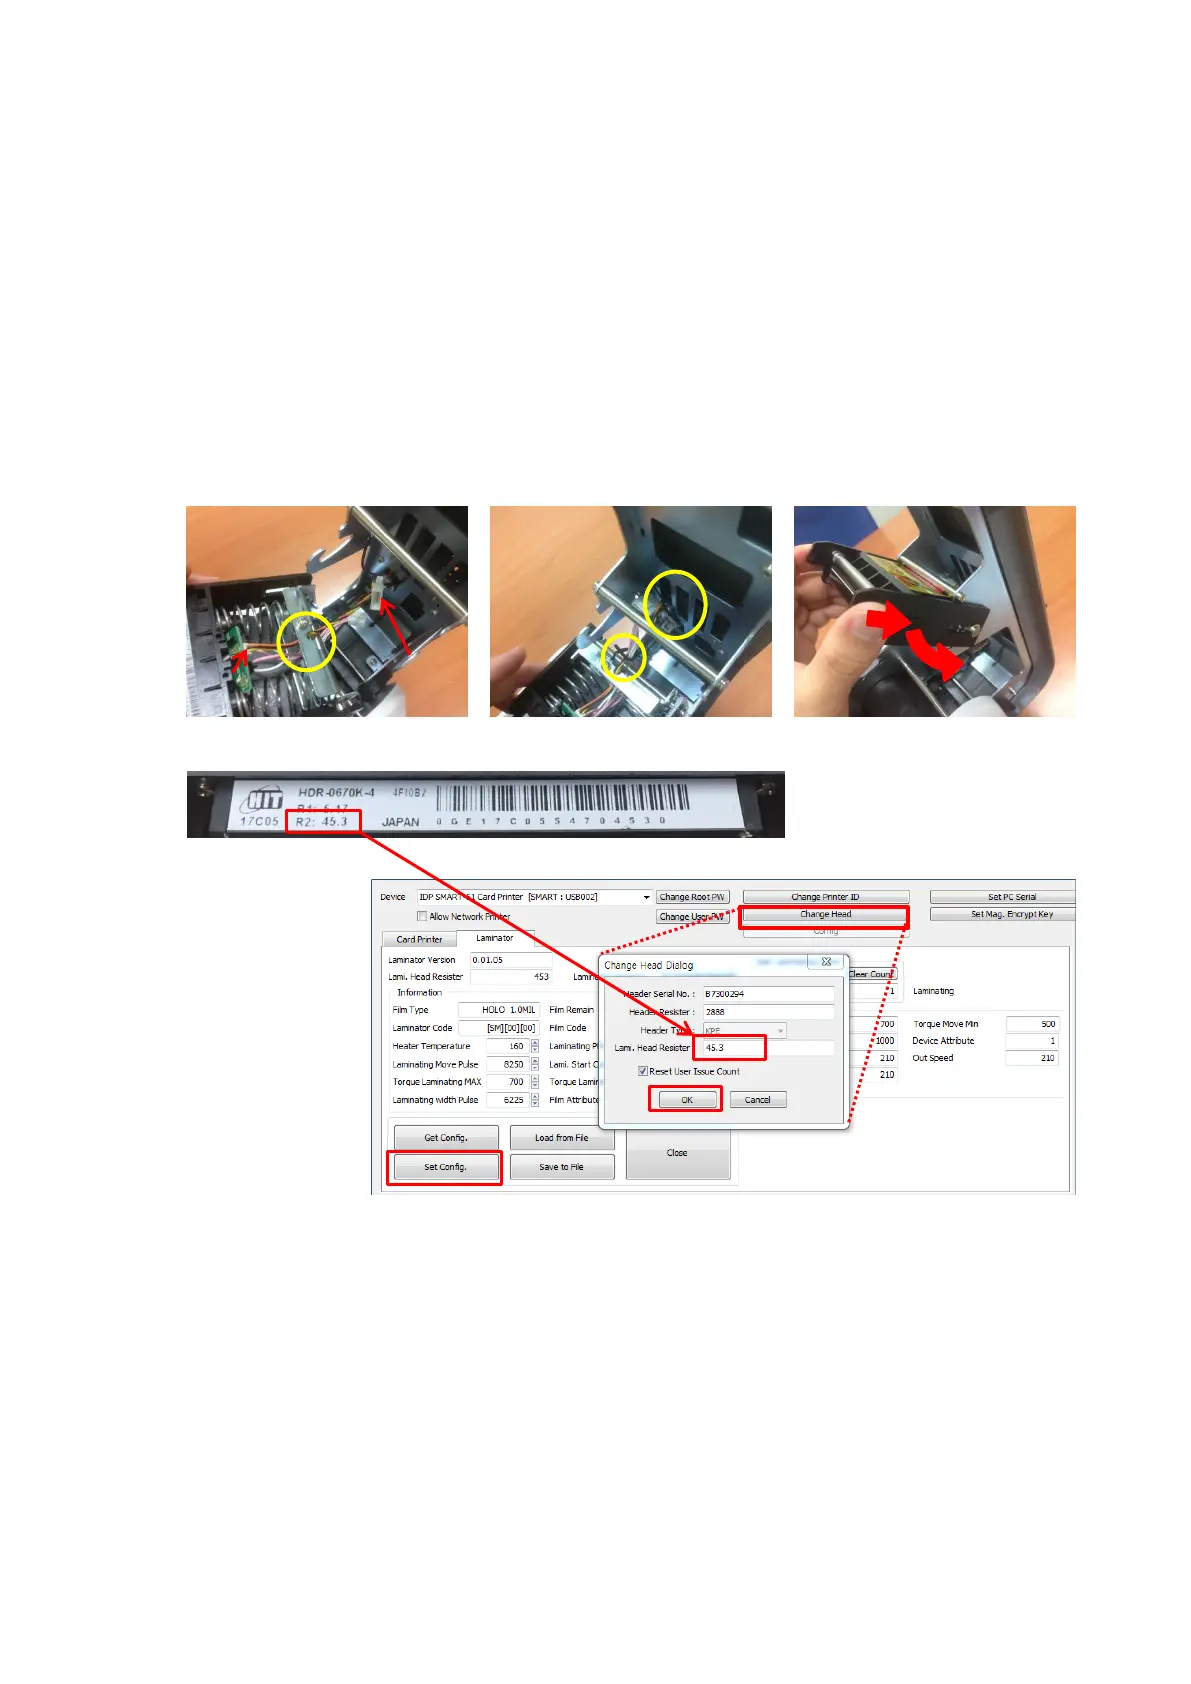
2. Assemble the new Laminator Head
6. Connect sensor wire(Con.1) and Laminator Head wire(Con.2) through the hole on top of the
Head Ass'y. (notice to the direction) (Step. 6)
7. Fix the cables using the retainer coil. (Step. 7)
8. Turn the Head Ass'y and place its upper part to fixing point of Top Cover. (Step. 8)
9. In reverse order of disassembly, push the Head Ass'y in the direction of the arrow and fix to the
hook. (Step. 8)
10. With connected PC, Launch [CardPrinterConfig], open [Change Head] window, insert the value
of R2 on the back of the Head(Step. 9) into [Lami. Head Resister] section and save the settings.
(Step. 10) The Resister value must be adjusted before Laminating.
<Step. 6> <Step. 7> <Step. 8>
<Step. 9>
<Step. 10>
Figure 117
Assemble the New Laminator Head
1. Click [Change Head]
2. Insert Resister value
Into [Lami. Head
Resister] section on
pop-up window
3. Click [OK] to close
pop-up window
4. Click [Set Config] to
save