21
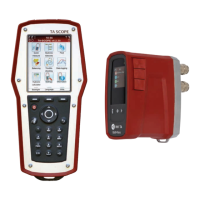
Measure Power
TA-SCOPE contains a method for measuring power. Depending on the type of circuit, i.e., number of measuring
points available, the function is performed in various ways. Follow the detailed instructions on the display.
1 Navigate
to Quick Measure in the main menu and press enter.
2 Navigate
to Measure Power and press enter.
3 Meas. configuration – State available measuring equipment.
4 State number of available measuring points. Connect the measuring needles and sensor(s), see page 15.
5 TA-SCOPE automatically checks if the correct set of sensors are connected according to selected measurement
configuration.
6 If power measurement can be performed at once follow the instructions below. An alternative instruction will be
displayed if not enough temperature probes or measuring points are available for measuring power in one step.
7 Optionally input Design Flow. Navigate
to and type the given design flow for the terminal. While
measuring the deviation is given as a percentage besides the entered design flow.
8 Define valve. Navigate
to and press enter.
9 Select input field for Type and press enter.
10 Navigate
to desired valve type and press enter.
11 Continue by defining Family and Valve in the same way.
12 Make valve settings valid by pressing the function key Done. Valve settings are visible in the Measure Flow
menu. Valve size can easily be changed from here, navigate
to and cycle the options. Type and
family stays the same.
13 Input Valve Opening. Navigate
to and type the number of turns stated at the digital read-out at the
handwheel, more handwheel details on page 16.
14 Define fluid in
. Press enter and navigate to input fluid temperature and properties. Press enter.
15 Freezing point is stated below the temperature input field and the auto correction function indicates if the allowed
limits are exceeded. More Fluid details on page 34.
16 Press function key Done to make fluid definition valid.
17 Press function key Measure to start measuring.
18 After the calibration cycle is done the measurement begins and values are displayed for Power, Flow and
Differential Temperature ∆T.
19 Press function key Hold to pause the measuring, and press Continue to resume.
20 Possible to save measuring data in the same way as Flow, see item 18 (page 18) in the Measure flow section.
21 End measurement by exiting the menu, press
and disconnect the measuring points according to page 15.
Quick Measure