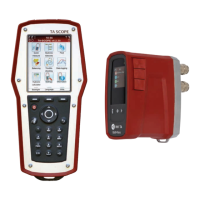
28
Modify or Define New Module
Whilst on site and performing balancing on a hydronic system changes from the original design might be
discovered. The function A newly defined module enables you to add modules to a hydronic network in
TA-SCOPE.
1 Select
Balancing from the main menu, press enter.
2 If required, adjust the acceptable flow deviations in design conditions with the option Balancing Tolerance (also
available in Settings menu, see page 37).
3 Select TA-Diagnostic method or TA-Wireless method. Press enter.
4 Navigate
to A newly defined module, press enter.
5 Enter number of circuits to add to the module.
6 Untick the box Partner valve available if no partner valve is included in the module.
7 If required adjust the option Minimum Dp in the index valve, which is set by default to the market standard
value.
8 Press function key Continue.
9 Define system properties including design flow, valve type and valve opening for the valves in the new module.
Press function key Continue.
10 A list of existing hydronic networks is displayed and the newly defined module can be inserted into one of these.
Navigate
the desired network and press enter.
11 The network will appear as an expandable structure. Press
or enter to expand/collapse the network. Navigate
to the correct level for the new module, press enter to insert.
12 Enter a module name of your own preference or use the automatic name function by ticking the box automatic,
press enter when the box is in focus.
13 Alternatively a separate network for the new module can be created. Instead of selecting an existing network,
enter a network name which has not been used previously. Also name the module, either enter a name or use the
automatic function.
14 Press function key Continue to start balancing the valves in the new module.
15 Continue the balancing process as described in “Balance a Hydronic Network with TA-Diagnostic”, item 8 (page
25) to the end, or as described in “Balance a Hydronic Network with TA-Wireless”, item 8 (page 26) to the end.
Balancing