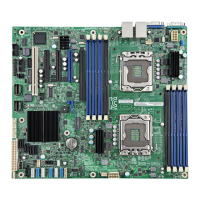
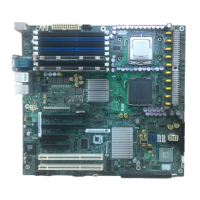
Jumper Blocks Intel® Server Board S2400SC TPS
Intel order number G36516-002 Revision 2.0
Pins 2-3 should not be jumpered for normal system operation.
Update
ME Firmware Force Update Mode – Disabled
ME Firmware Force Update Mode – Enabled
Clear
These pins should have a jumper in place for normal system operation.
To clear administrator and user passwords, power on the system with pins 2-3 connected.
The administrator and user passwords clear in 5-10 seconds after power on. Pins 2-3
should not be connected for normal system operation.
Update (not
used)
CPLD online update disabled(Default)
CPLD online update enabled
Note:
1. For safety purposes, the power cord should be disconnected from a system before
removing any system components or moving any of the on-board jumper blocks.
2. Access to jumper blocks near Riser Slot #1 is limited, removal of the riser card may be
necessary to move these jumpers.
3. System Update and Recovery files are included in the System Update Packages (SUP)
posted to Intel’s web site.
BIOS Default (CMOS Clear) and Password Clear Usage Procedure
The BIOS default (J2J3) and Password Clear (J1C6) recovery features are designed to achieve
the desired operation with minimum system down time. The usage procedure for these two
features has changed from previous generation Intel
®
server boards. The following procedure
outlines the new usage model.
Clearing CMOS (BIOS default)
1. Power down the server and unplug the AC power cord.
2. Open the server chassis. For instructions, see your server chassis documentation.
3. Move the jumper (J2J3) from the default operating position (covering pins 1 and 2) to the
reset/clear position (covering pins 2 and 3).
4. Wait 5 seconds.
5. Move the jumper back to default position, covering pins 1 and 2.
6. Close the server chassis and reconnect the AC power cord.
7. Power up the server.
The CMOS is now cleared and you can reset it by going into the BIOS setup.
Note: Removing AC power before performing the CMOS Clear operation causes the system to
automatically power up and immediately power down after the procedure is followed and AC
power is re-applied. If this happens, remove the AC power cord again, wait 30 seconds, and re-
install the AC power cord. Power up the system and proceed to the <F2> BIOS Setup Utility to
reset the desired settings.