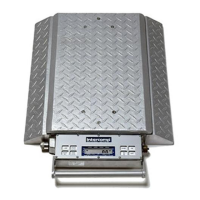
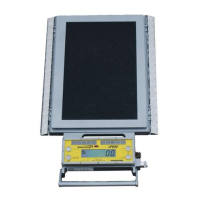
CS3000, Users
Rev A, January, 2011
Page 12 of 35
13. The display will show “Proto”. Press the Mode button. The flashing display
shows the current setting. There are 4 protocol settings for the scale, Standard
(“StAnd”), Low Power (“Lo Pr”), Current Loop (“C.L00P”), or “None”
. Set this
setting to “Lo Pr” for wireless operation with the RFX wireless indicator. Battery
life will be improved if “nonE” is chosen, but this disables any wireless operation.
Press either the zero button or the lb/kg button to toggle the display through the
different settings. When the desired setting is displayed press the mode button to
continue through the mode menu.
14. The display will show “i.bAud”. Press the Mode button. The display will show the
current setting flashing. This setting is not used on the CS3000 and can be left
at either of the two settings available, 9600 and 115200. Press the mode button
to continue through the mode menu.
15. The display will show “rAdio”. Press the Mode button. The display will show the
current setting flashing. This is the radio enable status and is either on or off. Set
this setting to “yes” for wireless operation with the RFX wireless indicator. Set
this setting to “no” to disable wireless operation which will also increase battery
life. If you select “no” the scale will skip the rest of the settings and return to
normal weighing. Press either the zero button or the lb/kg button to toggle the
display. When the desired setting is displayed press the mode button to continue
through the mode menu.
16. The display will show “rF CH”. Press the Mode button. The flashing digit shows
the current setting. All scales and indicators in a system must be set to the same
radio channel setting in order to communicate with each other. The flashing digit
may be incremented by pressing the Lb/Kg button or decremented by pressing
the ZERO button. To move one digit to the left, press the TARE button. When
the desired number is displayed, press the Mode button.
17. The display will show “rF.PAn”. Press the Mode button. The display will show the
current setting with the number on the right flashing. All scales and indicators in
a system must be set to the same Personal Area Network ID setting in order to
communicate with each other. The flashing digit may be incremented by
pressing the Lb/Kg button or decremented by pressing the ZERO button. To
move one digit to the left, press the TARE button. When the desired number is
displayed, press the Mode button.
18. The display will show “rF.ECP”. Press the Mode button. The display will show the
current setting flashing. This is the encryption enable status and is either on or
off. Use the Lb/Kg button or the ZERO button to toggle between the settings.
When the desired status is flashing, press the Mode button. If “Yes” was
selected go to the next step. If “no” was selected skip the next step. The display
will show “00000” with the number on the right flashing. The flashing digit may be
incremented by pressing the Lb/Kg button or decremented by pressing the ZERO
button. To move one digit to the left, press the TARE button. Enter any number
from 0 to 65534. This is the encryption key. For security purposes, this setting is