INSTRUCTIONS - WISEINSIGHT
WiseInsight - View Menu
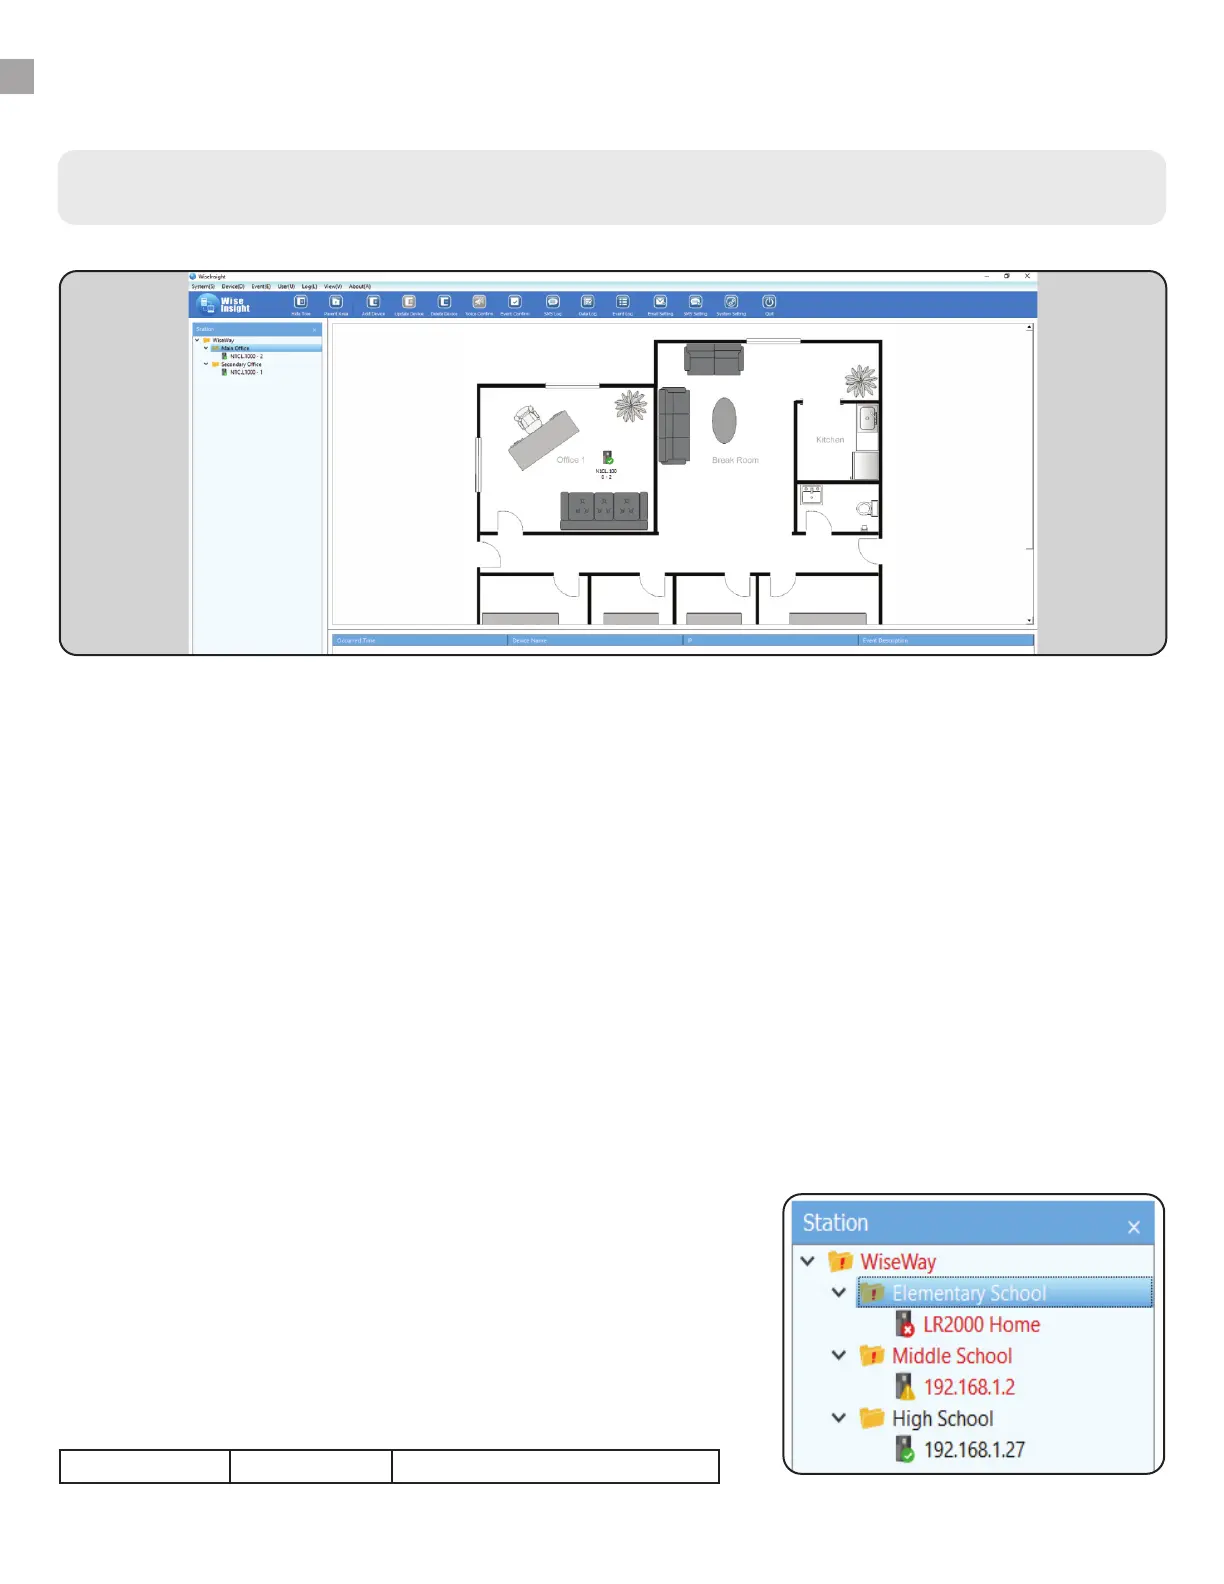
Map
Map View lets you view uploaded floor plans, photos, diagrams or maps (must be a .jpg file) and arrange your
UPS device icons on them to get a visual representation of the physical location where each device is located
in the physical world. This is useful if you have a large building or multiple locations/buildings, and
multiple UPS devices.
To upload a map, you need to have at least one “area” or sub-folder in the station tree menu. Right-click the
top-most folder (default name is “WiseWay”) and choose “Add Area.” Give the area a name that represents the
location of the UPS (examples: building name, building address, wing or floor number).
If needed, you can create multiple areas, and even sub-areas (such as a building, then by floor level) in the
station tree hierarchy.
Drag and drop your UPS icons from the Station tree menu into the appropriate Area folder. The UPS devices
will appear below the folders in the folder hierarchy.
Right-click on an area folder and choose “set map.” Click “Browse” and navigate to the file you wish to upload.
Then, highlight the folder and select “map” from the “View” menu.
Left-click the folder you wish to edit in the station menu. The image
file should appear on the main window of the dashboard. Drag-and-
drop the UPS device icons to the appropriate location on the image
you’ve uploaded. These icons will change color in the event of an
alarm trigger (such as a loss of power or communication). This will let
you easily see where the problem area is so you can send help to that
area.
green: normal amber: alarm red: off-line/no communication
3.
28
 Loading...