MK-100151 Rev. A
23
ENGLISH
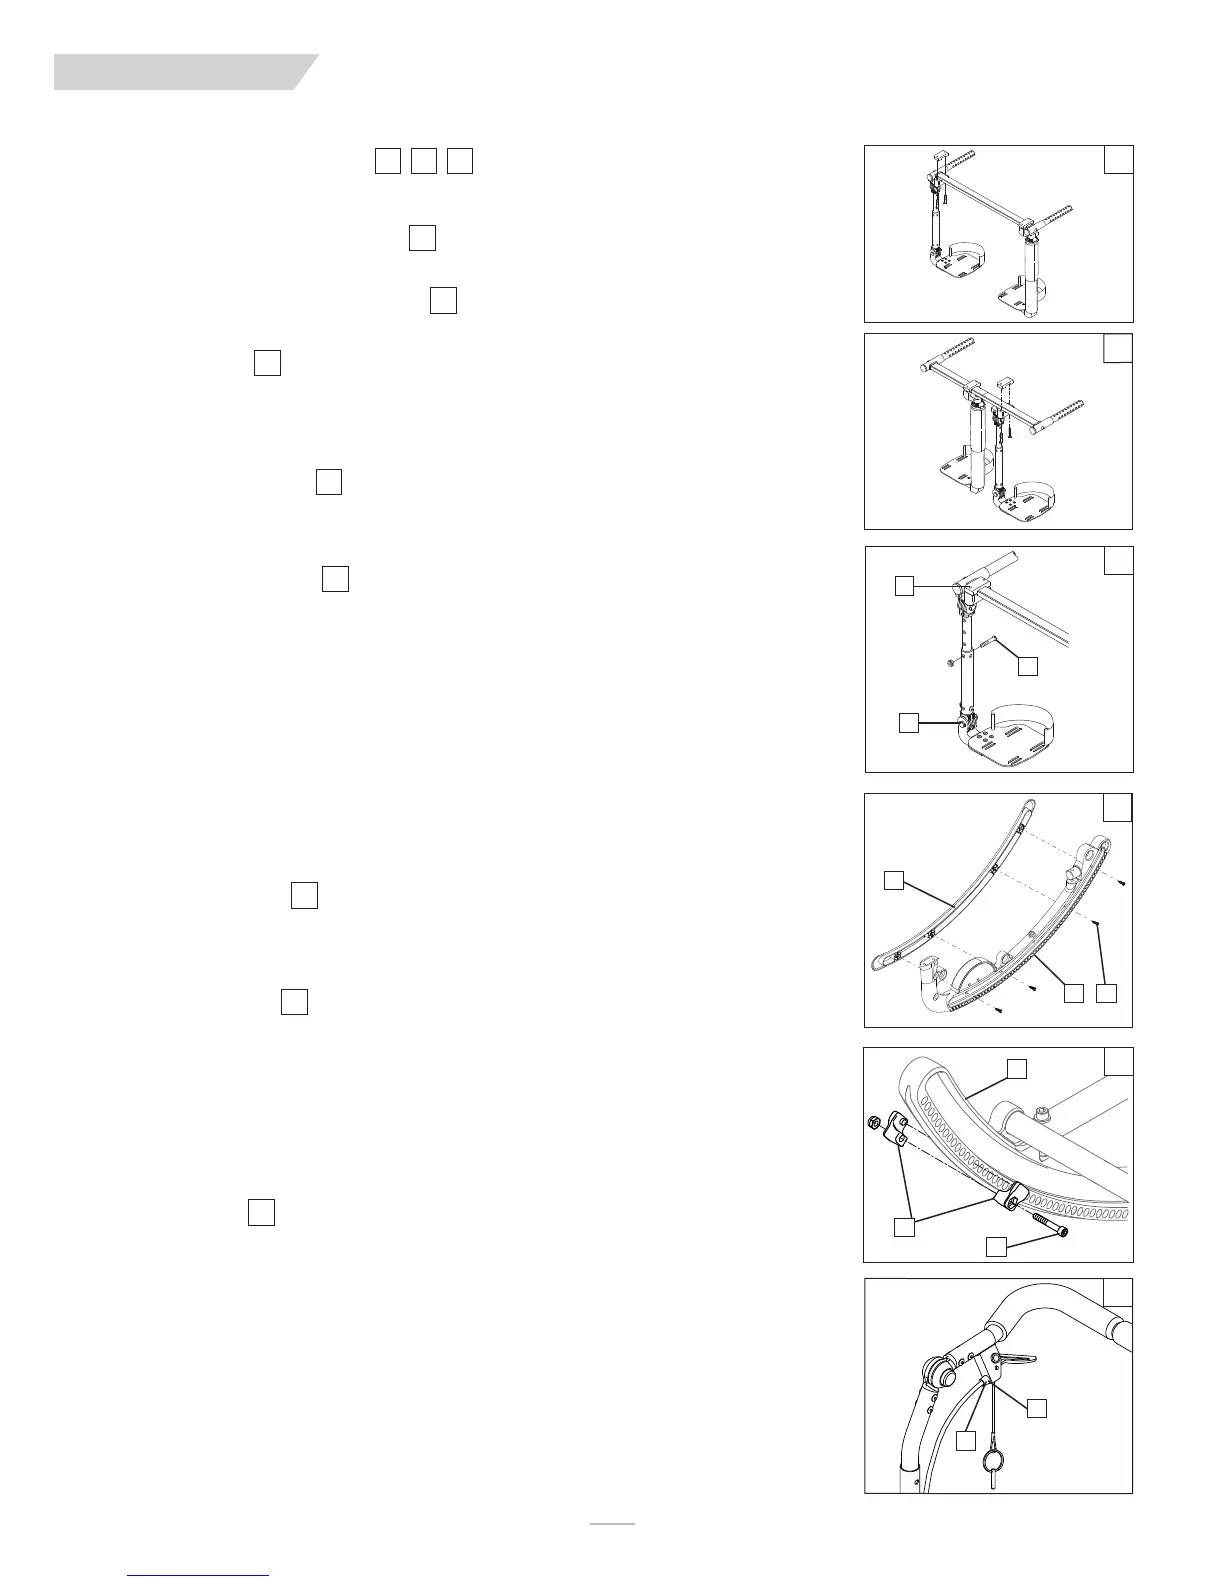
N. CONTRACTURE FOOTREST
1. Outside Mount -
Can be mounted laterally
2. Inside Mount -
Can be mounted in the center.
3. Height Adjustment
a. Loosen and remove the retaining bolt (A) in the footrest mounting bracket.
b. Slide the lower tube upward or downward to the desired position until predrilled holes on hanger tubes
are aligned.
c. Reinsert bolt (A) and tighten.
4. Footrest Angle Adjustment
a. Loosen the retaining bolt (B) in the adjustment locking joint.
b. Position footrest foreword or rearward in desired angle.
c. Retighten the bolt (B).
5. Footplate Angle Adjustment
a. Loosen the retaining bolt (C) in the footplate locking joint.
b. Position footplate upward or downward in desired angle.
c. Retighten the bolt (C).
O. TILT-IN-SPACE MECHANISM
The tilt-in-space mechanism is installed by Sunrise. Two cable/trigger mechanisms positively lock the chair in
place from -5º to 60º depending on the set-up. The Quickie/Zippie IRIS has the capability to provide from 0º to
5º of forward tilt.
The Caregiver or User of this chair should not attempt to make a forward adjustment on
their own
. This adjustment must be performed by an authorized supplier.
1. Rocker Cover removal
a. Remove the (4 or 5) screws (D) that hold the cover to the Rocker Frame (E).
b. Remove the Rocker Cover (F) and store with screws in case you need them later.
2. Tilt-stops Adjustment
NOTE– When using tilt stops, you must first remove the Rocker Cover.
Adjustments can be made to limit the amount of tilt (rotation) that the chair provides by using the tilt-stops (H).
a. Loosen and remove the retaining screw (G).
b. Locate the tilt-stops to the desired limit either anterior or posterior.
c. Each half of tilt stop assembly should plug into directly opposing holes on the rocker (E), then secure in
place by tightening the screw (G).
3. Cable Adjustment
NOTE–
Do not use lubricants on the components or assembly.
a. Loosen the jam nut (I).
b. Rotate the cable adjuster (J) until slack is removed from the cable. Make sure the plunger pin can fully
extend and retract after adjustment and that pins engage the rocker when triggers are released.
c. Tighten jam nut (I).
464544
44
45
46
46
46
47
48
49
IX. DEALER SERVICE & ADJUSTMENT
47
44
4
5
46
48
A
B
C
H
G
E
49
I
J
F
E D