Do you have a question about the janitza UMG 96 RM-M and is the answer not in the manual?
Legal information regarding the manual's use and reproduction rights.
Statement about ownership and rights of trademarks mentioned in the manual.
Statement on the manufacturer's responsibility for errors or omissions.
Specifies the purpose and application areas of the UMG 96RM-M power analyzer.
Details the physical and electrical specifications of the UMG 96RM-M device.
Lists the key functional capabilities and interfaces of the UMG 96RM-M.
Specifies suitable locations for installing the UMG 96RM-M for proper operation and ventilation.
Provides guidance on the vertical orientation required for the UMG 96RM-M for adequate ventilation.
Details the dimensions required for cutting the panel to mount the UMG 96RM-M.
Explains the procedure for mounting the UMG 96RM-M onto a switchboard using its brackets.
Describes how to connect the necessary supply voltage to the UMG 96RM-M device.
Information on the overvoltage category and rated pulse voltage for the voltage measurement inputs.
Details the mains frequency range required for accurate measurement and calculation by the device.
Lists key characteristics of the M-Bus interface, including addressing and protocol support.
Provides recommendations for connecting cables to the M-Bus interface for optimal data transmission.
Describes the star topology for M-Bus connections where each device connects directly to the master.
Explains the sequential connection of devices in a line for M-Bus networks, noting potential issues.
Details the tree topology combining star and line structures for M-Bus networks.
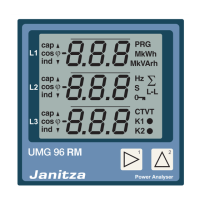
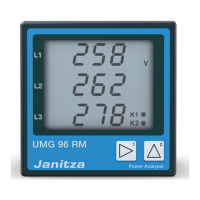
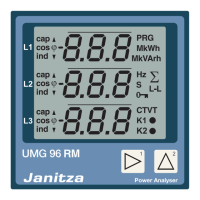
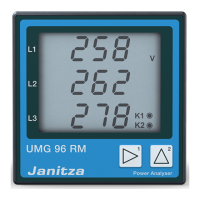
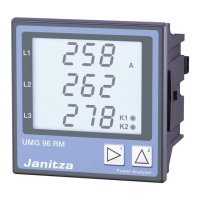
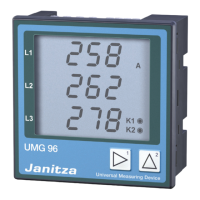
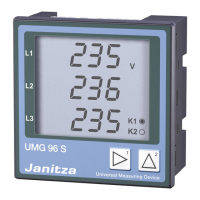
Explains how to navigate and view measured values on the device's LCD screen.
Describes how to access and change device settings via buttons and menus.
Details button operations for navigating and viewing data in display mode.
Outlines button operations for changing settings and parameters in programming mode.
Steps for connecting the supply voltage to enable the UMG 96RM-M configuration.
Instructions on setting current and voltage transformer ratios for accurate measurements.
Procedure to enter programming mode, including password entry if set.
Steps for navigating and selecting parameters to modify using device buttons.
Process for altering the values of selected parameters using the device buttons.
Instructions on how to exit programming mode and return to the normal display.
Setting for the averaging period for current measurements to form mean values.
Setting for the averaging period for power measurements to form mean values.
Setting for the averaging period for voltage measurements to form mean values.
How to view the recorded active energy values on the device display.
Formula and context for calculating total harmonic distortion in current measurements.
Formula and context for calculating total harmonic distortion in voltage measurements.
Setting the duration for automatic display changes between measured values.
Selection of different profiles for organizing and displaying measured values.
Configuration of display profiles to select which measured values are shown.
Setting a password to prevent accidental changes to device programming data.
Control of the display backlight during normal operation.
Control of the display backlight when the device is in standby mode.
Steps to power the device and initiate the commissioning process.
Procedures for connecting and verifying measured voltage inputs for accuracy.
Steps for connecting current transformers and verifying input current readings.
Checking the direction of voltage rotation on the device display.
Verifying correct connection of phase conductors to current transformers.
Ensuring accurate power readings by checking current transformer connections.
Verifying that all voltage and current inputs are correctly connected for accurate readings.
Confirming correct assignment of current transformers to phase conductors for accurate power ratings.
Validating the accuracy of sum power ratings by comparing with energy meter values.
Displays the raw data string transmitted during an M-Bus test.
Shows an excerpt of M-Bus scanner analysis focusing on data points 1 through 6.
Configuration and functions for the first digital output of the UMG 96RM-M.
Configuration and functions for the second digital output of the UMG 96RM-M.
How the status of digital outputs is represented on the device display.
Selecting the power value to be issued as an energy pulse output.
Identifying the source that delivers the measured value for the digital output.
Defines the minimum duration of the pause between pulses for energy metering.
Describes how pulse spacing is related to power within the selected setting.
Adjusting the pulse length according to the requirements of the connected pulse receiver.
Calculating the maximum connected load to determine pulse value parameters.
Formula and steps for calculating the pulse value based on load and pulse rate.
Setting up comparator group 1 for monitoring a specific current limit value.
Selecting the source for digital output 1, linking it to comparator group 1.
Option to invert the result from comparator group 1 for digital output logic.
Logic for combining comparator results (AND/OR) for the final output state.
Final outcome of the monitoring setup, indicating digital output state and current flow.
Details the structure and function of comparator group 1 for limit value monitoring.
Procedures for device repair and calibration, emphasizing manufacturer involvement.
Instructions on how to clean the front membrane of the device safely.
Guidelines for the proper disposal of the UMG 96RM-M as electronic scrap.
Information on how to contact the manufacturer for support and required details.
Information regarding factory calibration and its necessity under normal conditions.
Recommendations for periodic recalibration by the manufacturer or an accredited laboratory.
Illustrates a specific error message format, combining serious error and internal cause codes.
Shows visual examples of how metering range exceedances are displayed on the device.
Basic physical and operational specifications of the UMG 96RM-M.
Conditions and specifications for safely transporting and storing the device.
Environmental conditions required for the UMG 96RM-M to operate correctly.
Specifies the size and type of conductors that can be connected to the power supply terminals.
Guidance on selecting appropriate circuit breakers for protecting the power supply lines.
Advice on the number of devices that can be safely connected to a circuit breaker.
Details conductor sizes and torque specifications for output terminals.
Conductor specifications for voltage and current measurement terminal connections.
Lists supported M-Bus baud rates and device load.
Comprehensive list of device parameters, addresses, units, and default settings.
Information on which data is saved and how frequently, including configuration data saving.
Diagram showing the rear view of the UMG 96RM-M with dimensions.
Diagram illustrating the side view of the UMG 96RM-M with dimensions.
Diagram showing the bottom view of the UMG 96RM-M with dimensions.
Specifies the panel cutout dimensions required for installing the UMG 96RM-M.
Step-by-step guide to changing current transformer primary and secondary settings.
How to view recorded measured values using the device buttons.
Explains the function of buttons 1 and 2 for navigating measured values and their associated data.
| Mounting | DIN Rail |
|---|---|
| Measurement Parameters | Voltage, Current, Power, Energy, Frequency, Harmonics |
| Power Measurement | Active, Reactive, Apparent Power |
| Device Type | Power Analyzer |
| Current Measurement | Yes |
| Energy Measurement | Active, Reactive, Apparent Energy |
| Frequency Measurement | 45 Hz to 65 Hz |
| Harmonics Analysis | Yes |
| Communication Interfaces | Ethernet |
| Display | LCD |
| Accuracy | Class 0.5S |
| Power Supply | AC 85 to 265 V |
| Operating Temperature | -10°C to +55°C |
| Storage Temperature | -20 to +70 °C |
| Dimensions | 96 x 96 x mm |
| Measurement Category | CAT III 300 V |