98
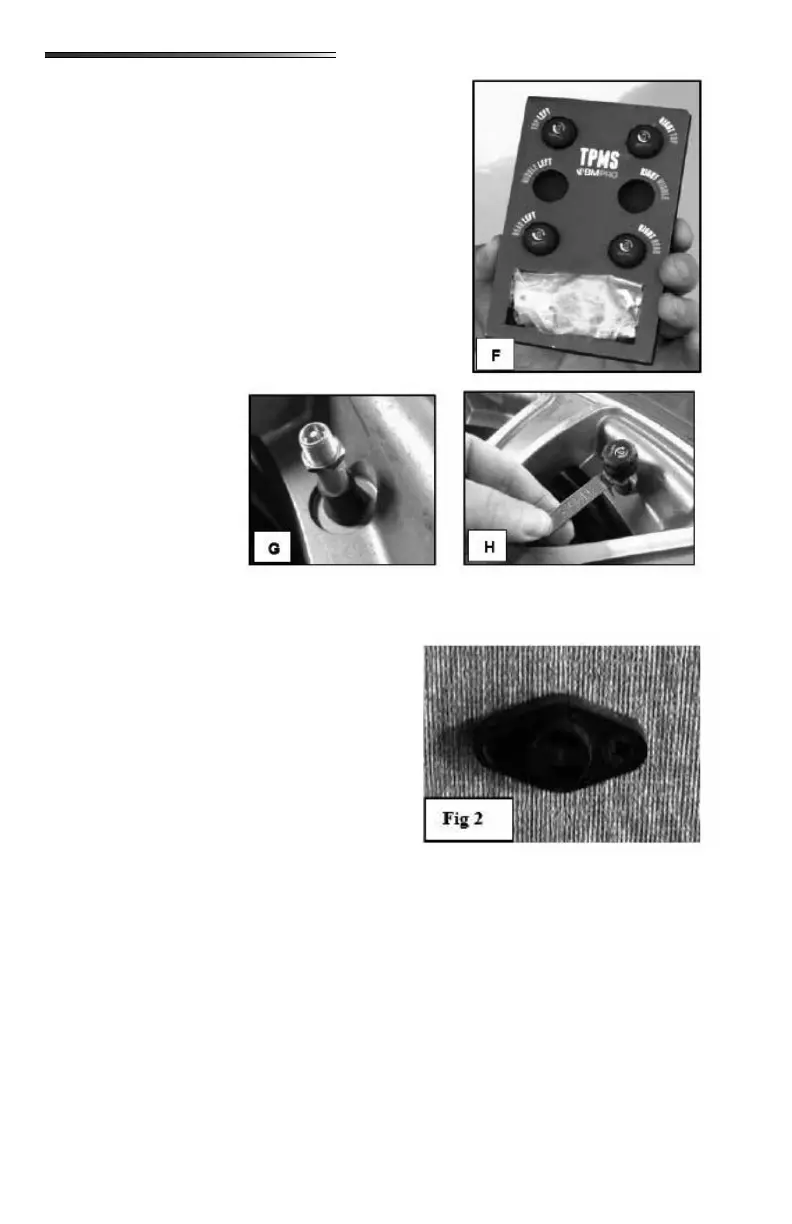
Tire sensors come already paired to the RVMaster system
from the factory. Sensors come on a card () that shows
where each sensor should be installed on the RV. The top
of the card represents the “hitch” end of the RV. Top left
sensor would install on the front driver side tire. Top right
sensor would install on the front passenger side tire, etc.
The bag shown at the bottom of the card is the parts kit
(refer to photo previously).
Install a nut from the parts kit () on to the valve stem of
each tire. Run the nut all the way down the valve stem
().
Screw one of the sensors onto the valve stem. You will
hear a pu of air as you
tighten the sensor on the
stem. Sensor should be
screwed as far onto the
valve stem as possible.
DO NOT OVERTIGHT-
EN. Once the sensor is
installed on the stem,
run the nut back up the
valve stem until it con-
tacts the bottom of the
sensor. Use the wrench
to tighten the nut under the TPMS sensor ().
There are no thermostats located in the RV. Heat-
ing and cooling is controlled through the BMPro
RVMaster touchscreen Climate screen. One or
more small sensors () are located on the walls
of the RV. These sensors work with the touch-
screen to monitor how hot or cold an area of the
RV is and to tell the system when to turn on the
AC or the heat according to climate settings on the
touchscreen.
Shows an overview of the key features of your RV. Climate, lights, motors, tanks and en-
ergy.
Shows your tank monitors (black, gray, fresh) water pump switch, water heater switches for
gas and electric and possibly the tank heater switch.
The Motors Screen is where you will nd controls for the leveling system, the awnings, the
slideouts, jacks and the ramp door (if you have a toyhauler with an automated ramp door).
○ The app on your smart device automatically locks out the Motors screen on your
device. You must swipe to unlock the screen in order to operate motors.
○ Only one motor may be operated at a time.