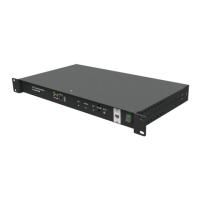
ACU-5000 Operations Manual
Interoperability Now 1-3
1.4 Handset
A handset with PTT switch is provided with the unit, which can be plugged into the single front
panel RJ-12 connector. This is the same handset that is provided with other ACU devices. The
handset interface has two main purposes:
o Provide a simple means to properly set up & optimize an ACU-5000 interoperability
system. The “level reference” provided by the handset port assists this operation.
o Allow a local operator to access the system and communicate with other devices
interfaced to the ACU-5000.
o The handset volume is controlled via push buttons on the front panel, or via the web-
based control interface. (Note that volume controls for the handset affect the speaker
volume as well.)
1.5 Local Speaker and Speaker Connector
A local, internal speaker with volume/mute control provides another option (beyond the handset)
for local monitor of ongoing communications. A 3.5 mm stereo speaker jack allows an external
speaker to be connected; doing so will disable the internal speaker. [Note – tip and sleeve used;
ring connection is open.]
1.6 Headphones and Microphone Connectors
These connectors are available on the rack mount version only; there isn’t enough room for them
on the tabletop version. Marked as “Phones” and “Mic” on the front panel, both are the same 3.5
mm type as can be found on a typical PC.
The headphone connector receives the same audio stream as the speaker output, although at a
lower level. As with the handset and speaker, the level is controlled by the handset TX level
setting either via the front panel buttons or through the GUI. The handset, speaker, and
headphones are all enabled simultaneously (though whenever an external speaker is plugged in
the internal speaker is disabled).
The mic input is a future function and is not currently enabled.
1.7 Configuration Methodology
The unit’s web-based graphical user interface includes full configuration capability.
Configuration has two basic steps:
o For each of the 12 communications channels, select the type of interface Radio (four-
wire), VoIP, RoIP, or PSTN (note previously mentioned limitation - only 3 PSTN
physical interfaces are available).
o For each channel, adjust and optimize the various configuration items such as audio
levels, squelch type, etc.