10
2-1
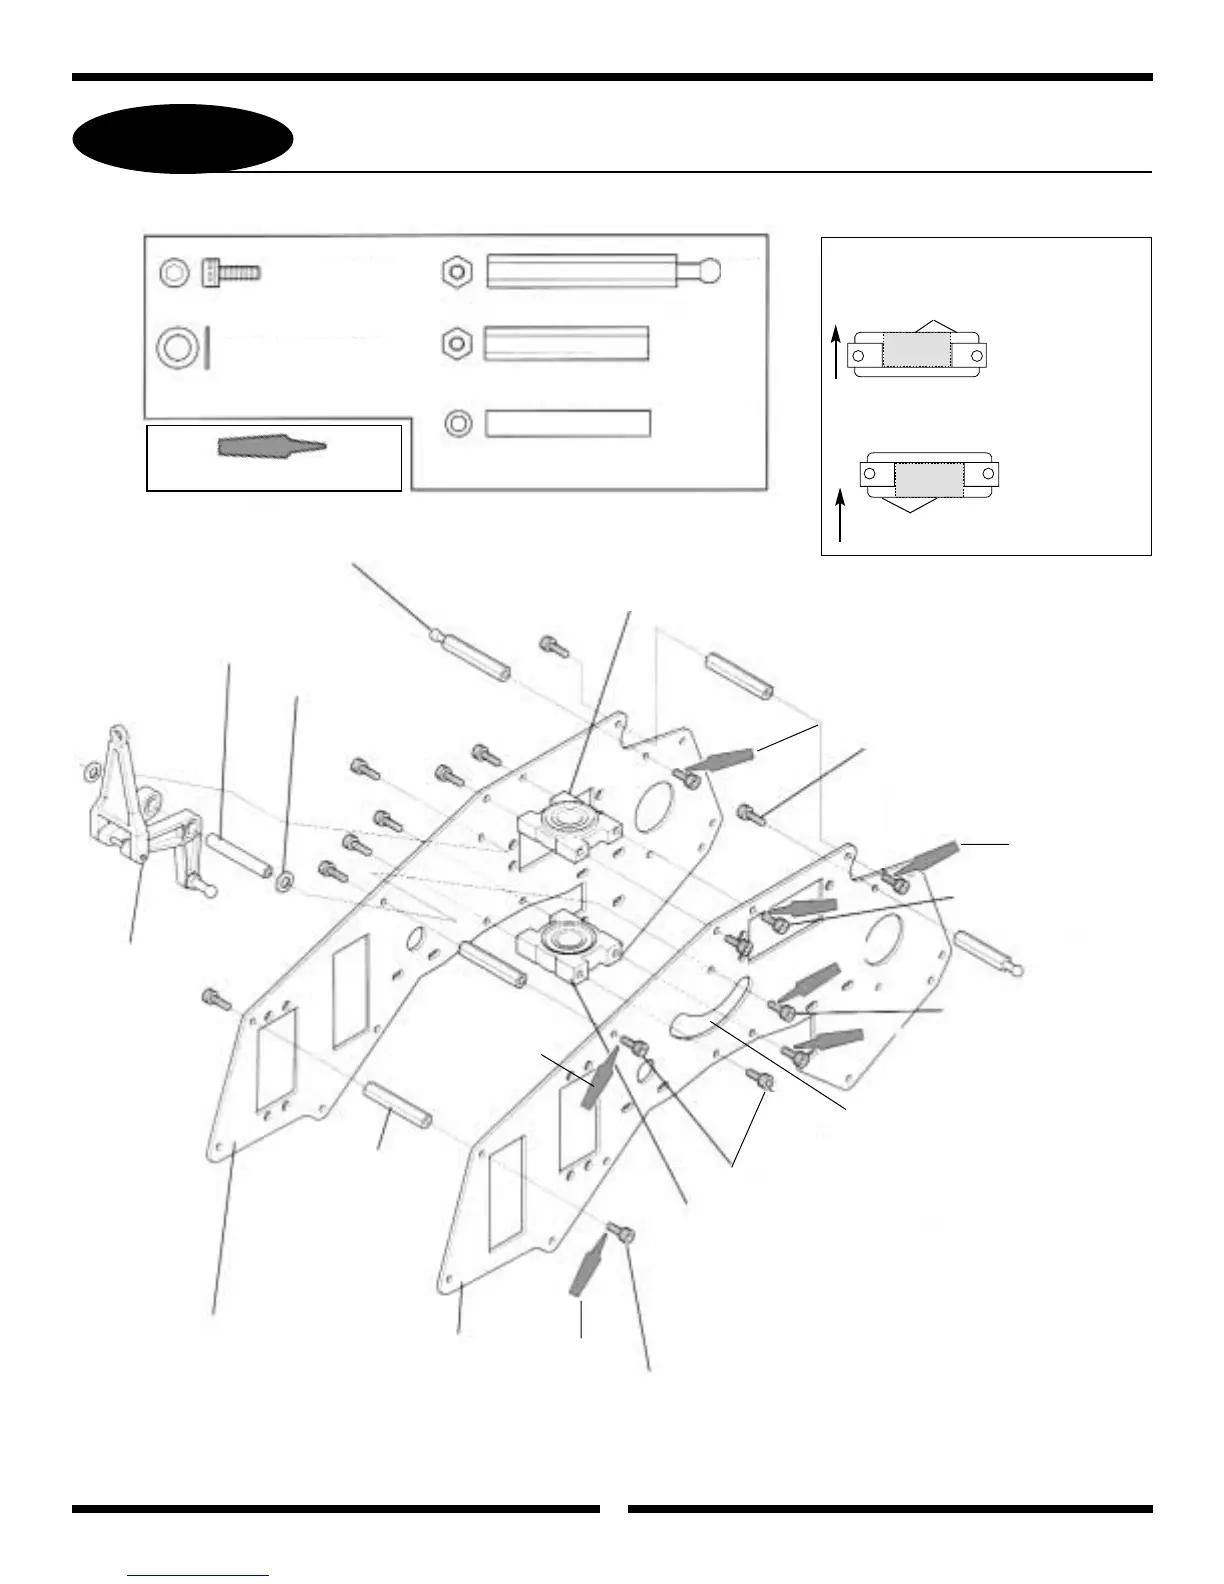
UPPER MAIN FRAME SECTION ASSEMBLY
5mm Nylon Washer
Main Frame Standoff, 32mm
Body Mounting Standoff, 37mm
3x8mm Socket Head Bolt
3x8mm Socket Head Bolt
3x8mm Socket Head Bolt
Slot denotes left frame side
3x8mm Socket Head Bolt
Bearing side must face
downward
3X8mm Socket Head Bolt
Use Threadlock
Use Threadlock
Use Threadlock
Use Threadlock
Upper Main Frame, Left
Upper Main Frame, Right
Main Frame Standoff,
32mm (3)
*
Elevator Arm from Step 1-3
Elevator Arm Bushing, 32mm
5mm Nylon Washer
Body Mounting Standoff, 37mm
Use Blue Threadlock On All Screws
Upper Main Shaft Bearing Block
Position so the side
of the bearing block
that has the bearing
flush with the flange
is upward.
UP
Lower Main Shaft Bearing Block
UP
Bearing Flush
with Flange
Bearing
Bearing
Position so side of
the bearing block
that has the bearing
flush with the flange
is downward.
Bearing side must
face upward
*Note: Install elevator arm
assembly first!
Note: Be sure to note left & right
upper main frame positions
. . . . . . . 18 pcs
. . . . . . . . . . . . 2 pcs
. . . . . 2 pcs
. . . . . 1 pc
2 pcs
3x8mm Socket Head Bolt
Elevator Arm Bushing, 32mm
Bearing Flush
with Flange