3-7
ENGINE INSTALLATION (ALL)
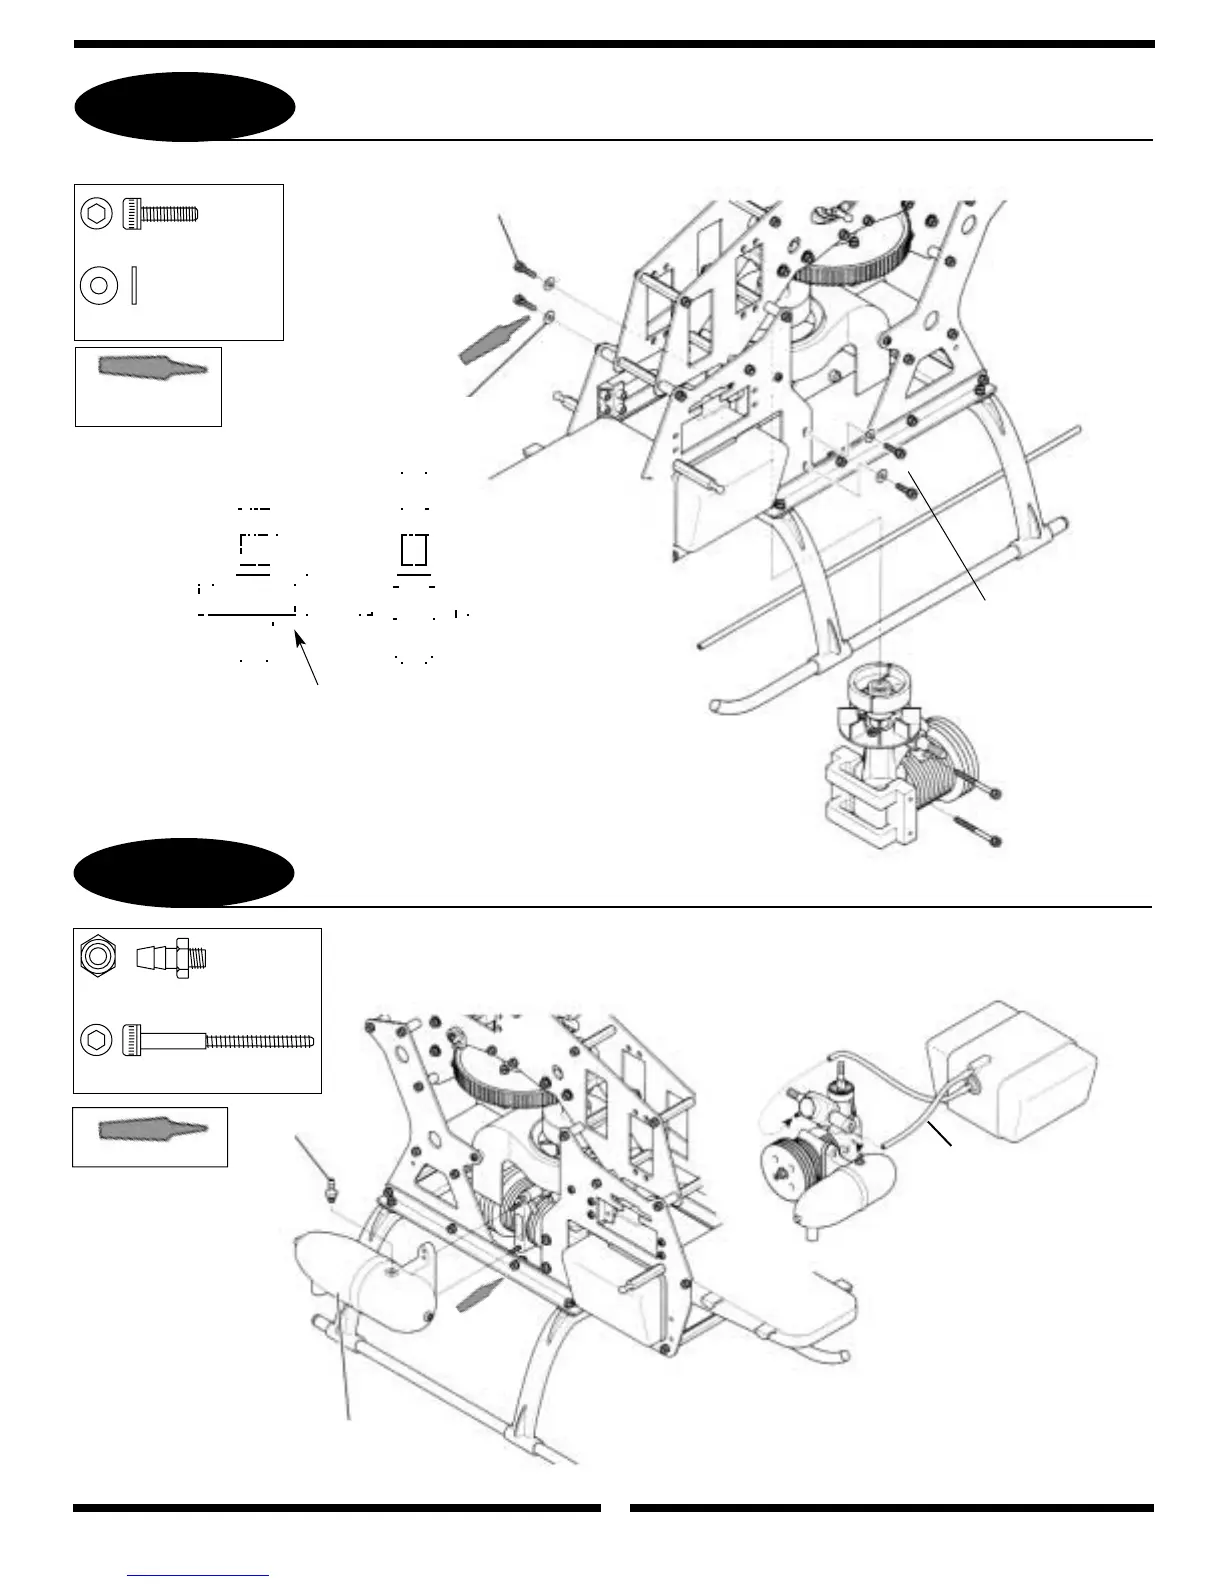
3-8
INSTALLATION OF THE MUFFLER
19
Pressure Tap
........1 pc
3x30mm Socket Head Bolt
.......2 pcs
Adjust the height and position of the Engine
as shown so the bottom of the Clutch
Assembly is flush with the bottom of the
Clutch Bell. Also check to insure that the
Engine and Clutch Bell are parallel.
*It is highly recommended that you insert
the Muffler Bolts into the Engine Case prior
to installing the engine in the frame.
3mm Flat Washer
........4 pcs
3mm Flat Washer (4 pcs)
3x8mm Socket Head Bolt
Pressure Fuel Line Attachment
JR .32–.36 Muffler Shown
(Purchased Separately,
JRP960078)
Pressure Tap
Correct
Incorrect
See note in step 3-5.1
Note: The installation shown is for a .32–.36 size engine with a JR muffler (JRP960078). Installation of
other .32–.36/.46 engine muffler combinations may vary. Please refer to your engine/muffler
instructions for proper installation.
Use Blue Threadlock
on all screws
Use Threadlock
.......4 pcs
3x8mm Socket Head Bolt
Use Threadlock
Use Blue Threadlock