6-4
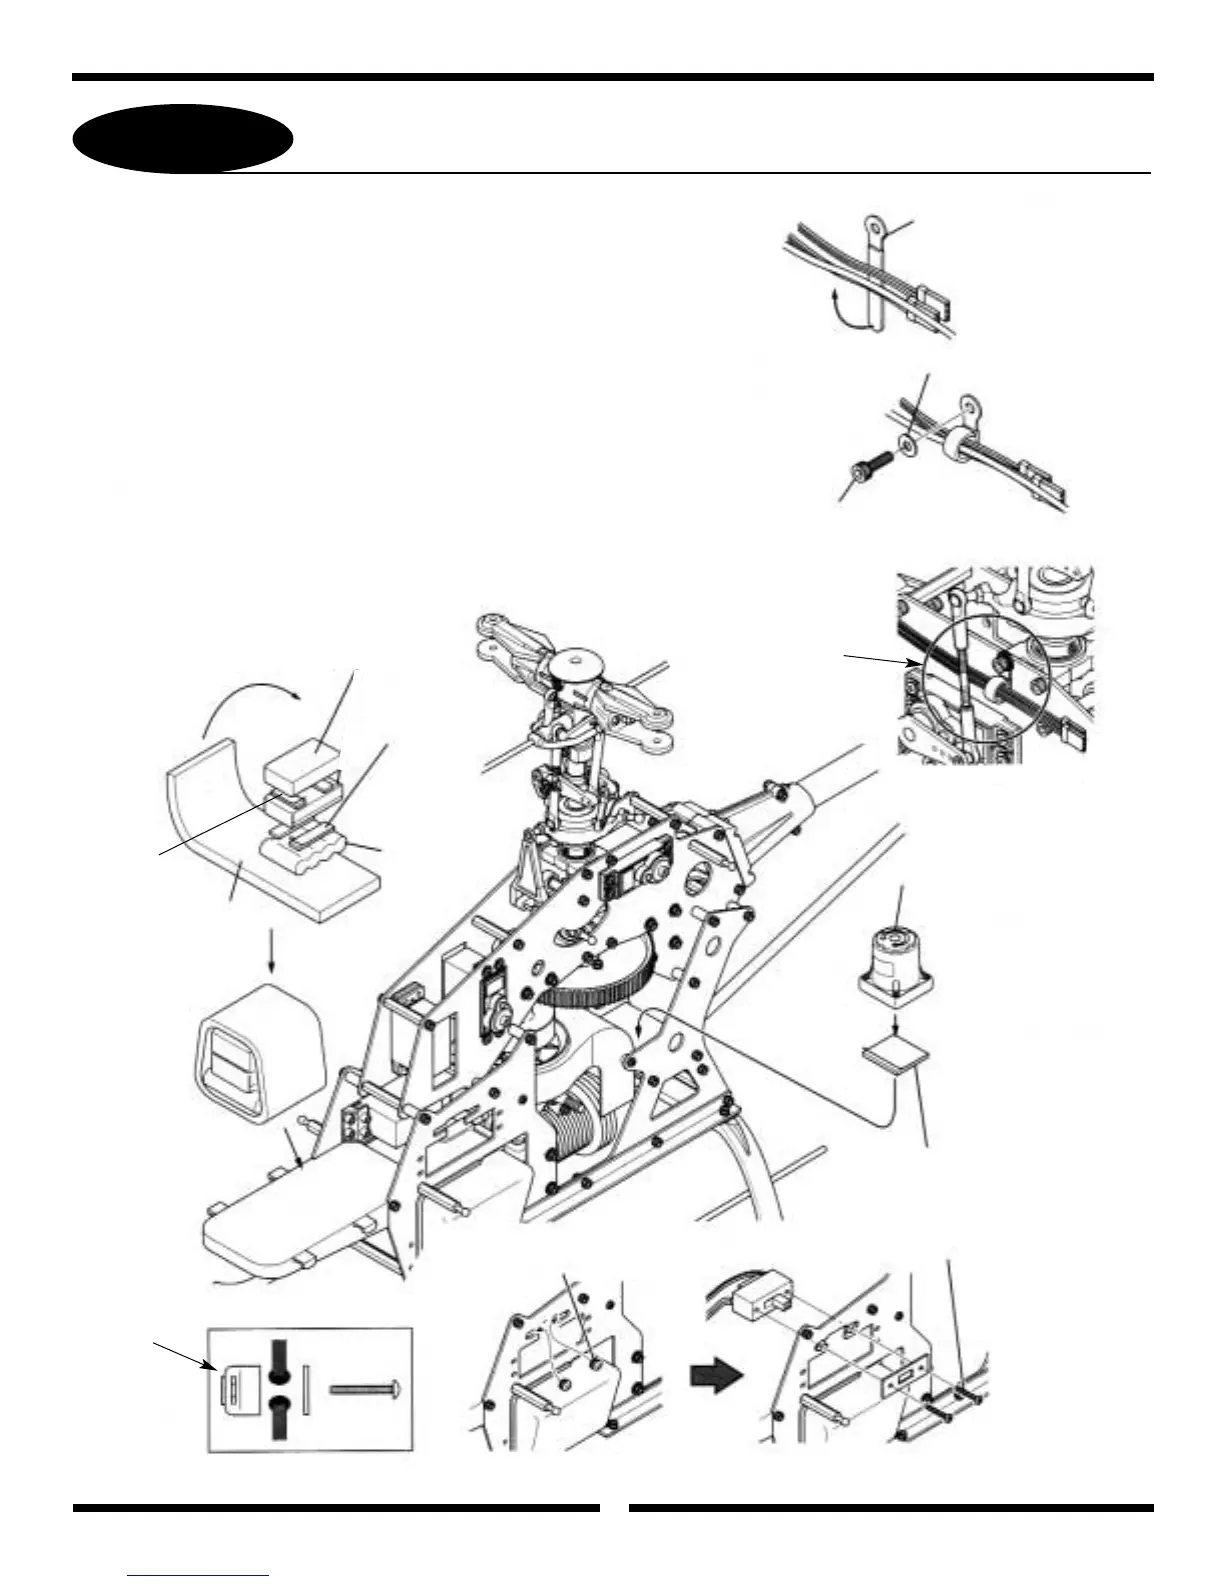
GYRO/RECEIVER/SWITCH HARNESS/BATTERY INSTALLATION
33
Caution: Be certain when installing the Gyro to the Gyro Mounting Plate that it does
not come into contact with the frame of the helicopter and that the surfaces
are free from oil, residue, etc. Clean if neccessary to insure proper adhesion.
It is suggested that both the receiver and gyro amplifier be isolated from
vibration by wrapping them in foam, then securing them to the model using
double-sided servo tape.
Note: Nylon Wire Ties and Double Sided Servo Tape are not included in this kit.
*Wrap with foam or sponge rubber individually before installation.
Servo Wire Holder
3mm Flat Washer
Foam or Sponge Rubber
(not included)
Double Sided Servo
Tape (not included)
*Battery Pack
(1000mAh min.)
Receiver
*Gyro Amplifier
Gyro Sensor
Special Thin Gyro
Mounting Tape
Switch Plate Screws
Round Rubber Grommets
Install switch
harness as shown
3mm Main Frame Screw—
remove screw from frame
and attach as shown
Check to make sure there
is proper clearance