3-3
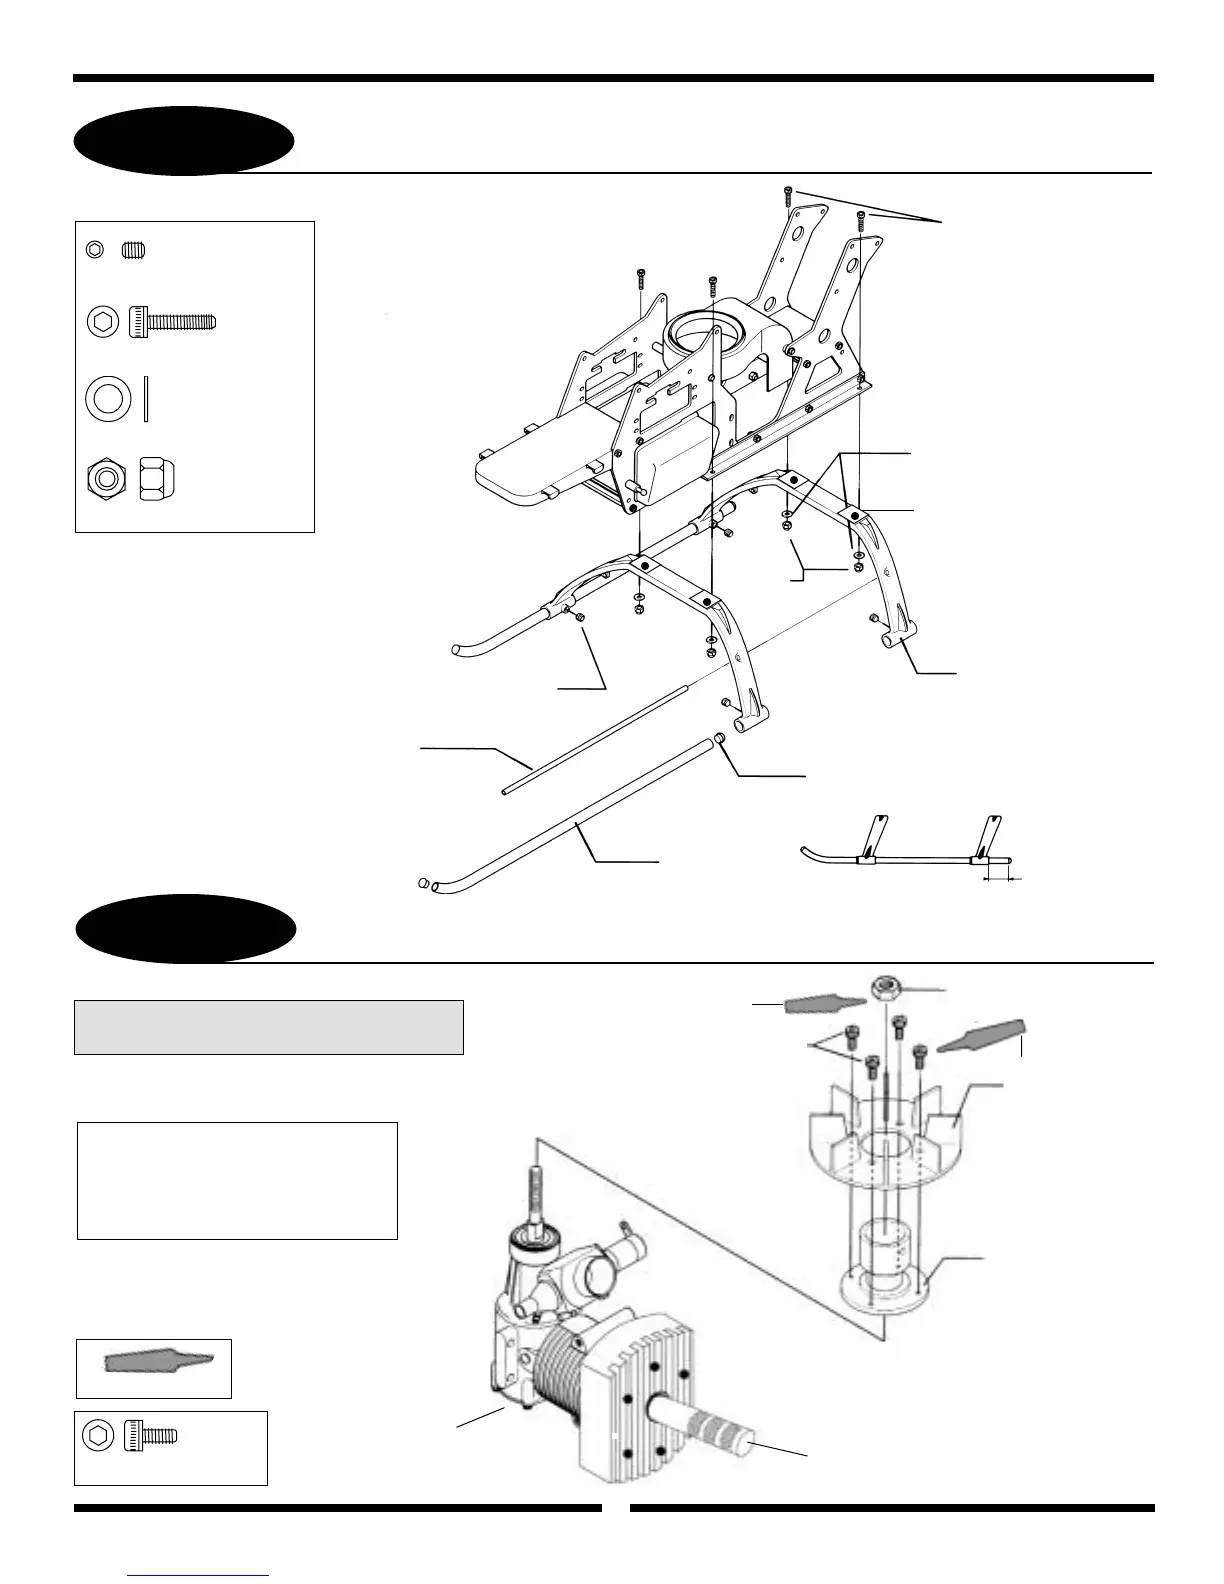
LANDING GEAR ASSEMBLY INSTALLATION
16
3mm Lock Nut
........4 pcs
3x12mm Socket Head Bolt
........4 pcs
3mm Flat Washer
........4 pcs
4x4mm Set Screw
........4 pcs
Note: If you are building the Ergo .46 3D Version,
proceed to Step 3-4.1
O.S. .32SX-H Installation
For proper installation of this engine, it will be
necessary to purchase the O.S. Prop Drive
Washer for this engine (Part #23408000).
*It is recommended that a Piston Locking Tool
be used to properly secure the Fan Assembly to
the engine.
3x5mm Socket Head Bolt
........4 pcs
3x12mm Socket Head Bolt (4 pcs)
3mm Flat Washer (4 pcs)
Landing Strut
Landing Gear Dampers (4 pcs)
Landing Skid Cap
Landing Skid
20mm
Antenna Tube
4x4mm Set Screw (4 pcs)
3mm Lock
Nut (4 pcs)
Cooling Fan Hub .32-.36
Cooling Fan .32-.36
Nut Supplied with Engine
Use Threadlock
3x5mm Socket
Head Bolt (4 pcs)
Use Blue Threadlock
For proper installation of the fan assembly, it’s neccessary
for the engine to have the prop drive washer installed.
MDS .38 Heli engine shown
*
Revolution 1003 Piston Locking Tool
(Purchased Separately)
Use Threadlock
3-4
.32–.38 CO0LING FAN/HUB INSTALLATION