8-1
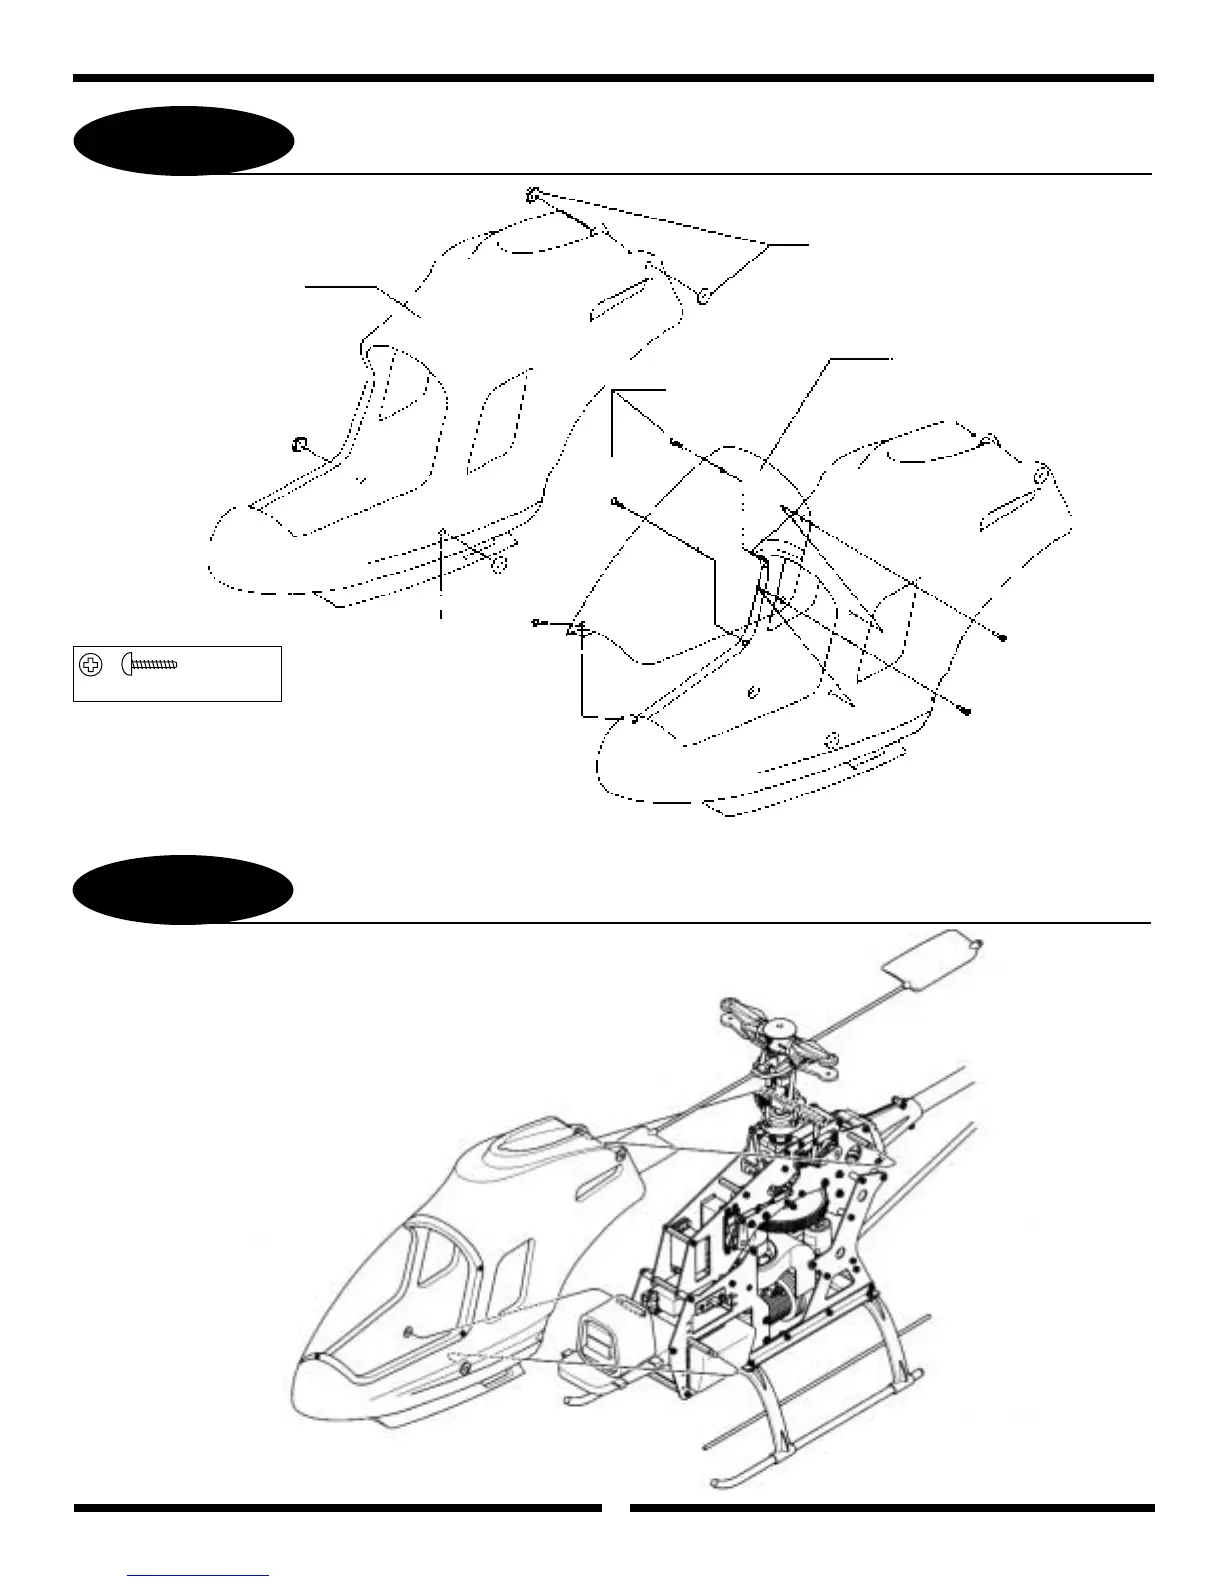
BODY ASSEMBLY/CANOPY ATTACHMENT
8-2
BODY ATTACHMENT
49
..........5 pcs
2.3x8mm Self Tapping Screw
* After trimming, attach the canopy to the body
temporarily with tape. Next, drill five 1/16" holes
through both the canopy and the body and
secure using the 2.3x8mm screws provided.
Note: It will be necessary to trim
away the unwanted plastic
off the canopy and side
window areas using a
hobby knife.
Slide the completed body over the mechanics and secure
through the four canopy mount standoffs as shown.
Note: Check to insure that the body
does not come contact with
any portion of the Main Frame,
Muffler, Servo/Servo Horns,
etc. Trim for clearance if
necessary.
Body
Drill four 15/64" holes and
insert rubber grommets
as shown.
2.3x8mm Self
Tapping Screw
(5 pcs)
*Canopy (trim prior to attachment)
Rubber Grommets (4 pcs)