31
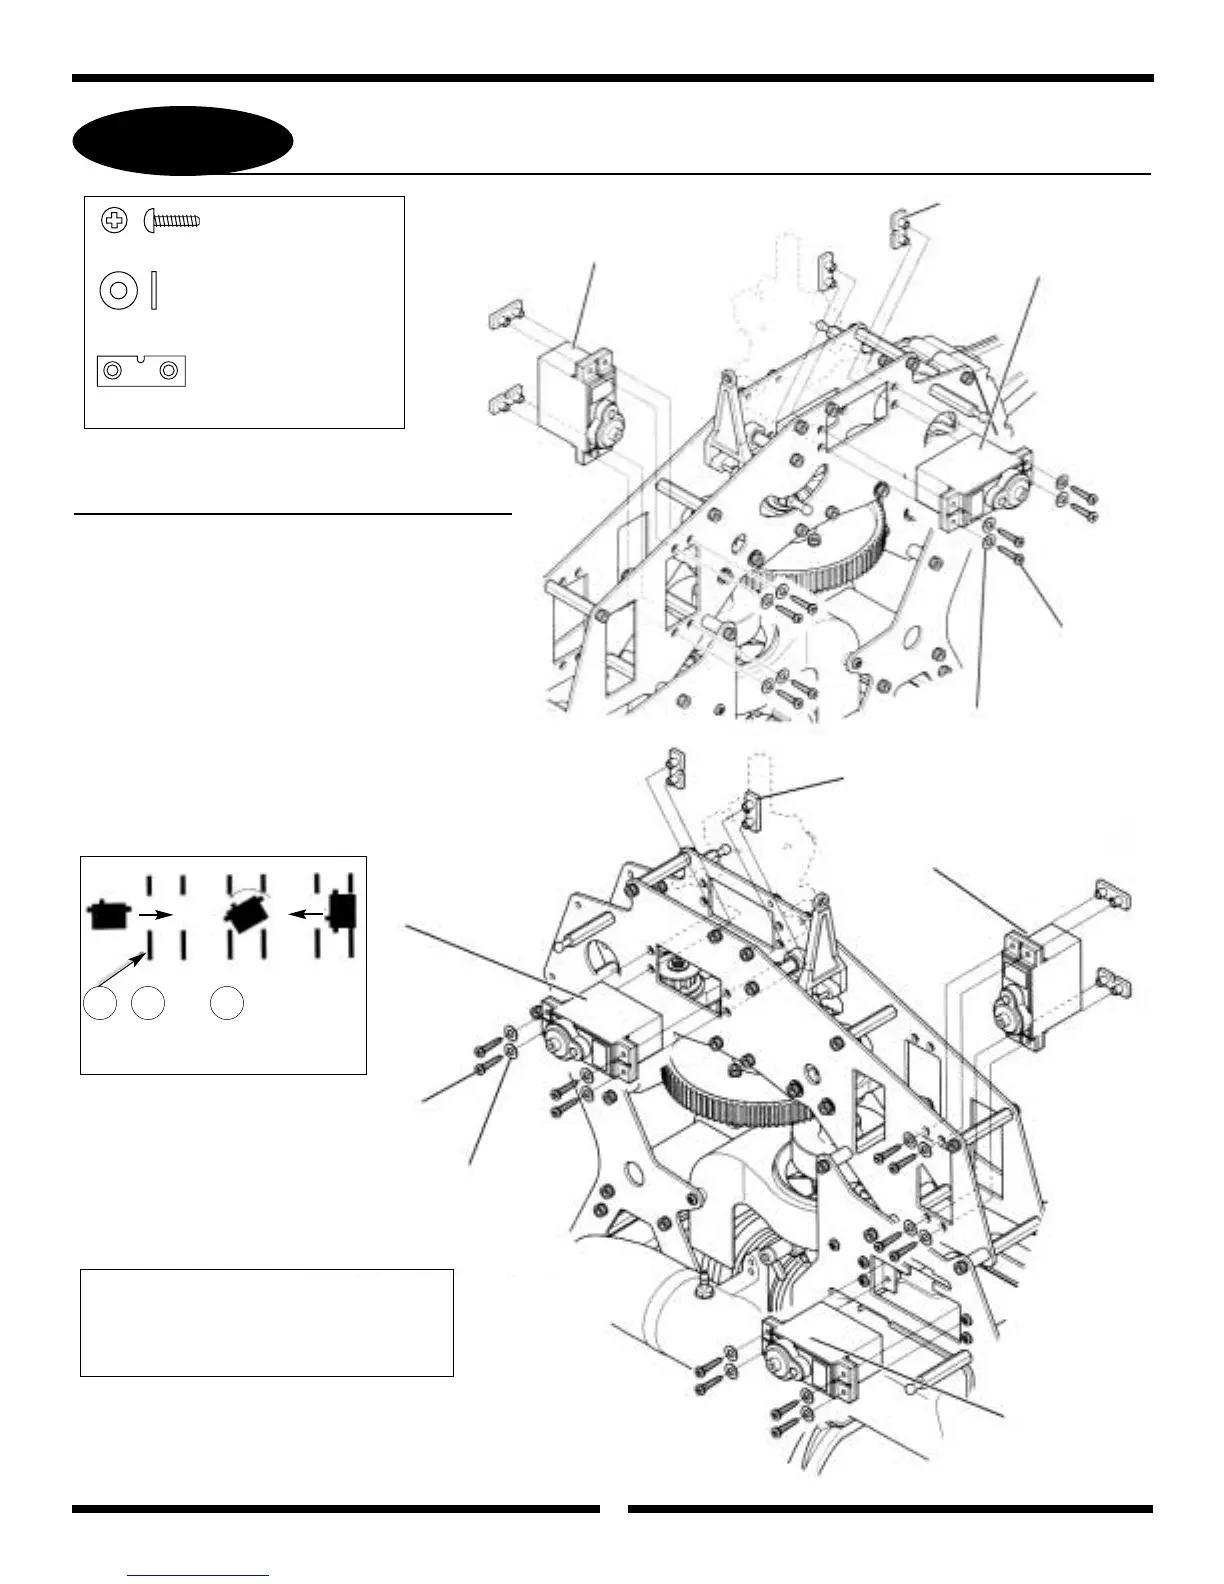
RADIO INSTALLATION SUGGESTIONS
Be sure to install four rubber servo grommets and eyelets
to each servo prior to installation. When securing the
servos to the helicopter, be sure not to over-tighten the
mounting screws.
When adjusting control rods, be sure to adjust each
universal link the same amount so as not to unthread one
link too far.
Be sure to keep all servo lead wires, etc., away from all
servo arms, rods, and sharp edges of the helicopter’s
mechanics. After final installation, group these wires
together as indicated using the small nylon wire ties and
the nylon spiral tubing included with this kit.
2.6x12mm Self Tapping Screw
......20 pcs
2.6mm Flat Washer
......20 pcs
Servo Mounting Plates “B”
......8 pcs
Servo Mounting Plates “B”
Left Servo
2.6x12mm Self
Tapping Screw
2.6mm Flat Washer
Servo Mounting
Plates “B”
Tail Rotor Servo
Right Servo
2.6x12mm
Self Tapping
Screws
2.6mm Flat Washer
Throttle Servo
*Front Servo
6-1
SERVO INSTALLATION
Note: Before installing servos, it’s suggested that the
servo mounting plates “B” be secured to the
inside frame position using a small amount of
CA adhesive. This will ease servo installation.
*Install the front servo into the main
frame location as shown.
1 2 3