4-4
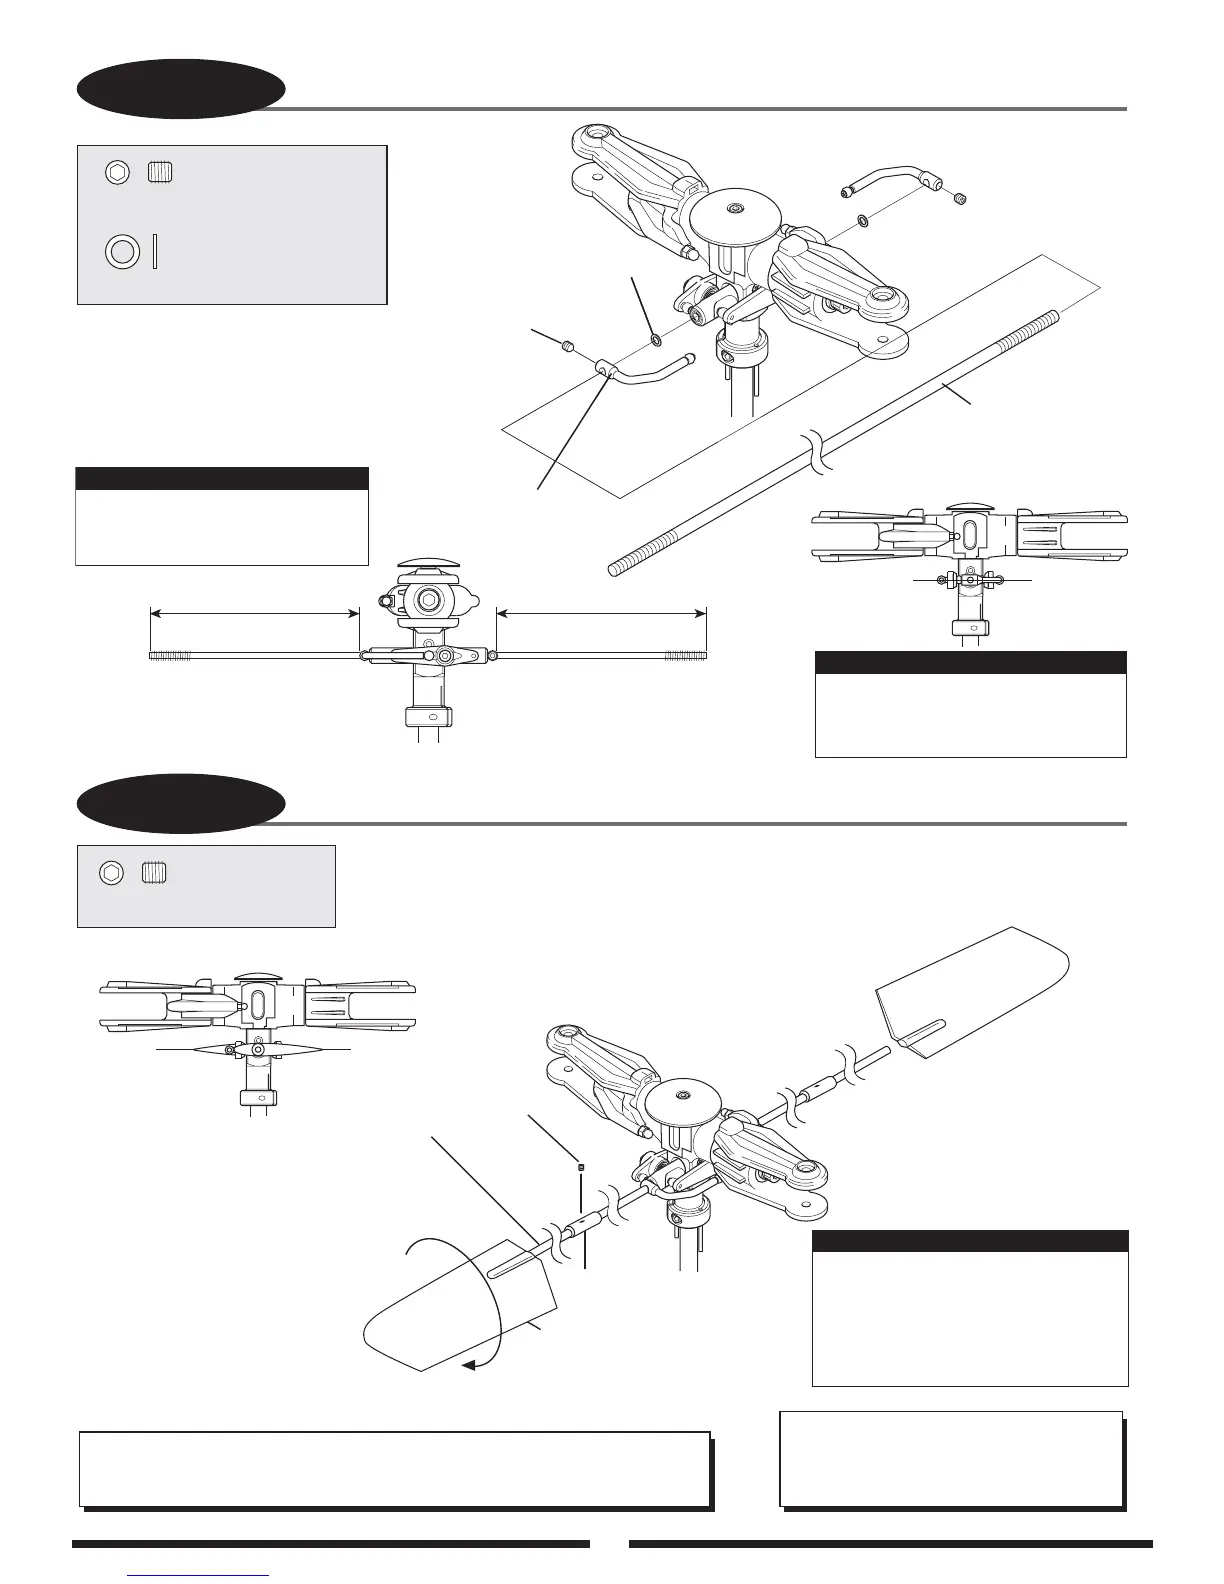
FLYBAR INSTALLATION
4-5
FLYBAR PADDLE ATTACHMENT
Center the flybar in the seesaw
shaft before securing the two
flybar control arms.
Caution:
Check to ensure that the two
flybar control arms are parallel to
the center line of the flybar.
Caution:
Washer, 4 x 6 x 0.5 mm
Washer,
4 x 6 x 0.5 mm (2 pcs)
Flybar, 530 mm
Set Screw, 3 x 4 mm
Set Screw,
4 x 4 mm (2 pcs)
...............................2 pcs
............................2 pcs
Flybar Control Arm
Equal Distance
Equal Distance
Set Screw, 4 x 4 mm
...................2 pcs
Thread the paddle onto the flybar
approximately 20 mm. Adjust each
flybar paddle so they are parallel to
the flybar control arms and to each
other.
Note:
Set Screw,
4 x 4 mm (2 pcs)
Flybar Paddles
Flybar
Align paddles
so they are parallel
to each other.
TEAM TIP: Use JB-weld (epoxy steel) to
glue the flybar paddles to the flybar.
The glue prevents the paddles from
turning in flight.
TEAM TIP: Flight tune your Vibe to achieve the desired cyclic rate by moving
the flybar weights in and out on the flybar (in=more cyclic rate, out=less).
Make sure that they are set to the same distance or vibration can occur.
Flybar Weight
(2 pcs)

 Loading...


