3
!2
2
3 5 7 9
!1
2 4 6
8
!0
Settings done by switches
8
,
9
,
!0
and
!1
are only available under the setting where the auto-
lifter can be used (i.e., FL ON).
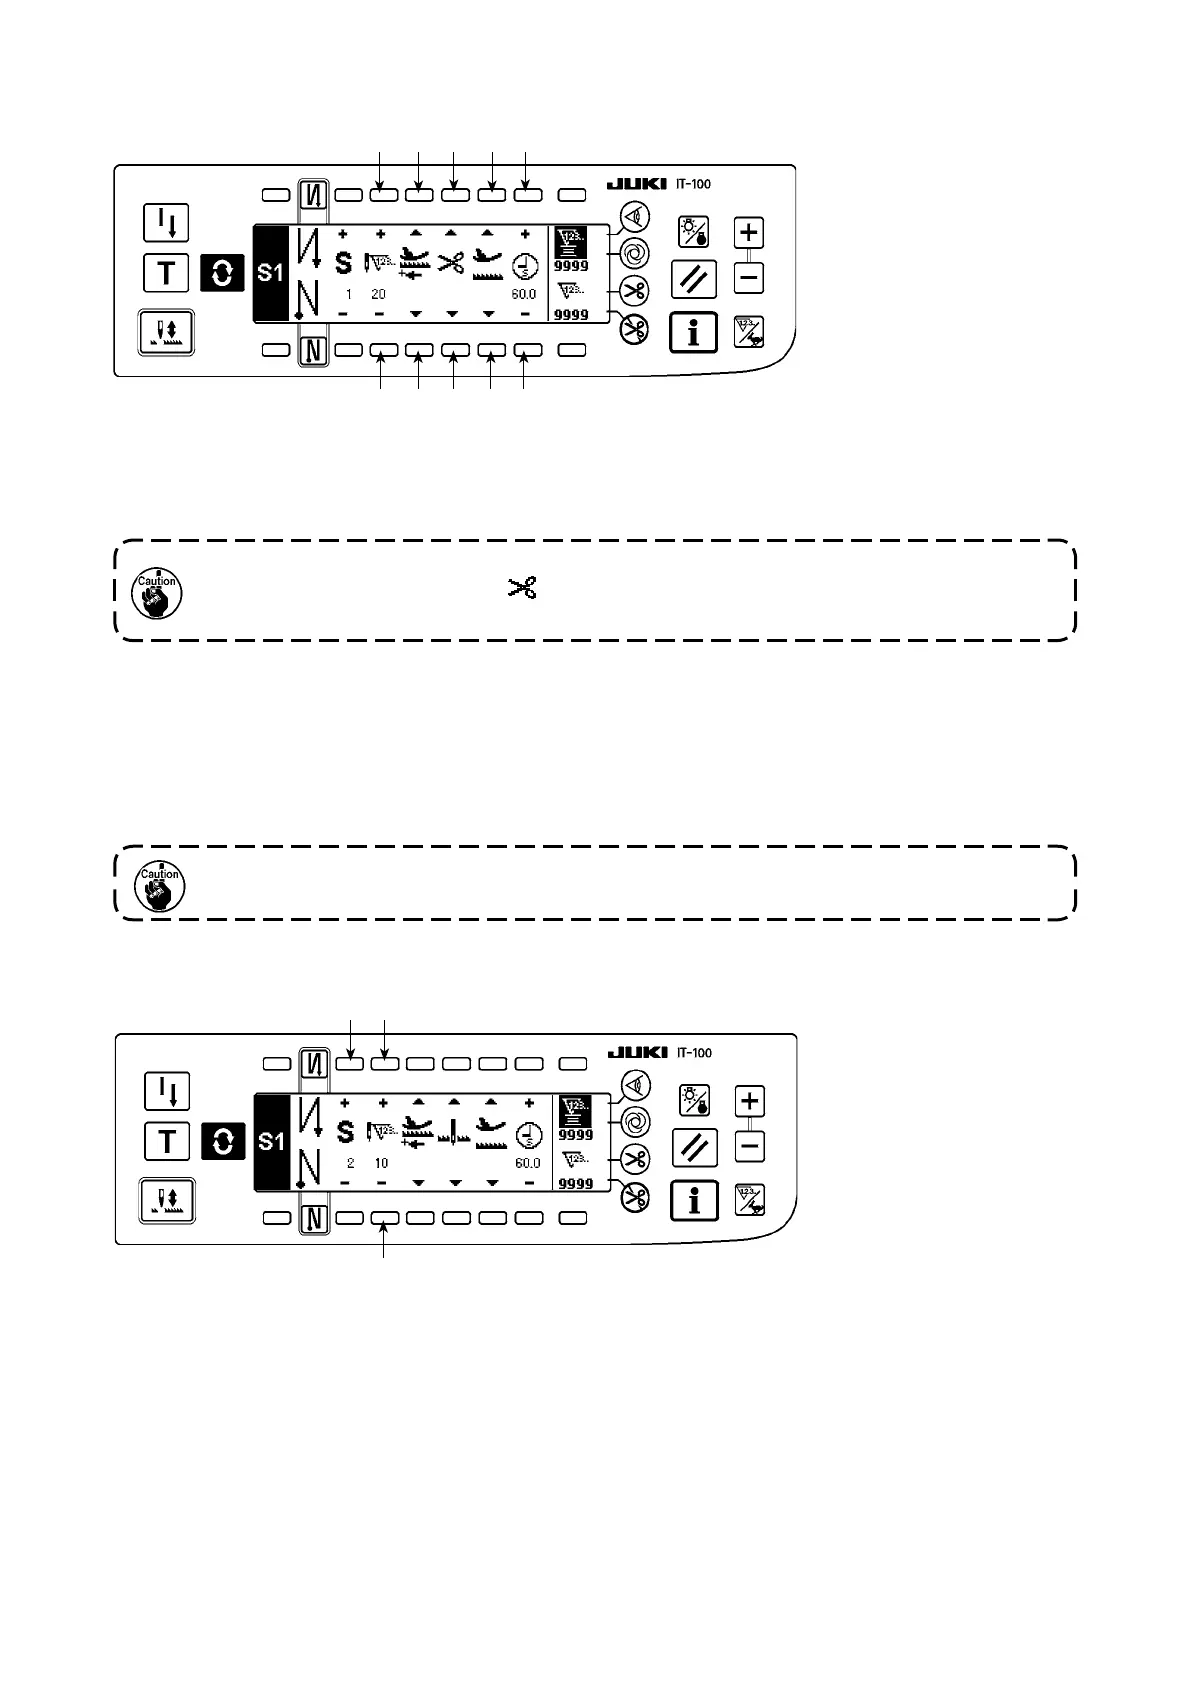
[Step 1]
1) Conrmthatstep1isdisplayedonthepanel.Now,setthenumberofstitchesto20usingswitches
2
and
3
.
2) Setthefeedingdirectiontothenormaldirectionusingswitches
4
and
5
.
3) Setthestopstateofthesewingmachinetotheneedle-downstopmodeusingswitches
6
and
7
.
4) Setthepositionofthepresserfoot,whenthesewingmachinestops,totheupperstoppositionusing
switches
8
and
9
.
(Ifyouwanttospecify,Inparticular,thelengthoftimeduringwhichthepresserfootIsraised,setItas
desiredusingswitches
!0
and
!1
.IntheInitialstate,thelengthoftimeIs60seconds.Possiblesetting
rangeofthetimeduringwhichthepresserfootIsraised:0.1sec.to99.9sec.)
If the number of stitches is set to 0 stitch or the stop-state of the sewing machine is set to the
automatic thread trimming mode , the machine will not proceed to the subsequent opera-
tion step.
[Step 2]
5) Pressswitch
!2
oncetodisplaystep2.
6) Setthenumberofstitchesto10usingswitches
2
and
3
.
 Loading...


