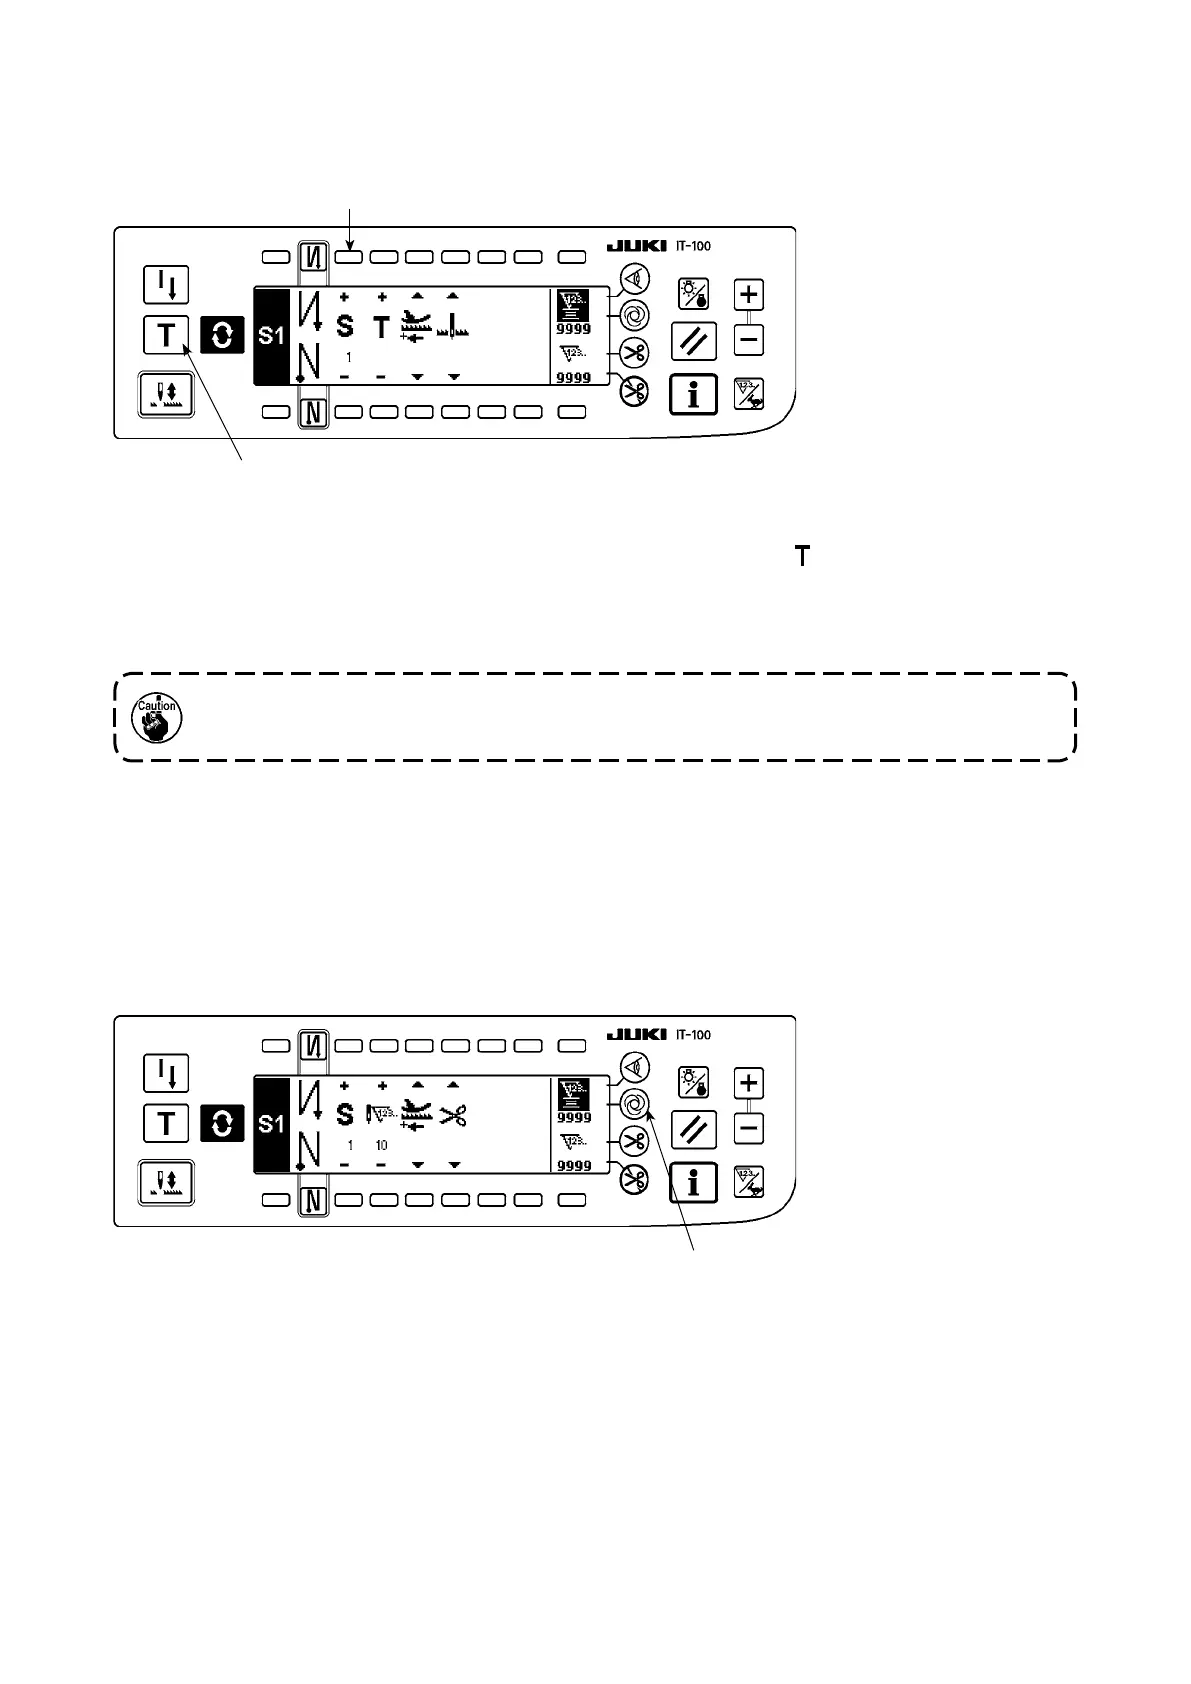
2
1
1
<
Teaching mode
>
In the teaching mode, it is possible to set the number of stitches of the step in a programmed stitching pat-
tern to the number of stitches that has been actually sewn.
1) In the programmed stitching setting screen, press teaching switch
1
to select the teaching mode.
2) The indication shown on the number of stitches input section changes to . This shows that the sewing
machine has entered the teaching mode.
3) Depress the front part of the pedal to make the sewing machine perform sewing until the last stitch of the
current operation step is reached.
4) Return the pedal to its neutral position to make the sewing machine stop running. Now, the number of
stitches which has been sewn is displayed.
5) Proceed to the subsequent step using switch
2
or make the sewing machine perform thread trimming.
This completes the input of the number of stitches for operation step 1.
1) In the programmed stitching pattern setting screen, press one-shot automatic stitching switch
1
to select
the one-shot automatic stitching function.
2) A mark is displayed on LCD section of the switch, which shows the one-shot automatic stitching function
has been selected.
3) In the step where the one-shot automatic stitching function has been selected, the sewing machine
will automatically continue sewing, once the sewing machine starts running, until the end of the step is
reached.
<
One-shot automatic stitching
>
The one-shot automatic stitching function can be separately set by steps.
The number of stitches is not counted for the stitch sewn by manually turning the sewing ma-
chine or using the needle up/down switch.