3-10
3-9. Replacement of main PCB (TR6SNR)
Detach the E cover F and replace the main PCB.
When the replacement is finished, make jumper setting, make DIP switch setting, initialize the
EEPROM and enter parameters in it. (See 3-9 (2) and (3).)
When replacing 40046222 or 40040690 with 40095247, you must also replace the ROM.
If it is replaced with 40137756, it is not necessary to install ROM.
Execute settings by referring to the following table after replacement.
The following tool is recommended for removing the ROM.
Manufacturer: Sunhayato Corp.
Model: GX-7 (DIP IC remover)
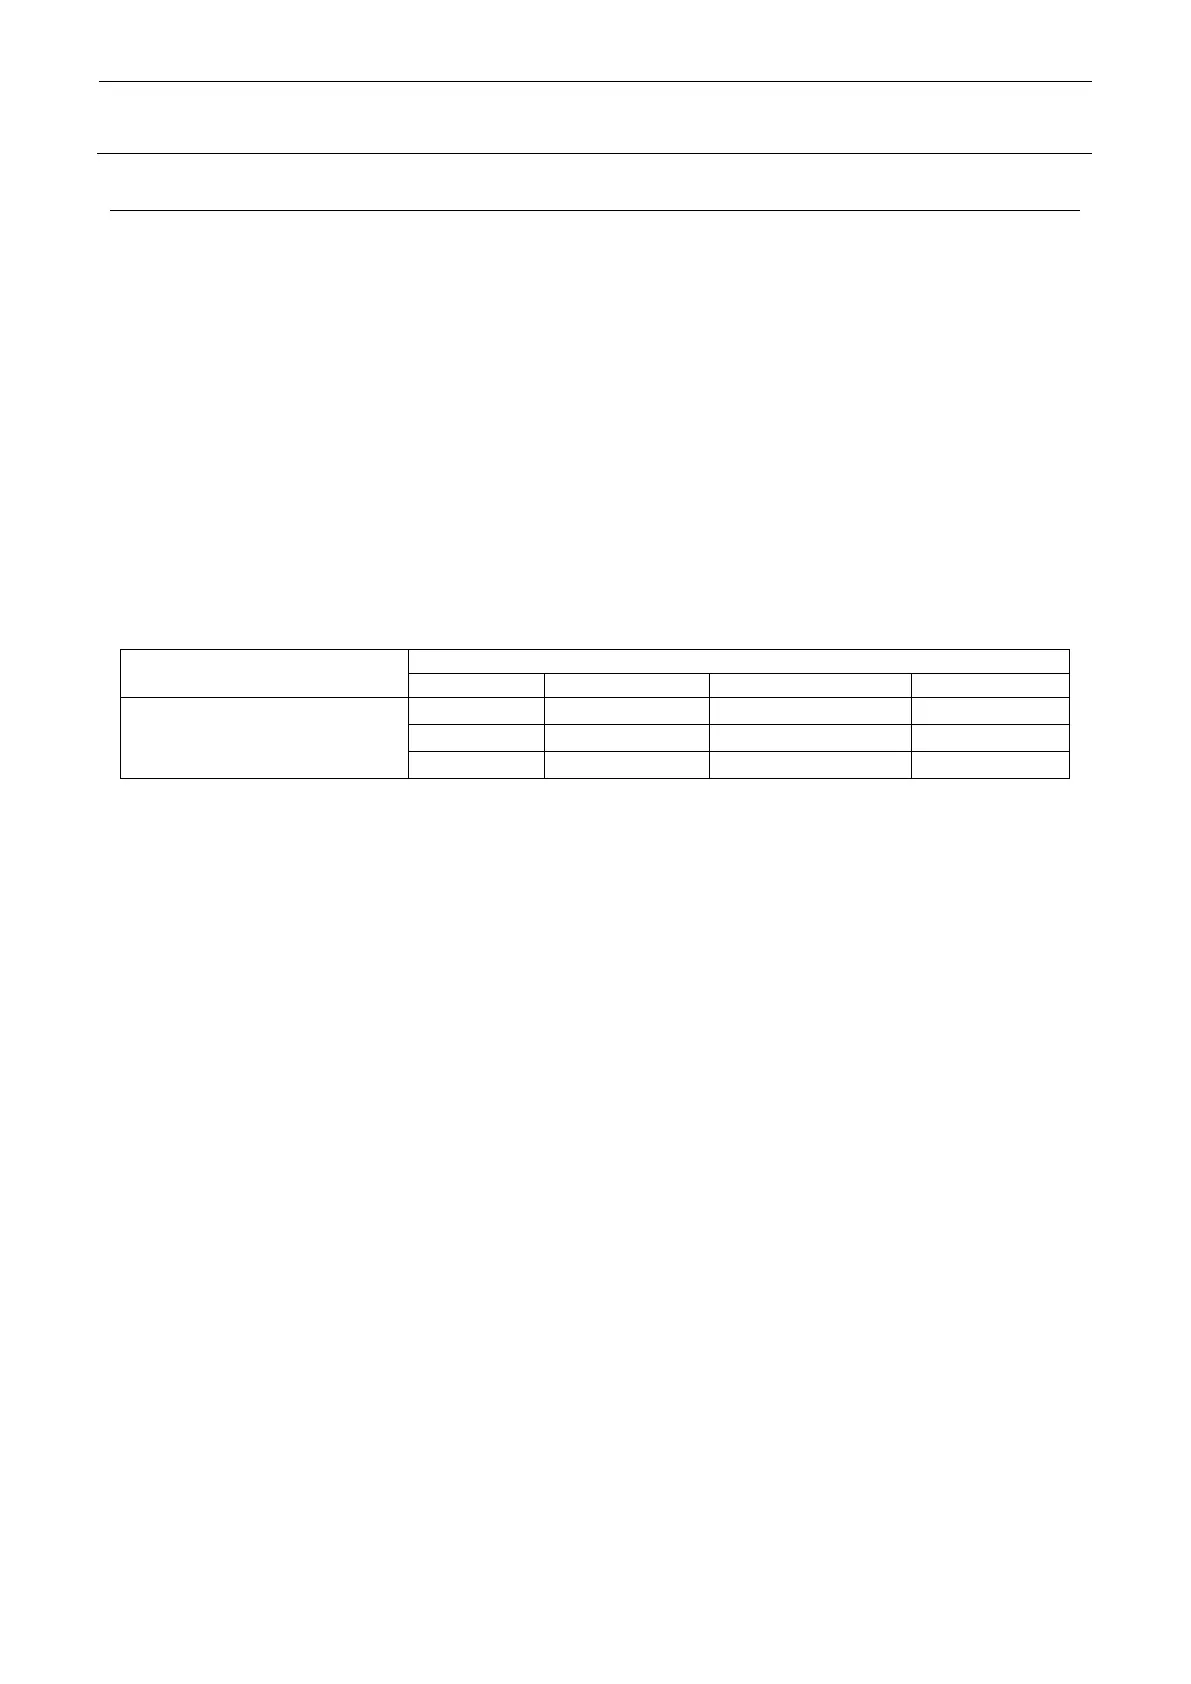
Setting execution item table after replacement of the board assembly
replacement of the board
assembly
Setting items after replacement of the board assembly
40046223 or 40040690 note1
40095248 or 40095246 note2
40137759 or 40137756 note3
○
○
○
○
○
○
○
○
○
○
○
note1:40040690 can be used in common for TR6DNR/6SNR/5DNR/5SNR. Since ROM is not
mounted in 40040690, replace the existing board assembly with ROM.
note2:40095246 can be used in common for TR6DNR/6SNR/5DNR/5SNR/6DNX/6SNX/
5DNX/5SNX.Since ROM is not mounted in 40095246, it is necessary to replace it with the
dedicated ROM (software Ver. 11-03-01A or later for TR6DNR/6SNR/5SNR).
note3:40137756 can be used in common for TR6DNR/6SNR/5SNR. Since software is already
written in 40137756, ROM installation is not required.
 Loading...


