Installation Manual Installation
19k2evo702 - 201610Kaba c-lever and variants
Part 2
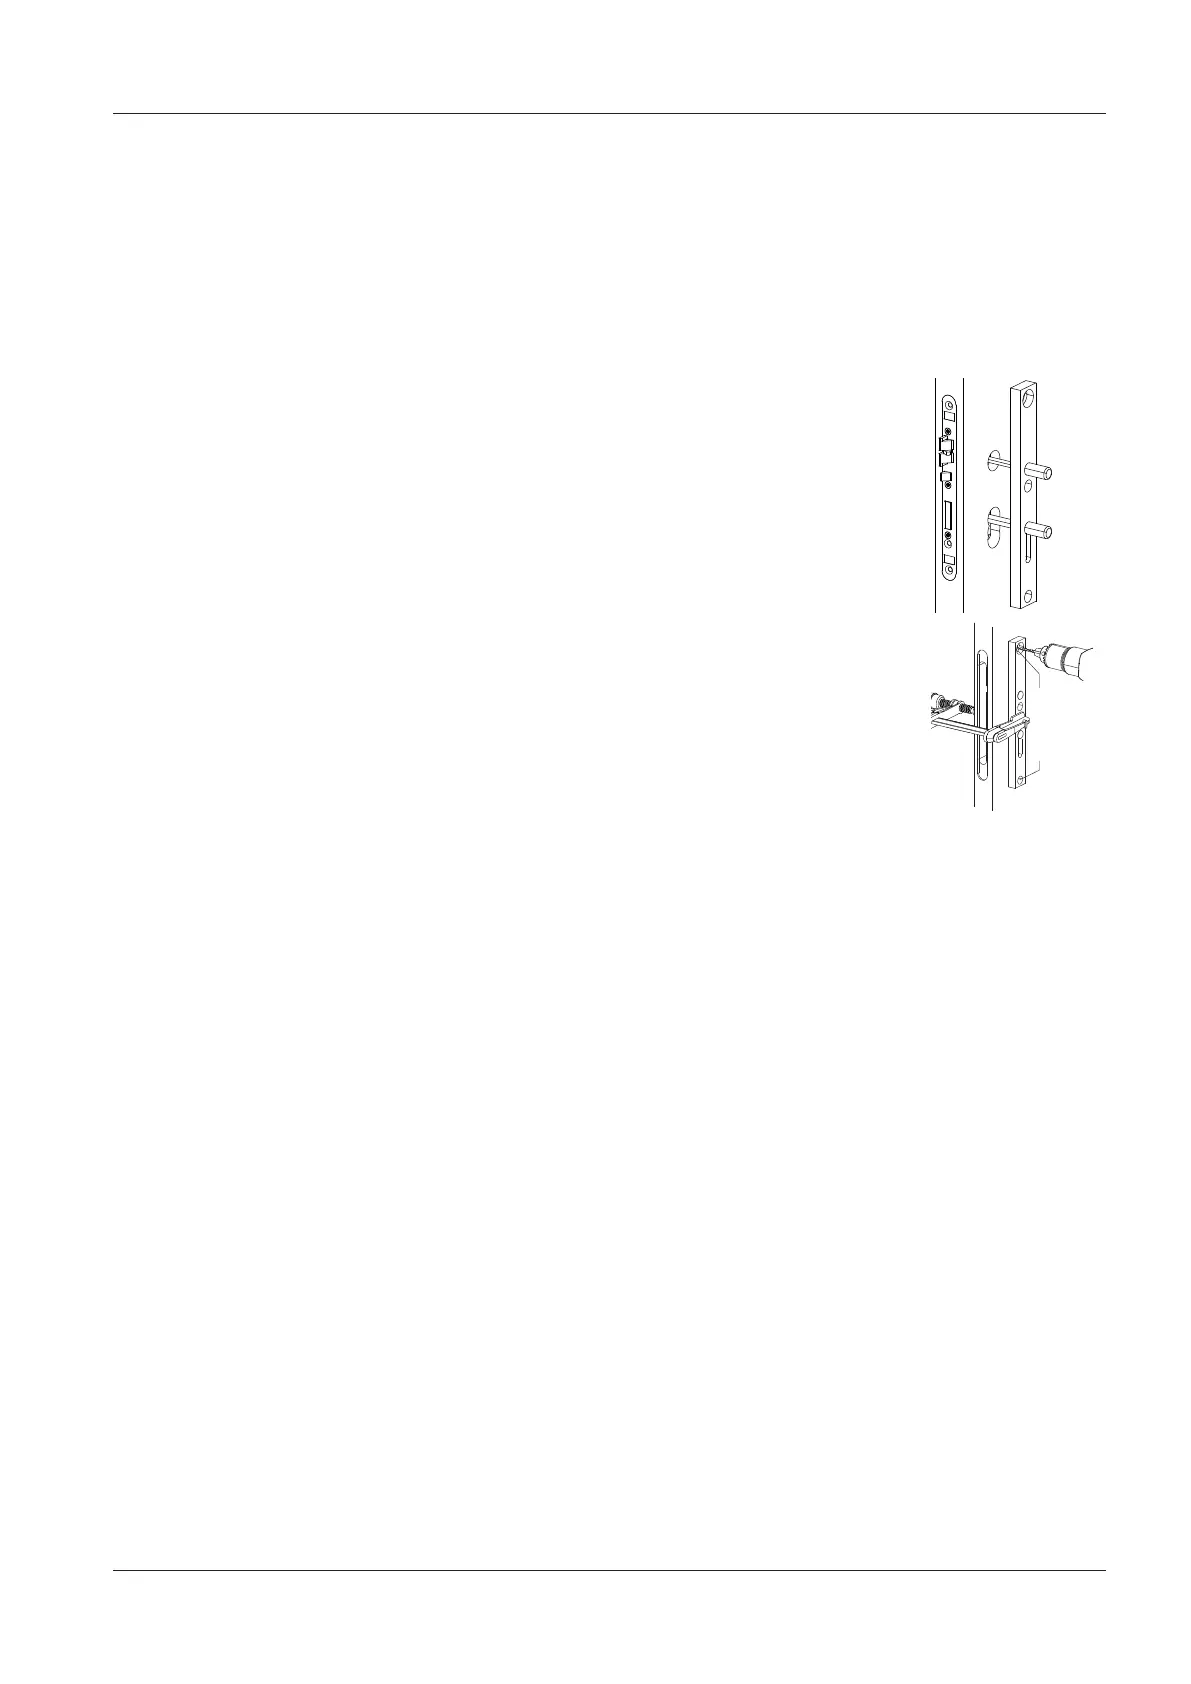
Requirement:
• On the opposite side from part 1
• Mortise lock installed
Procedure:
1. Position the drill jig with guide pin for cylinder on the
door.
2. Insert the pin for the spindle through the lock hub.
3. Fasten the drill jig to the door with a C-clamp.
ð The drill jig is connected securely to the door.
4. Remove the guide pin for the cylinder and the pin for
the spindle.
5. Remove the mortise lock.
6. Use drill bit Ø13mm to drill the top fastening hole up
to the lock mortise.
7. Note: Only drill a fastening hole for the
c-lever ES1 variant.
Use drill bit Ø9mm to drill the middle fastening hole
up to the lock mortise.
8. Use drill bit Ø9mm to drill the bottom fastening hole
up to the lock mortise.
9. Remove the drill jig and C-clamp.
10. Clean the lock mortise.
11. Insert the mortise lock.
Result:
The fastening holes for the fitting are drilled on both sides
of the door.
 Loading...