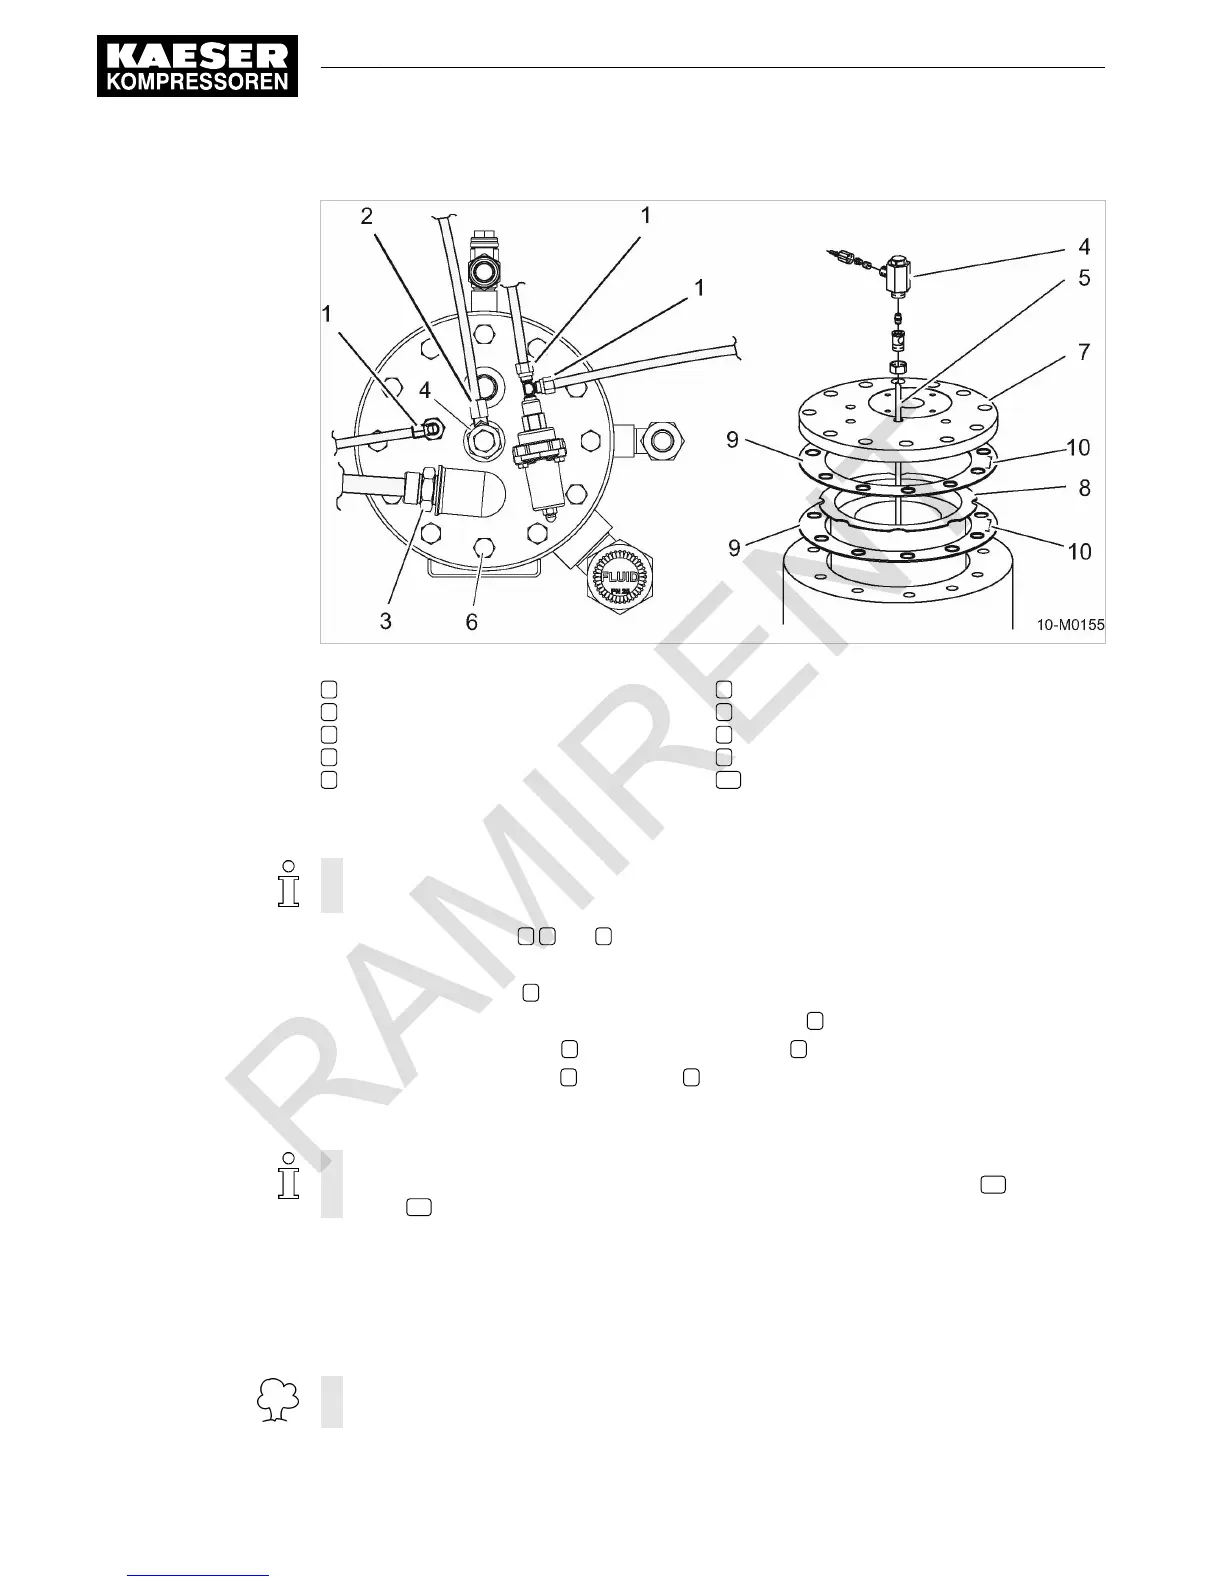
Fig. 36 Changing the oil separator cartridge
1 Control air line union nut
2 Oil scavenge pipe union nut
3 Compressed air hose union nut
4 Dirt trap
5 Oil scavenge pipe
6 Fixing screw
7 Cover
8 Oil separator cartridge
9 Gasket
10 Metal clip
Changing the oil separator cartridge
The dirt trap must be cleaned/changed when the oil separator cartridge is changed.
Maintain dirt trap, (see chapter
10.4.5.1).
1. Undo the union nuts 1
, 2 and 3 .
2.
Remove the control line, oil scavenge line and compressed air hose.
3. Unscrew the dirt trap 4
.
4.
Carefully draw out the dirt trap with the oil scavenge pipe 5
and lay them to one side.
5.
Remove the fixing screws 6
and carefully lift the cover 7 and lay it to one side.
6.
Take out the old cartridge 8
and gaskets 9 .
7.
Clean all sealing surfaces, taking care that no foreign bodies (dirt particles) fall into the oil sep‐
arator tank.
Do not remove the metal clips!
The metal parts of the oil separator tank are electrically coupled. The gaskets 13 have metal
clips 14 to make contact with the oil separator tank and the machine frame.
8. Insert the new oil separator cartridge with gaskets and screw down the cover.
9.
Replace and tighten all fittings.
10. Check the oil level in the oil separator tank.
Top up if necessary.
11. Reconnect the negative cable to the battery.
Dispose of the old separator cartridge and gaskets, along with any working materials conta‐
minated with cooling oil, in accordance with environment protection regulations.
10 Maintenance
10.4 Compressor
94
Service Manual Screw Compressor
M43 No.: 9_9432 02 E