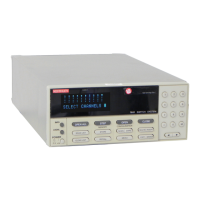
Front Panel Operation
4-30
Perform the following steps to assign card TYPE.
1. Display the CARD CONFIG MENU (see para-
graph 4.7, General rule #1).
2. Place the cursor on TYPE and press ENTER. The
following message will be displayed:
SET CARD TYPE
SLOT-1 SLOT-2
SLOT-1
To assign slot 1, place the cursor on SLOT-1
and press ENTER. A message indicating the current
slot assignment will be displayed. For example, if slot
1 was last assigned as a Model 7052, the following mes-
sage will be displayed:
SLOT-1 CARD: 7052
Note: If slot 1 is assigned as a Model 701X series card,
you will not be able to change the assignment since that
is the card that is actually installed in the slot. Press
EXIT to return to the SET CARD TYPE menu.
Table 4-5
TYPE assignments
Assignment message Interpretation*
SLOT-1 CARD: 701X** 701X series card installed in slot 1.
SLOT-1 CARD: NONE No card installed in slot 1, or slot 1 is not assigned.
SLOT-1 CARD: 7YYY*** Non-701X series model number assigned to slot 1 by the user. The card may or
may not be installed in the slot. Also, a different non-701X series card may be
installed.
SLOT-1 CARD: 9990 Slot 1 assigned by user to simulate a 40-channel multiplexer. A non-701X card may
be installed.
SLOT-1 CARD: 9991 Slot 1 assigned by user to simulate a 4 × 10 matrix. A non-701X card may be
installed.
SLOT-2 CARD: 701X** 701X series card installed in slot 2.
SLOT-2 CARD: NONE No card installed in slot 2, or an unassigned card installed.
SLOT-2 CARD: 7YYY*** Non-701X series model number assigned to slot 2 by the user. The card may or
may not be installed in the slot. Also, a different non-701X series card may be
installed.
SLOT-2 CARD: 9990 Slot 2 assigned by user to simulate a quad 1 × 10 multiplexer. A non-701X card
may be installed.
SLOT-2 CARD: 9991 Slot 2 assigned by user to simulate a 4 × 10 matrix. A non-701X card may be
installed.
* Assumes that power is cycled whenever a card is installed or removed from the mainframe.
** Model 701X series card, such as the Model 7011, 7012 or 7013.
*** Models 7052 though 7402.
1. Determine the correct assignment for slot 1 using
the following guidelines:
A. If slot 1 is empty and is not going to be used, as-
sign it as “NONE”. This will turn off the front
panel channel status display for slot 1 since it is
not going to be used.
B. If using a non-701X series card (Models 7052
through 7402) that is installed in slot 1, assign
slot 1 as that model number. For example, if the
Model 7062 is installed in slot 1, assign slot 1 as
“7062”
C. If slot 1 is going to be used to simulate a 40
channel mux, assign it as “9990”. To simulate a
4 × 10 matrix, assign it as “9991”. Note that a
non-701X series card left installed will be con-
trolled while using slot 1 as a simulator.
2. Use the cursor keys ( and ) to display the cor-
rect slot assignment. In general, the cursor key
increments the displayed model number while the
cursor key decrements the model number.
Artisan Scientific - Quality Instrumentation ... Guaranteed | (888) 88-SOURCE | www.artisan-scientific.com