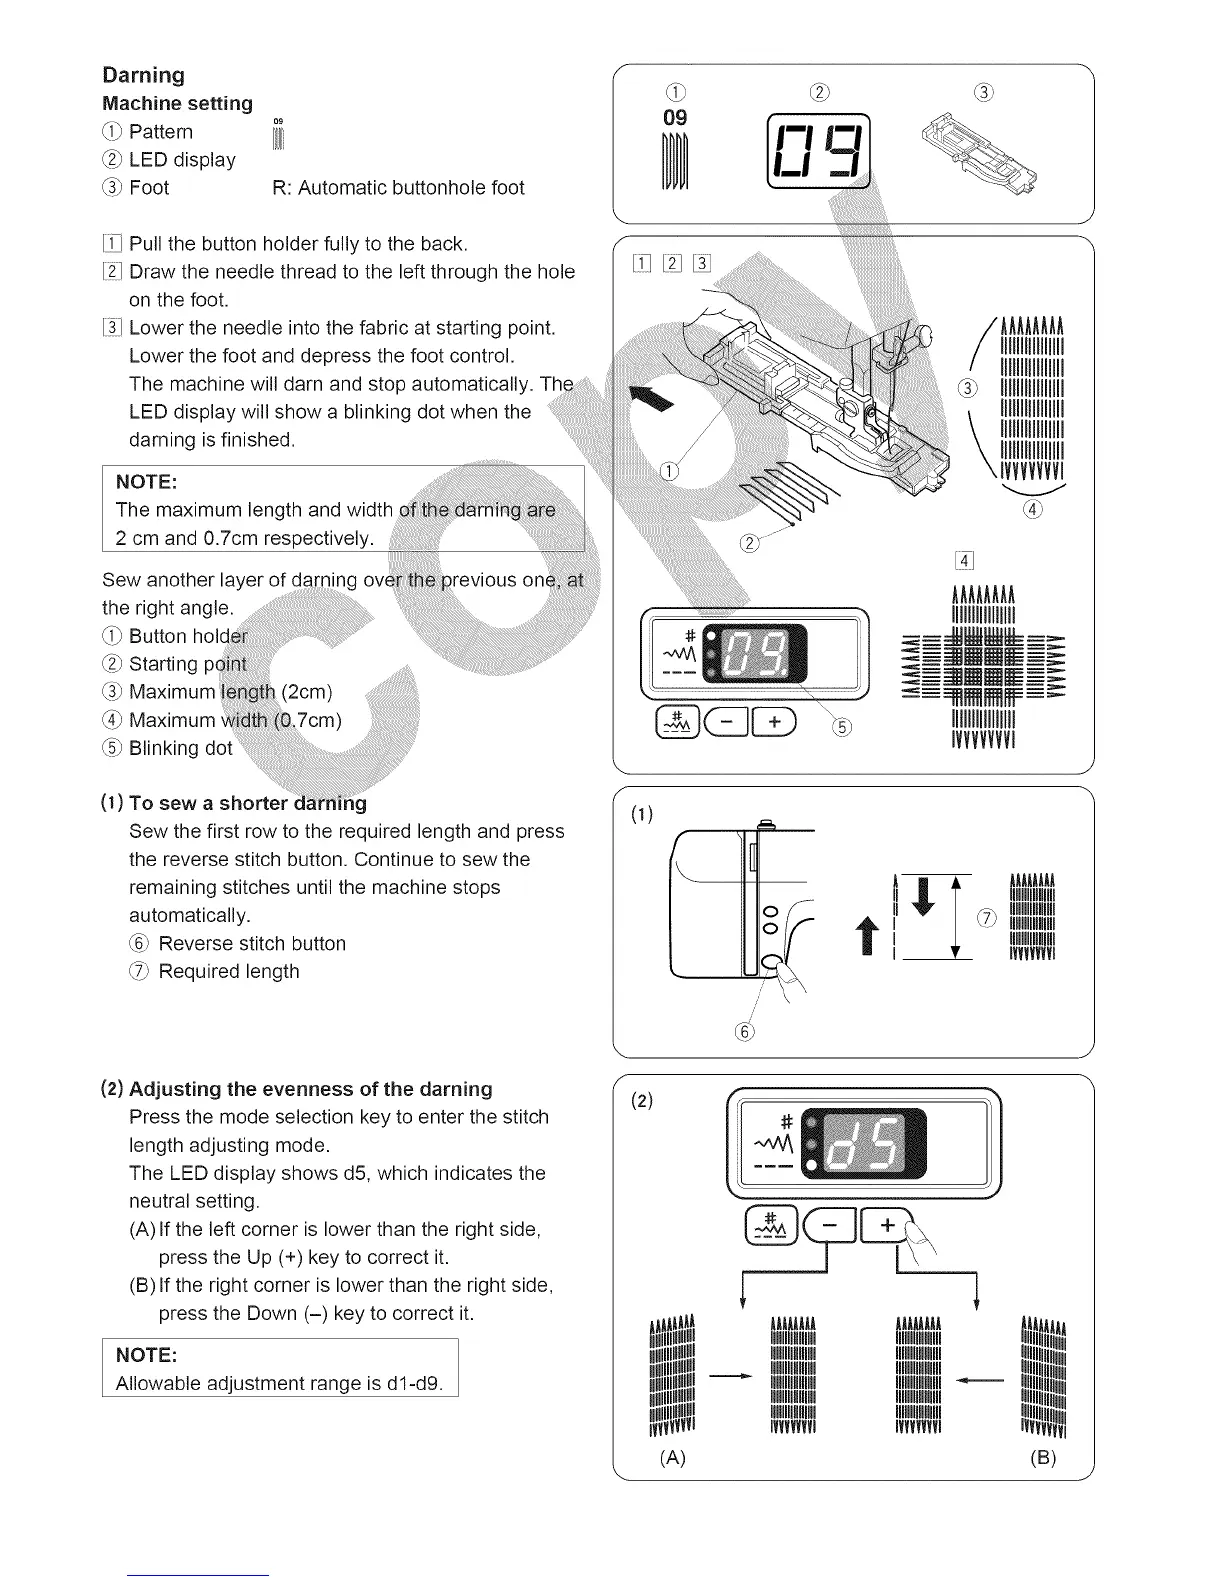
Darning
Machine setting
_i_ Pattern
_2_LED display
_3_Foot R: Automatic buttonhole foot
[iiq Pull the button holder fully to the back.
[ii_ Draw the needle thread to the left through the hole
on the foot.
[i_i1Lower the needle into the fabric at starting point.
Lower the foot and depress the foot control.
The machine will darn and stop automatically.
LED display will show a blinking dot when the
darning is finished.
NOTE:
The maximum length and width
2 cm and 0.7cm respectively.
Sew another layer of darninc
the right angle.
_i_ Button
_2_Starting pc
_3_ Maximum (2cm)
(4_Maximum
(5_Blinking
_revious
(1) To sew a shorter g
Sew the first row to the required length and press
the reverse stitch button. Continue to sew the
remaining stitches until the machine stops
automatically.
_6_Reverse stitch button
_7_Required length
(2) Adjusting the evenness of the darning
Press the mode selection key to enter the stitch
length adjusting mode.
The LED display shows d5, which indicates the
neutral setting.
(A) If the left corner is lower than the right side,
press the Up (+) key to correct it.
(B) If the right corner is lower than the right side,
press the Down (-) key to correct it.
NOTE:
Allowable adjustment range is dl-d9.
O9
E:i E:21[31
AAAAAAAA
I111111111111111
It11111111111111
I111111111111111
I111111111111111
I111111111111111
I111111111111111
IVVVVVVVI
0)
/'
//
11"
(2)
AAAAAAAA AAAAAAAA
IIIIIIIit1111111 IIIIIIIit1111111
MIIIIIIIIII MIIIIIIIIII
IMtUl IMtUl
IIIIIIIIIIIIIII IIIIIIIIIIIIIII
IIIIIIIIIIIlUU IIIIIIIIIIIlUll
IIIIIIlUlIIIIII IIIIIIlUlIIIIII
IVVVVVVVI IVVVVVVVI
IIIlUlIIIIIIII
VVVVVVVl
J
(A) (B)