T46W233A
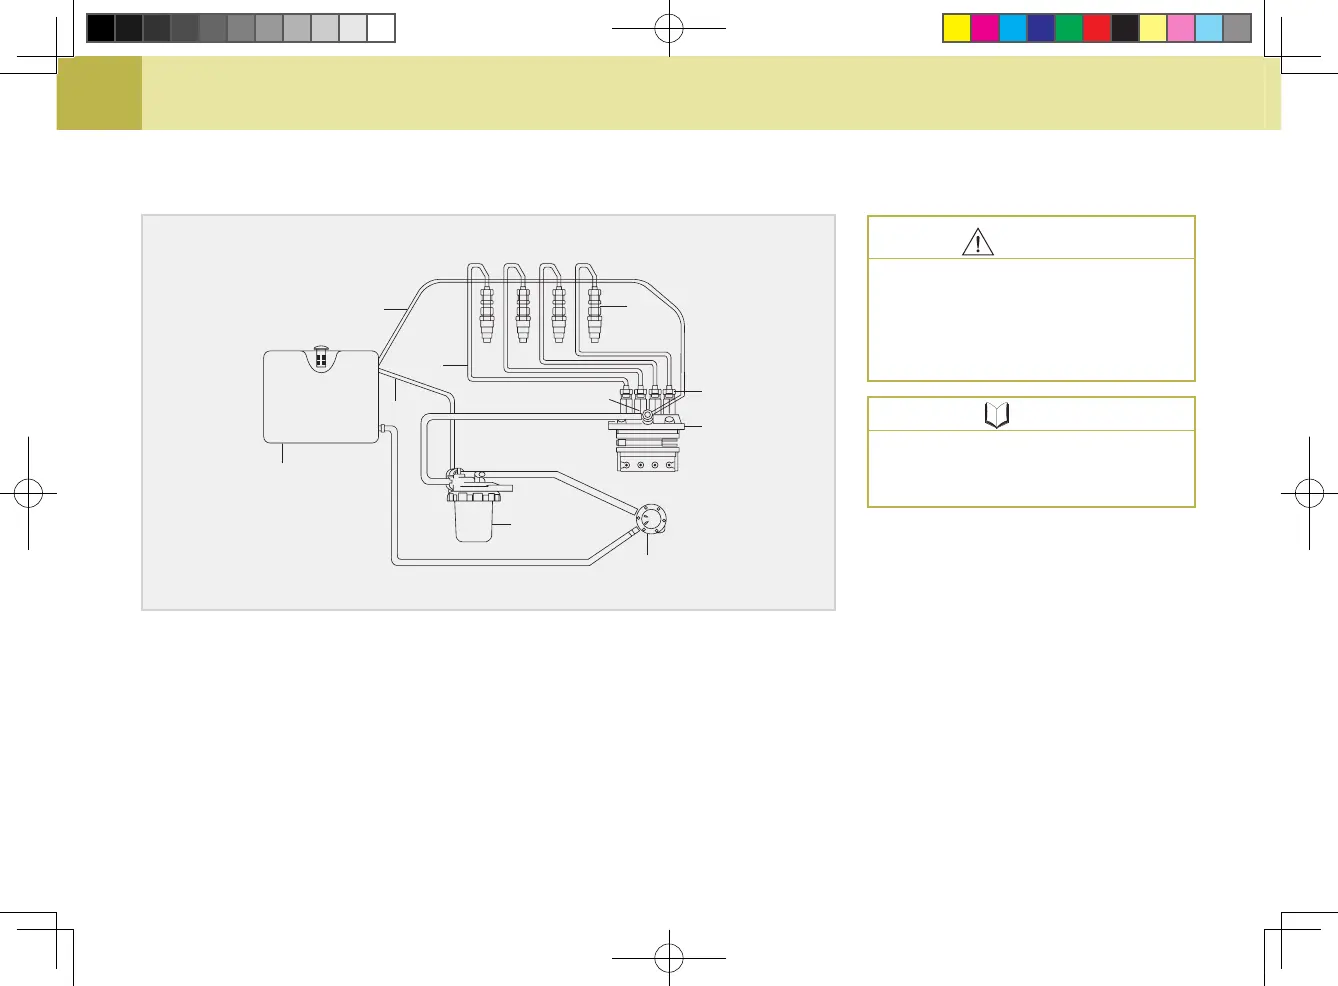
(1) Fuel Tank
(2) Fuel Filter
(3) Fuel Injection Pump
(4) Injection Pipe
(5) Injection Nozzle
(6) Fuel Overow Pipe (Hose)
(7) Fuel Feed Pump
(8) Bleeding Bolt
(9) Bleeding Hose
(10) Nozzle Holder Nut
2. If there is air in the fuel lter, turn the lter cock to the air side and turn
the ignition key to turn the start motor. Then, the air in the lter port is dis-
charged through the bleeding hose as shown in the gure.
3. When the amount of the fuel in the fuel lter port goes over 3/4 level, stop
cranking the engine and turn the cock in the gure to the “ON” (open) posi-
tion.
4. Unscrew the bleeding bolt in the
figure and crank the engine to
bleed the system. Then, tighten
the bolt.
5. If the engine still cannot be started
even after performing the above
step, unscrew the 1 or 2 nozzle
holder nuts out of 3 or 4 and crank
the engine to bleed the system.
6. When air bubbles aren`t seen any-
more in the drained fuel, tighten
the loose parts and start the en-
gine.
It is not necessary to bleed the
system if lling the pot with fuel
before installing the fuel lter.
Do not operate the start motor
for more than 10 seconds con-
tinuously. Instead, operate it
for several times within 10 sec-
onds each time.
CAUTION
NOTE