


S
Sandy BrownAug 18, 2025
Why does the Kodak i1405 LED stay red even when connected?
- TTonya SmithAug 18, 2025
The LED on your Kodak scanner will remain a steady red until your application connects to the scanner.
Why does the Kodak i1405 LED stay red even when connected?
The LED on your Kodak scanner will remain a steady red until your application connects to the scanner.
What to do if my Kodak i1405 Scanner documents are jamming?
If documents are jamming in your Kodak scanner, ensure that the output tray and guides are adjusted for the document size. Remove all jammed documents from the paper transport area. Verify documents meet the size, weight, and type specifications. Remove all staples and paper clips. Ensure the separator and feed modules are clean and properly installed, and that the drive rollers and imaging guides are also clean.
Why is my Kodak i1405 not scanning or feeding documents?
If your Kodak scanner isn't scanning or feeding documents, check that the power cord is plugged in and the power is on. Ensure the scanner cover is completely closed and that you followed the correct power-up sequence, verifying the green light is on and the software has enabled scanning. Make sure documents contact the feed module. Ensure the document stack height is less than 10.2 mm or about 150 sheets of 60 g paper, and that documents meet size, weight, and type specifications. For thicker documents, lift the gap release lever. Inspect the feed and separator modules for wear and replace if needed. You can also try powering the scanner off and on again.
How to fix skewed documents during Kodak scanning?
To correct skewed documents during scanning with your Kodak scanner, make sure the document side guides are adjusted to fit the documents. Ensure documents are fed perpendicular to the feed module and centered in the ADF. Remove all staples and paper clips. Clean the feed module, separator module, and drive rollers. Also, ensure the scanner cover is firmly closed and latched.
What to do if the Kodak i1405 pauses excessively during scanning?
If your Kodak scanner pauses excessively, ensure the host computer meets the minimum requirements. Check for sufficient free space on the hard disk drive and close other applications. Verify the USB connection is 2.0. You can also try changing the scanning options, such as compression, in your scanning application.
How to resolve Kodak i1405 Scanner communication errors on Linux Fedora 7?
To resolve a communications error after installing Linux drivers on Fedora 7 with your Kodak scanner, before checking cable connections and power cycling: Click OK on the message, then go to System>Administration>SELinux Management. Enter your root/superuser password. In the SELinux Administration screen, select Permissive from both the System Default Enforcing mode and Current Enforcing mode drop-down lists. Close the SELinux Administration screen and try again.
How to resolve issues with long documents jamming in my Kodak i1405?
If 35.6 cm (14 in.) or longer documents are not feeding or are jamming in your Kodak scanner, make sure that the input and output tray extenders are pulled out to provide support for long documents.
How to fix roller marks or streaks on Kodak scanned documents?
To fix roller marks or streaks appearing on documents after scanning with your Kodak scanner, clean the feed module, separator module, and drive rollers.
How to fix vertical lines appearing on images from Kodak i1405 Scanner?
To fix vertical lines appearing on images from your Kodak scanner, clean the imaging guides.
How to fix Kodak i1405 Scanner failing after Windows Vista Standby or Hibernate?
If you cannot scan after Standby or Hibernate with Microsoft Windows Vista using your Kodak scanner, upgrade to Service Pack 1 or higher.
Lists key features like ease of use, compact size, scan dimensions, output types, printing capabilities, Smart Touch, replaceable modules, resolutions, image processing, drivers, and interface.
Provides a step-by-step procedure for installing the scanner.
Explains how to use basic image processing features, available on CD and web.
Covers power outlet placement, power supply usage, IT power systems, printer access door, and MSDS availability.
Advises on avoiding loose clothing, jewelry, hair length, removing loose objects, taking breaks, and using correct cleaning supplies.
Details compliance with worldwide environmental requirements, consumable disposal, and recyclability of packaging.
Explains compliance with FCC rules for digital devices and potential interference issues.
Information regarding VCCI standards for Japan.
EMC registration for household use in Korea.
Specifies the operator-position noise emission value.
Notes suitability for Norwegian IT power systems with 230V.
Lists all items included in the scanner package, including the welcome folio with documentation.
Specifies the recommended PC configuration, including processor, RAM, hard disk space, and supported operating systems.
Lists the TWAIN, ISIS, WIA, and SANE drivers provided for different operating systems.
Guides the installation of scanner software for Windows and Linux operating systems.
Details connecting the power cord and USB cable to the scanner and PC.
Explains how to attach and adjust the input and output trays for different document sizes.
Describes turning on the scanner, finalizing driver installation, and installing optional application software.
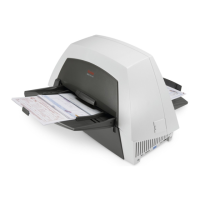
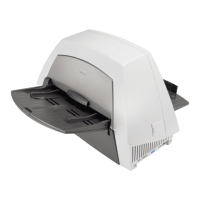
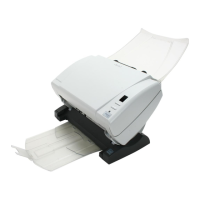
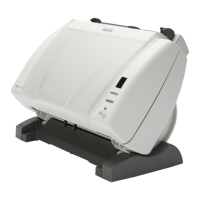
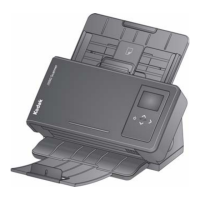
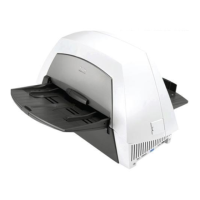
Identifies external components visible from the front of the scanner, including the cover, trays, and LEDs.
Details internal components like the separator module, rollers, and feed module, accessed by opening the scanner.
Illustrates external connectors and indicators on the sides of the scanner, including power button, ports, and LEDs.
Instructions on how to turn the scanner on and off using the power button.
Explains how to adjust tray extenders and side guides for different document sizes and types.
Describes the three possible positions of the output tray for various document lengths.
How to initiate and terminate a scanning job using application software.
Guidelines for arranging documents, removing staples/clips, and using protective sleeves for damaged documents.
Steps to verify successful installation using the Scan Validation Tool on Windows.
Steps to verify successful installation using ScanTWAIN on Linux.
Guidance on using other scanning applications with the scanner.
Introduction to configuring and using predefined scanning tasks via the system tray icon.
Details on using the Configuration dialog box to set up scan destinations, file types, and naming conventions.
Explains destination options (File, Application, Email, Printer/Fax) and related settings like image editing and file types (PDF, RTF, JPEG/TIFF).
Covers setting shortcuts, display options, and saving custom configurations for scanning.
Guides on configuring specific tasks by selecting function numbers and modifying their settings.
Instructions on how to add new software applications as scan destinations.
Describes the window for viewing and performing basic edits on scanned images before sending.
How to launch configured Smart Touch tasks by selecting their assigned numbers from the listing.
Procedure for loading and scanning documents using the automatic document feeder.
Methods for continuous feeding and manual feeding of documents.
Instructions for scanning torn or fragile documents using protective sleeves.
Details about the scanner's printing capabilities, including lines, characters, orientation, and ink cartridges.
Step-by-step instructions for installing or replacing ink cartridges for both Enhanced and Document Printers.
Procedure for manually adjusting the horizontal print position of the printer carrier.
Instructions for locating and replacing the ink blotter strips in the scanner's transport area.
A list of consumables and parts available for order, along with their catalog numbers.
Troubleshooting guide for common printer issues like poor print quality, jamming, or no printing.
General advice on cleaning scanner rollers and tires for optimal image quality.
Detailed list of supplies and consumables, including important safety notes.
Detailed steps for removing, cleaning, and reinstalling the separator module.
Detailed steps for removing, cleaning, and reinstalling the feed module.
Procedure for cleaning drive rollers and the transport area using cleaning pads and wipes.
Instructions for cleaning the imaging guides to maintain image quality.
Steps for cleaning the paper path using a transport cleaning sheet.
Guidelines on replacing the separator module and its frequency.
Detailed procedures for replacing the feed module and its tires.
Detailed procedures for replacing the separator module and its tires.
Instructions for replacing the pre-separation pad on the separator module.
Procedures for replacing both the upper and lower imaging guides.
Explanation of scanner status indicated by LED lights and potential error codes.
Information on the meaning of service indicator lights.
Details the scanner's lamp saver feature to prolong lamp life.
Step-by-step guide to resolve document jams within the scanner.
Troubleshooting steps for when the scanner fails to scan or feed documents.
Steps to resolve issues related to image quality or reduced scanner performance.
Specific checks and solutions for recurring document jamming problems.
Solutions for false paper jams and when scanner lamps shut off prematurely.
Guidance on upgrading Windows Vista for scanner compatibility after standby or hibernate.
Solutions for documents skewing during scanning or scanner pausing excessively.
Troubleshooting steps for multifeeding documents and roller marks on scanned pages.
Solutions for vertical lines appearing on images and unexpected scanner errors.
Addresses the issue of page count not being communicated to the SANE driver in Linux.
Solutions for red LED status and communication errors when connecting to Linux systems.
Details the models, types (simplex/duplex), and scan speeds of the i1400 series scanners.
Specifies the CCD type, bit depth, and available output resolutions.
Lists supported file formats (TIFF, JPEG, PDF) and the maximum scan area dimensions.
Outlines the warranty coverage, exclusions, and duration for Kodak Scanners.
Explains the process for getting warranty service, including required information and procedures.
Provides instructions for packaging and shipping returned products to avoid damage and voiding the warranty.
Describes available service methods like On-site Service, AUR (Advance Unit Replacement), and Depot Service.
Lists eligibility criteria, coverage for consumables, and other limitations for warranty service.
Provides website addresses and phone numbers for obtaining information, service, and technical assistance.
| Film scanning | No |
|---|---|
| Color scanning | Yes |
| Grayscale levels | 256 |
| Input color depth | 48 bit |
| Maximum scan size | 297 x 863 mm |
| Output color depth | 24 bit |
| Optical scanning resolution | 600 x 600 DPI |
| Scanner type | Sheet-fed scanner |
| Product color | Black, White |
| Sensor type | CCD |
| Scan drivers | ISIS, TWAIN |
| Scan file formats | JPG, PDF, RTF, TIFF |
| Scanning noise level | 57 dB |
| Daily duty cycle (max) | 9000 pages |
| ISO A-series sizes (A0...A9) | A4 |
| Input voltage | 100-240 V |
| Power supply type | AC |
| AC input frequency | 50 - 60 Hz |
| Power consumption (typical) | 60 W |
| USB version | 2.0 |
| Standard interfaces | USB 2.0 |
| Linux operating systems supported | Fedora 9, SuSE Linux 11, Ubuntu 8.04 |
| Server operating systems supported | Windows Server 2003, Windows Server 2003 x64, Windows Server 2008, Windows Server 2008 R2, Windows Server 2008 x64 |
| Windows operating systems supported | Windows 7 Home Basic, Windows 7 Home Basic x64, Windows 7 Home Premium, Windows 7 Home Premium x64, Windows 7 Professional, Windows 7 Professional x64, Windows 7 Starter, Windows 7 Starter x64, Windows 7 Ultimate, Windows 7 Ultimate x64, Windows Vista Business, Windows Vista Business x64, Windows Vista Enterprise, Windows Vista Enterprise x64, Windows Vista Home Basic, Windows Vista Home Basic x64, Windows Vista Home Premium, Windows Vista Home Premium x64, Windows Vista Ultimate, Windows Vista Ultimate x64, Windows XP Home, Windows XP Home x64, Windows XP Professional, Windows XP Professional x64 |
| Operating temperature (T-T) | 15 - 35 °C |
| Operating relative humidity (H-H) | 15 - 76 % |
| Sustainability certificates | ENERGY STAR |
| Standard input capacity | 150 sheets |
| Depth | 300 mm |
|---|---|
| Width | 547 mm |
| Height | 365 mm |
| Weight | 10400 g |