114
Using the Set-up Menu (Cont’d)
Taking pictures using red-eye reduction
- By selecting RED EYE REDUCTION ON, you can minimize the “red-eye
effect” that causes people's eyes to glow red when flash photography is
used. (The default setting is OFF.)
- When you press the shutter button, the pre-flash comes on, followed by
the real flash which finishes the shot.
• Until the real flash comes on, do not move the camera or let the subject move.
• If the subject is not facing the pre-flash or final flash, or the distance to the subject
is too far, the red-eye reduction effect may not be apparent.
Using the Digital Zoom
- If you select “DIGITAL ZOOM ON”, it can become 2x zoom furthermore from
the maximum magnification of optical zoom, and pictures can be taken. (The
default setting is OFF.)
- When using the digital zoom, view the field through the LCD monitor.
Because the zoom effect is accomplished electronically, it is not possible
to use the viewfinder.
- When shooting movies, the digital zoom function is not available.
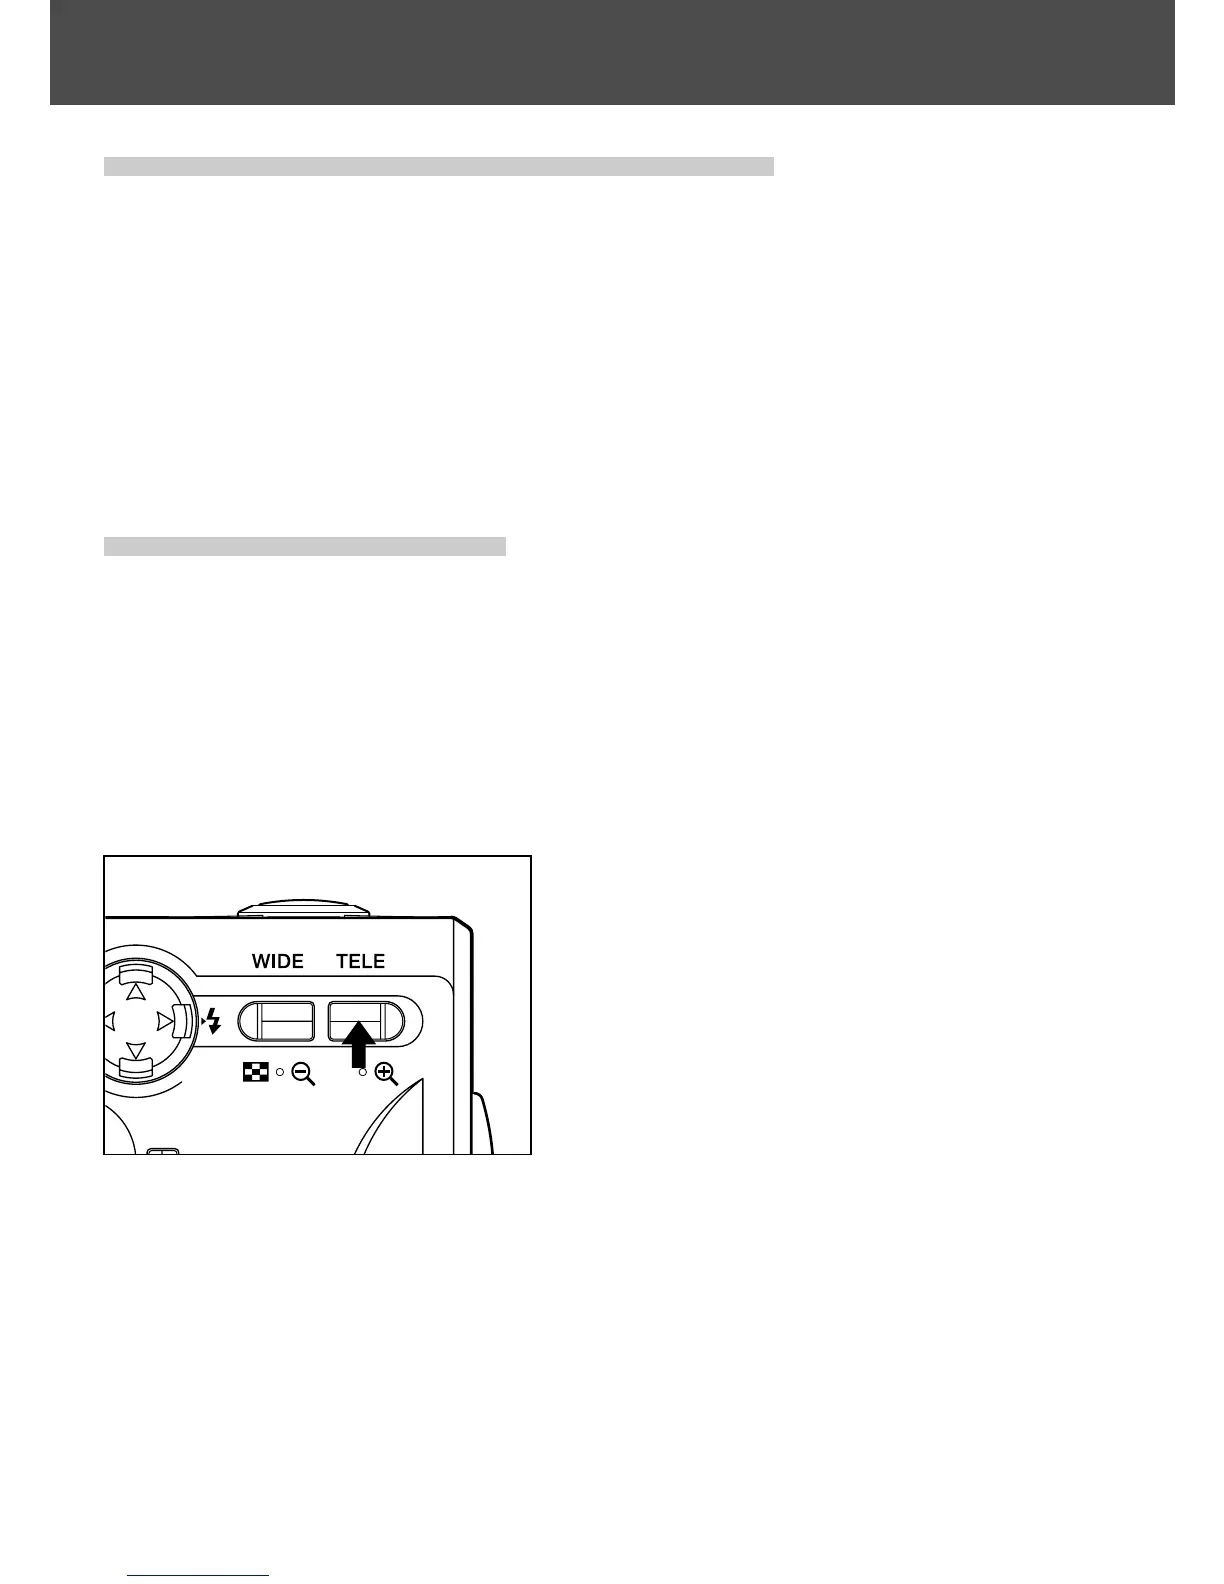
To take a picture, press the TELE zoom
button until it reaches the end of the optical
range, then release the button for a
moment, then press and hold the TELE
zoom button and the digital zoom is
engaged.
• The LCD monitor will display the digital zoom
ratio (×2).
•To return to normal mode, press the WIDE
zoom button.

 Loading...