232
MIDI
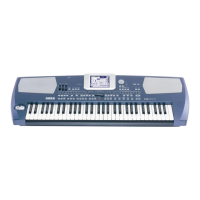
Connecting Pa500 to a Master keyboard
Connecting Pa500 to a Master keyboard
You can control the Pa500 with a master keyboard or any other
MIDI keyboard. You only need to connect the MIDI OUT con-
nector of the master keyboard to the MIDI IN connector of the
Pa500. The master keyboard will become the integrated key-
board of the Pa500 if it transmits over the same channel pro-
grammed as Global in the Pa500.
If the master keyboard transmits over the Global channel of the
Pa500, the split point and the status of the SPLIT button in the
control panel will affect the notes received from the master key-
board.
Connections and settings
To connect the master keyboard to the Pa500 follow this proce-
dure:
1. Connect the MIDI OUT connector of the master keyboard
to the MIDI IN connector of the Pa500.
2. Program the master keyboard to transmit over the Global
channel of the Pa500 (see “MIDI: MIDI In Channels” on
page 209).
For information on the master keyboard programming, see
the master keyboard own user’s manual.
3. Select the MIDI Setup parameter. You can do this by going
to the “MIDI: MIDI Setup / General Controls” page of the
Global mode, or in the dedicated page of the Style Play,
Song Play or Sequencer mode (see “Midi Setup” on
page 100, “Midi Setup” on page 162, and “Midi Setup” on
page 196).
Note: A different MIDI Setup may be selected for the Style
Play, Song Play and Sequencer modes. The “1-Default” MIDI
Setup is automatically selected when entering the Sound Edit
mode. MIDI settings are therefore modified when switching to
a different operating mode. The current MIDI Setup is also
shown in the Global mode.
4. Select the “Master Keyboard” MIDI Setup.
Note: Settings may change when new Global data is loaded
from a card. To protect settings from loading, use the Global
Protect function (see “Global Protect” on page 225).
5. To save the assigned MIDI Setup for the selected operative
mode into the Global, select the “Write Global-Style
Setup”, the “Write Global-Song Play Setup”, the “Write
Global-Seq. Setup”, or the “Write Global-Global Setup”
command from the page menu.
6. If needed, press one of the buttons in the MODE section to
go to the desired operative mode.
Connecting the Pa500 to a MIDI
accordion
There are various types of MIDI accordions, each one requiring
different MIDI settings. Pa500 is provided with a series of
“Accordion” MIDI Setups, each one suitable for a different MIDI
accordion (see page 207).
Connection and settings
To connect the accordion to the Pa500 follow this procedure:
1. Connect the MIDI OUT connector of the accordion to the
MIDI IN connector of the Pa500.
2. Select the MIDI Setup parameter. You can do this by going
to the “MIDI: MIDI Setup / General Controls” page of the
Global mode, or in the dedicated page of the Style Play,
Song Play or Sequencer mode (see “Midi Setup” on
page 100 and “Midi Setup” on page 162).
Note: A different MIDI Setup may be selected for the Style
Play, Song Play and Sequencer modes. The “1-Default” MIDI
Setup is automatically selected when entering the Sound Edit
mode. MIDI settings are therefore modified when switching to
a different operating mode. The current MIDI Setup is also
shown in the Global mode.
3. Select one of the available “Accordion” MIDI Setups.
Note: Settings may change when new Global data is loaded
from a card. To protect settings from loading, use the Global
Protect function (see “Global Protect” on page 225).
4. To save the assigned MIDI Setup for the selected operative
mode into the Global, select the “Write Global-Style
Setup”, the “Write Global-Song Play Setup”, the “Write
Global-Seq. Setup”, or the “Write Global-Global Setup”
command from the page menu.
5. If needed, press one of the buttons in the MODE section to
go to the desired operative mode.
MIDI IN
MIDI OUT
Pa500-110UM-ENG.book Page 232 Friday, March 28, 2008 11:12 AM
 Loading...