RK-100S 2 Owner's Manual
18
MIDI
Using the RK-100S 2 with other
MIDI devices (MIDI)
MIDI stands for Musical Instrument Digital Interface,
and is a world-wide standard for exchanging various
types of musical data between electronic musical
instruments and computers.
When MIDI cables are used to connect two or more
MIDI devices, performance data can be exchanged
betweenthedevices,eveniftheyweremadebydierent
manufacturers.
The RK-100S 2 lets you assign control change numbers to
themajorparametersthataectthesound,andcontrol
these parameters from an external MIDI sequencer while
you play the tone generator.
Youcanalsousetheassignedribbonsorbuonsto
transmit these control changes to control an external
MIDI device.
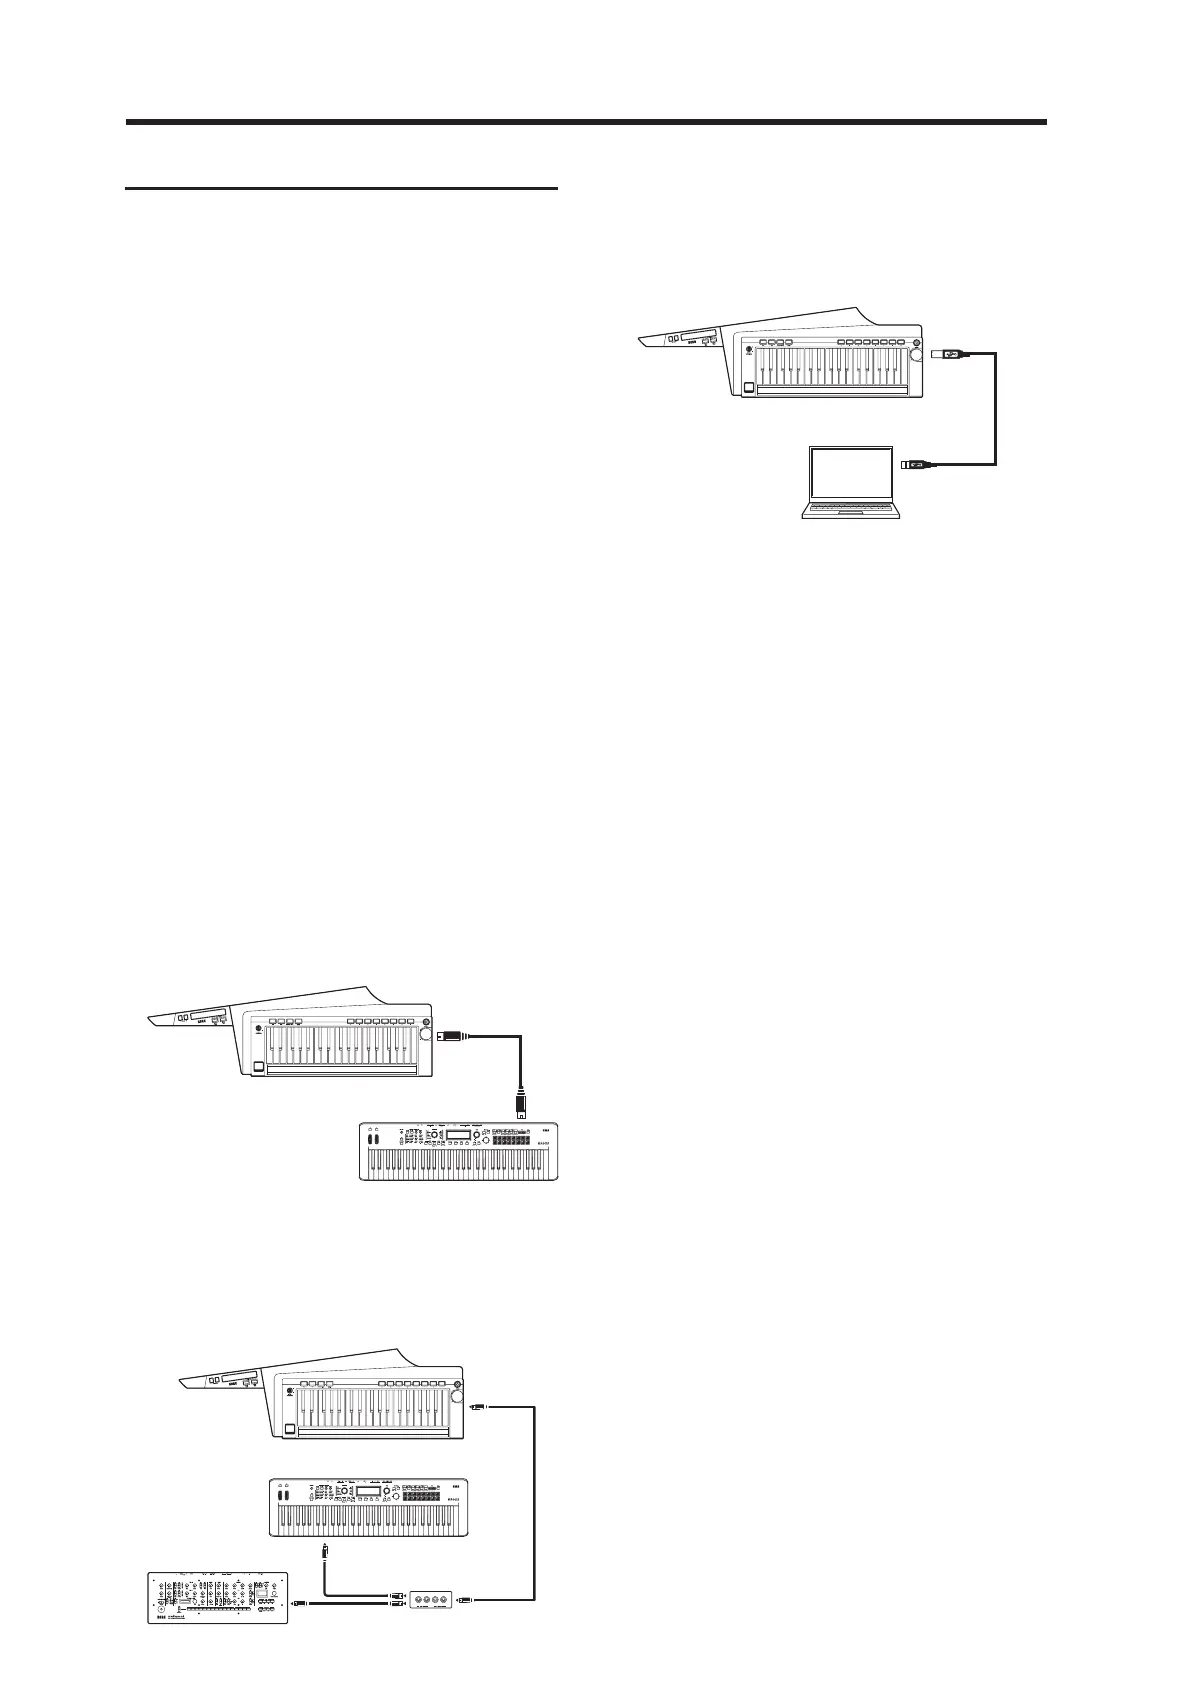
Connecting MIDI devices/computers
Controlling an external MIDI tone generator
from the RK-100S 2
When you want to use the RK-100S 2’s keyboard,
controllers, and arpeggiator. to play an external
MIDI tone generator, use a MIDI cable to connect
the RK-100S 2’s MIDI OUT connector to the MIDI IN
connector of the external MIDI tone generator.
Controlling two or more external MIDI tone
generators from the RK-100S 2
You can also use a MIDI patch bay to control multiple
MIDI devices.
MIDI OUT
MIDI IN
RK-100S 2
MIDI Keyboard
MIDI tone generator
MIDI OUT
MIDI OUT
MIDI OUT
MIDI IN
MIDI IN
Connecting the RK-100S 2 to your computer
via USB
Connect a USB cable to the USB connector of the
RK-100S 2 and the computer.
Note: In order to use a USB connection, you must install
the Korg USB-MIDI driver in your computer. Download
the Korg USB-MIDI driver from the Korg website, and
install it as directed by the accompanying documenta-
tion.
MIDI-related settings
MIDI channel setting
In order to exchange data with a connected external
MIDI device, you must set the RK-100S 2’s MIDI channel
to match the MIDI channel of the external MIDI device.
Refer to the “Global MIDI channel” section on page 16,
and specify the Global MIDI channel.
Recording the MIDI output from the
RK-100S 2’s arpeggiator onto an external
MIDI sequencer or computer
Connect and setting
Connect the RK-100S 2’s MIDI OUT connector to the
MIDI IN connector of your external MIDI sequencer.
Recording the note data from the arpeggiator onto
an external MIDI sequencer
TurnontheRK-100S2’sarpeggiator(ARPbuonlitup),
play the keyboard, and record the note data on your
external MIDI sequencer.
Synchronizing the arpeggiator
Forinformationonsynchronization-relatedseingsof
your external MIDI device, refer to the manual of your
device.
In order to use the RK-100S 2 as master and the external
MIDI device as slave, connect the RK-100S 2’s MIDI
OUT connector to your external MIDI device’s MIDI IN
connector.
Set your external MIDI device to receive incoming
MIDI clock messages. The external MIDI device (e.g.,
sequencer or rhythm machine) will operate at the tempo
speciedbytheRK-100S2’sTEMPObuon.
RK-100S 2
USB
Computer
USB cable
 Loading...