34
Sampling (recording a sample)
If the EXB-SMPL option (sold separately) is installed,
you will be able to record 48 kHz 16 bit stereo samples.
Sampled sounds can be used in a program, combina-
tion, or song.
Here we will explain the process of making sampling
settings, recording the actual sample, saving it, and
converting a multisample into a program. We will also
explain how a sample such as a drum phrase can be
played back repeatedly. For other procedures and more
detailed explanations, refer to p.84 and PG p.87.
In order to perform the steps described below, the
EXB-SMPL option must be installed. (
☞PG p.253)
Sampling a sound and playing it
back as “one-shot”
1. Connect a mic and make input settings
1 Turn off the power. Then turn it on again.
When you turn off the power, all unsaved sample
data will be erased. If you want to keep any of the
sample data, save it before you continue.
This explanation assumes that you are starting
from the initial power-on state.
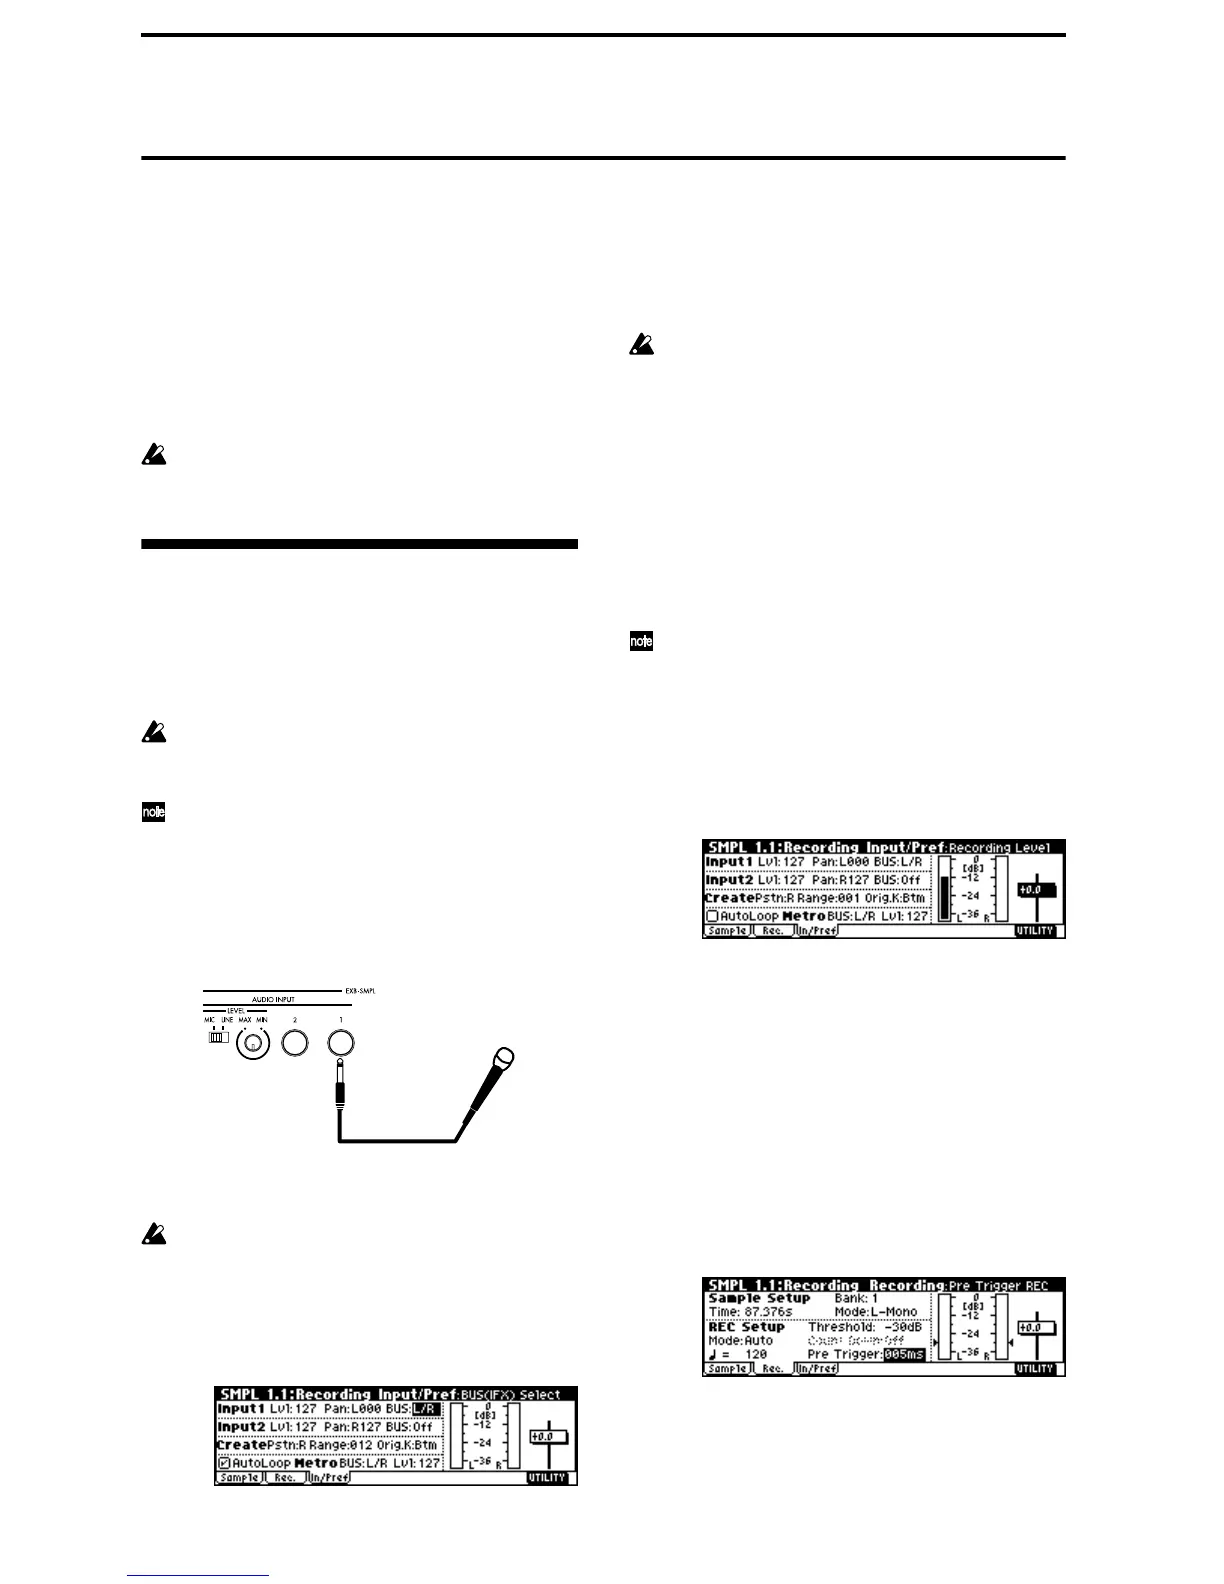
2 Connect a mic to the AUDIO INPUT 1 jack located
on the rear panel of the EXB-SMPL.
Set the AUDIO INPUT [MIC/LINE] switch to the
MIC position, and set the [LEVEL] knob to the cen-
ter.
3 Press the [SAMPLING] key to enter Sampling
mode.
If the EXB-SMPL option is not installed, the dis-
play will indicate “No Sampling Upgrade
Installed,” and it will not be possible to enter this
mode.
4 Press the [F3] (“In/Pref”) key to select the SMPL
1.1: Recording, Input/Pref page.
5 In the Input1 area, set “BUS” to L/R, specifying the
bus to which the AUDIO INPUT 1 jack will be
input.
Make sure that the Input1 level (“Lvl”) is 127, and
the “Pan” is L000.
Be aware that when “BUS” is changed from Off to
L/R or IFX, the volume level to the AUDIO OUT
L/MONO and R jacks or to the headphones may
rise abruptly.
2. Set the recording level
1 Speak into the mic at the volume that you will use
for recording.
If the display indicates “ADC OVER!” (AD con-
verter input overload!), turn the rear panel [LEVEL]
knob in the direction of MIN to adjust the level
appropriately.
For the ideal audio quality, the level should be
slightly lower than when the “ADC OVER!” dis-
play appears (i.e., the highest level that does not
produce an overload).
2 Press the [REC/WRITE] key.
Speak into the mic at the volume that you will use
for recording.
The level meter will show the input volume.
If the display indicates “CLIP!,” use the VALUE
controller to lower the “Recording Level” slider
(located in the right of the display) from the +0.0
setting down to an appropriate level.
3 When you have finished making adjustments,
press the [REC/WRITE] key.
3. Specify the recording method (Auto)
1 In the lower left of the SMPL 1.1: Recording,
Input/Pref page, select the “Auto Loop On” check
box, and press the [DEC] key to un-check it.
2 Press the [F2] (“Rec.”) key to select the SMPL 1.1:
Recording, Recording page.
3 In REC Setup, set “Mode (REC Mode)” to “Auto,”
and set “Threshold” to –30.
With this setting, recording will begin automatically
when the audio input reaches –30 dB or higher in
record-ready mode.
MIC
EXB-SMPL

 Loading...