73
Basic functions
Sequencer mode
Creating and recording RPPR
(Realtime Pattern Play/Record)
This section explains how to assign a pattern to RPPR,
and how to play and record. (
☞“Playing with the
RPPR function” p.30)
Creating RPPR data
1 Create a new song. (☞p.69)
2 Specify the program for each track.
For this example we will use a template song. Use
the Utility menu command “Load Template Song”
to load P14: Hip Hop/Rap. It is not necessary to
copy the patterns. (☞p.63)
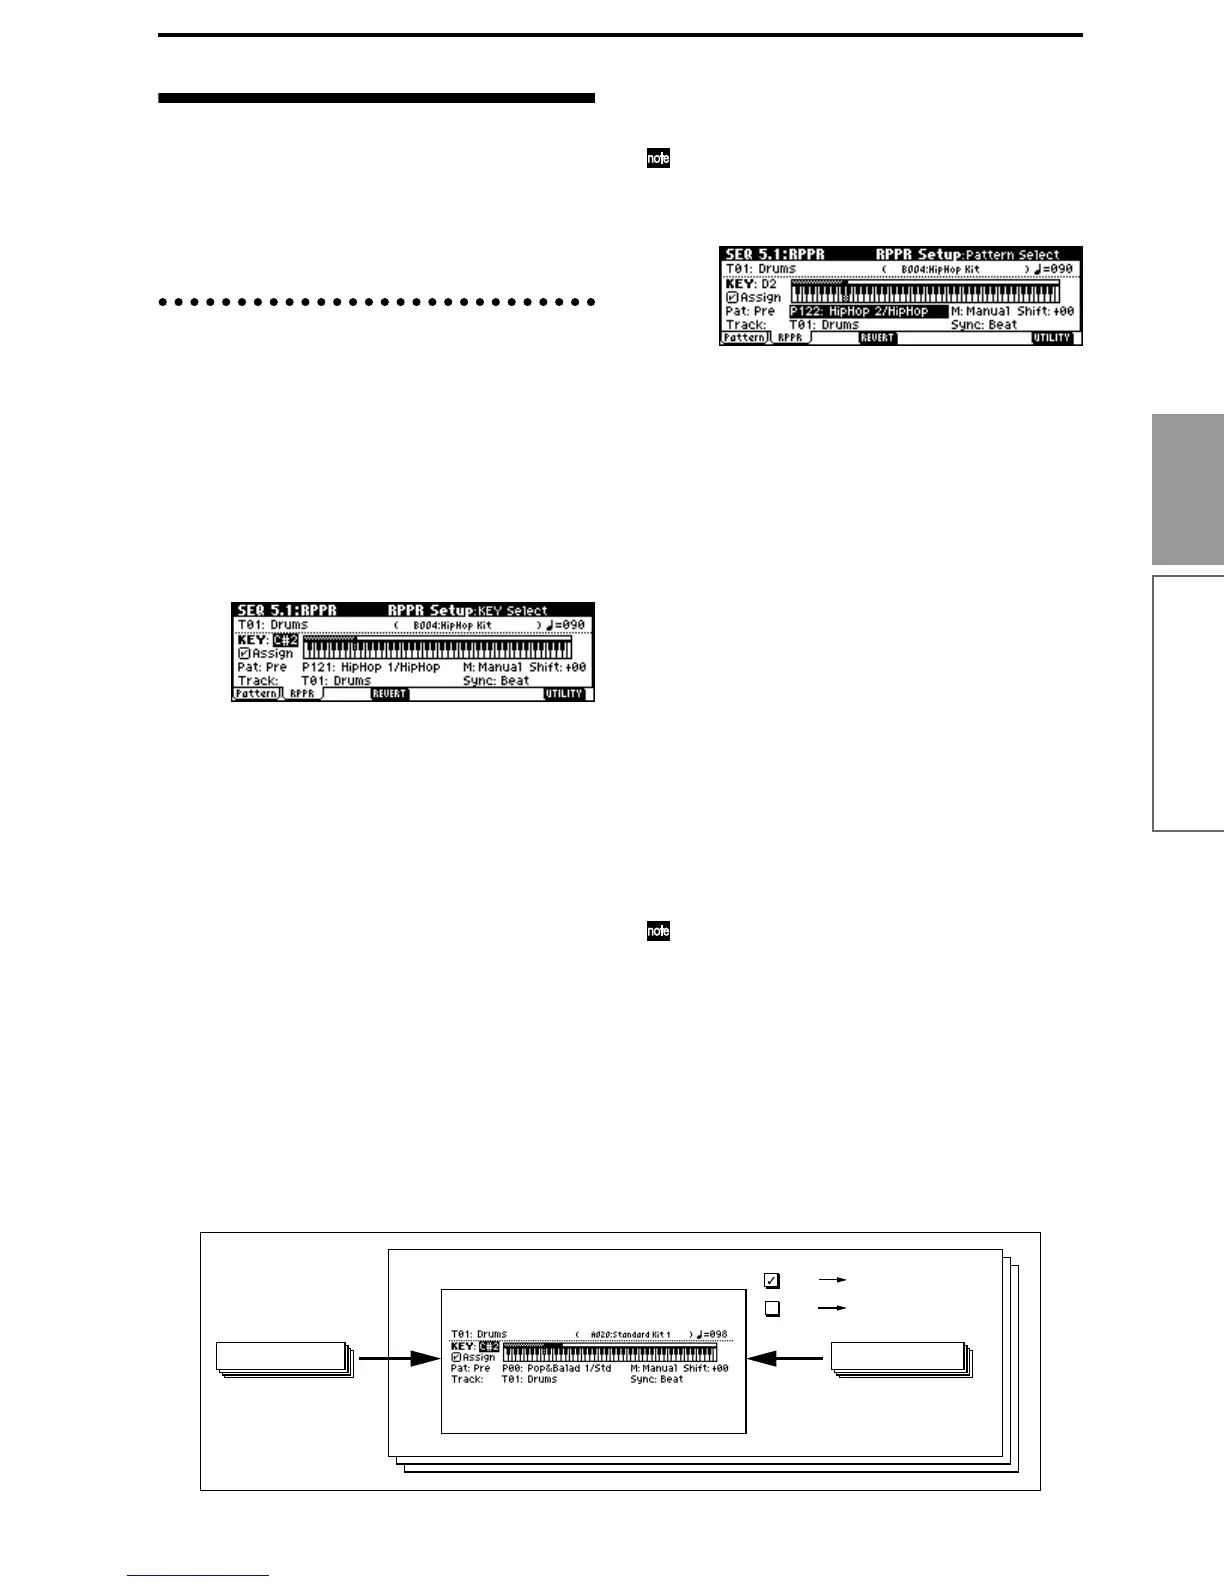
3 Select the SEQ 5.1: RPPR, RPPR Setup page.
In this page, the RPPR function is automatically
turned on.
4 Use “KEY” to select the key to which the pattern
will be assigned.
Select C#2. This can also be selected by holding
down the [ENTER] key and playing a note.
C2 and lower keys are used to stop playback, and
cannot be assigned.
5 Check the “Assign” check box.
6 Set “Pat (Pattern Bank)” to the Pre pattern type,
and set “Pattern Select” to pattern P121: HipHop 1/
HipHop.
7 Set “Track” to T01: Drums.
The selected pattern will be played according to the
settings (program, etc.) of the track you select here.
8 Assign patterns to other keys.
Set “KEY” to D2.
Press the [F4] (“REVERT”) key.
The settings for “Assign,” “Pat (Pattern Bank),”
“Pattern Select,” and “Track” will be set to the val-
ues that were specified earlier (in steps 5–7).
Choose “Pattern Select,” and press the [INC] key
once to select P122: HipHop 2/HipHop.
By using “REVERT” in this way, you can work
efficiently when the patterns to be assigned have
consecutive or nearby numbers, or use the same
track.
Use the above method to assign several patterns
from the range of P123: HipHop 3/HipHop–P135:
HipHop 15/HipHop.
9 Press the C#2 key.
The assigned pattern will play.
Take your finger off the C#2 key, and press the D2
key.
The pattern will change, and playback will begin. At
this time, the pattern operation will depend on the
“Sync” and “M (Mode)” setting.
Set “KEY” to C#2, and set “Sync” to Measure.
Make the same setting for D2.
Now press the notes consecutively. Notice that the
patterns operate in a different way.
With the “Measure” setting, patterns will be han-
dled in one-measure units. The second and subse-
quent patterns to be started will start in
synchronization with units of a measure relative to
the pattern that was started first.
If you change the “M (Mode)” setting to Once, the
entire pattern will playback to the end even if you
release your finger from the keyboard immediately.
To stop playback, either press the same key once
again, or press the C2 or lower key.
For details on “Sync,” “M (Mode),” and “Shift,”
refer to PG p.72.
Song
U00: Pattern 00
P00: Pop&Balad 1/Std
User Pattern U00 - U99Preset Pattern P00 - P149
RPPR
RPPR
5.1: RPPR, RPPR Setup
RPPR function is on
Normal multi playback
and recording

 Loading...