SERVICE WORK ON THE CHASSIS 38
B01038-10
Main work
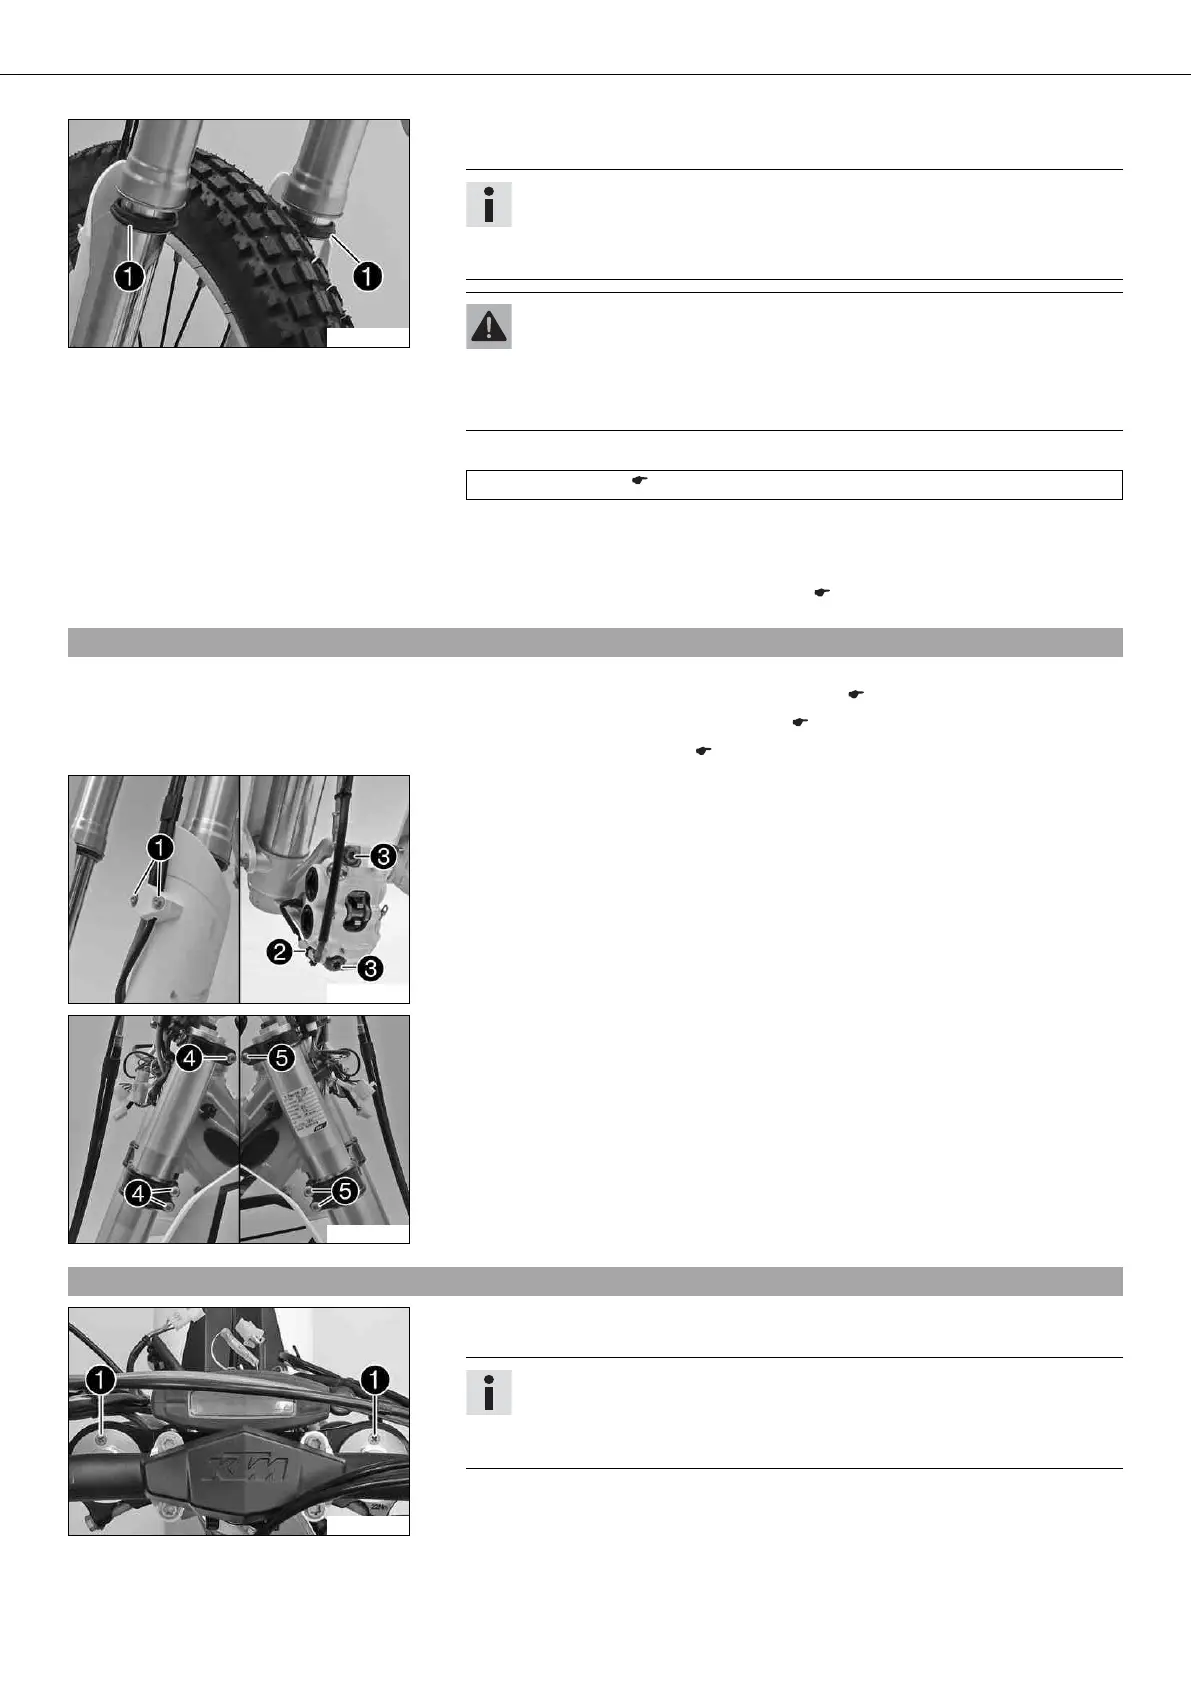
– Push dust boots 1 of both fork legs downward.
Info
The dust boots should remove dust and coarse dirt particles from the fork
tubes. Over time, dirt can penetrate behind the dust boots. If this dirt is not
removed, the oil seals behind can start to leak.
Warning
Danger of accidents Reduced braking efficiency due to oil or grease on the
brake discs.
– Always keep the brake discs free of oil and grease, and clean them with
brake cleaner when necessary.
– Clean and oil the dust boots and inner fork tube of both fork legs.
Universal oil spray ( p. 106)
– Press the dust boots back into their normal position.
– Remove excess oil.
Follow-up work
– Remove the motorcycle from the lift stand. ( p. 37)
10.5Removing the fork legs x
Preliminary work
– Remove the headlight mask with the headlight. ( p. 76)
– Raise the motorcycle with the lift stand. ( p. 37)
–
Remove the front wheel. x ( p. 68)
B01105-10
Main work
– Remove screws 1 and take off the clamp.
– Remove cable binder 2.
– Remove screws 3 and take off the brake caliper.
– Allow the brake caliper and brake line to hang tension-free to the side.
B01054-10
– Release screws 4. Take out the left fork leg.
– Release screws 5. Take out the right fork leg.
10.6Installing the fork legs x
B01055-10
Main work
– Position the fork legs.
Info
The lowest milled groove in the fork leg must be flush with the top edge of
the upper triple clamp.
Position bleeder screws 1 toward the front.