KARA
KARAKARA
KARA
®
®®
®
M
MM
MO
OO
ODULAR
DULARDULAR
DULAR WST
WST WST
WST
®
®®
®
SYSTEM
SYSTEM SYSTEM
SYSTEM
rigging procedures using
rigging procedures using rigging procedures using
rigging procedures using
kara
karakara
kara-
--
-minibu
minibuminibu
minibu
VERSION 1.0
KARA_SRM_EN_1-0
w w w . l - a c o u s t i c s . c o m
18
1818
18
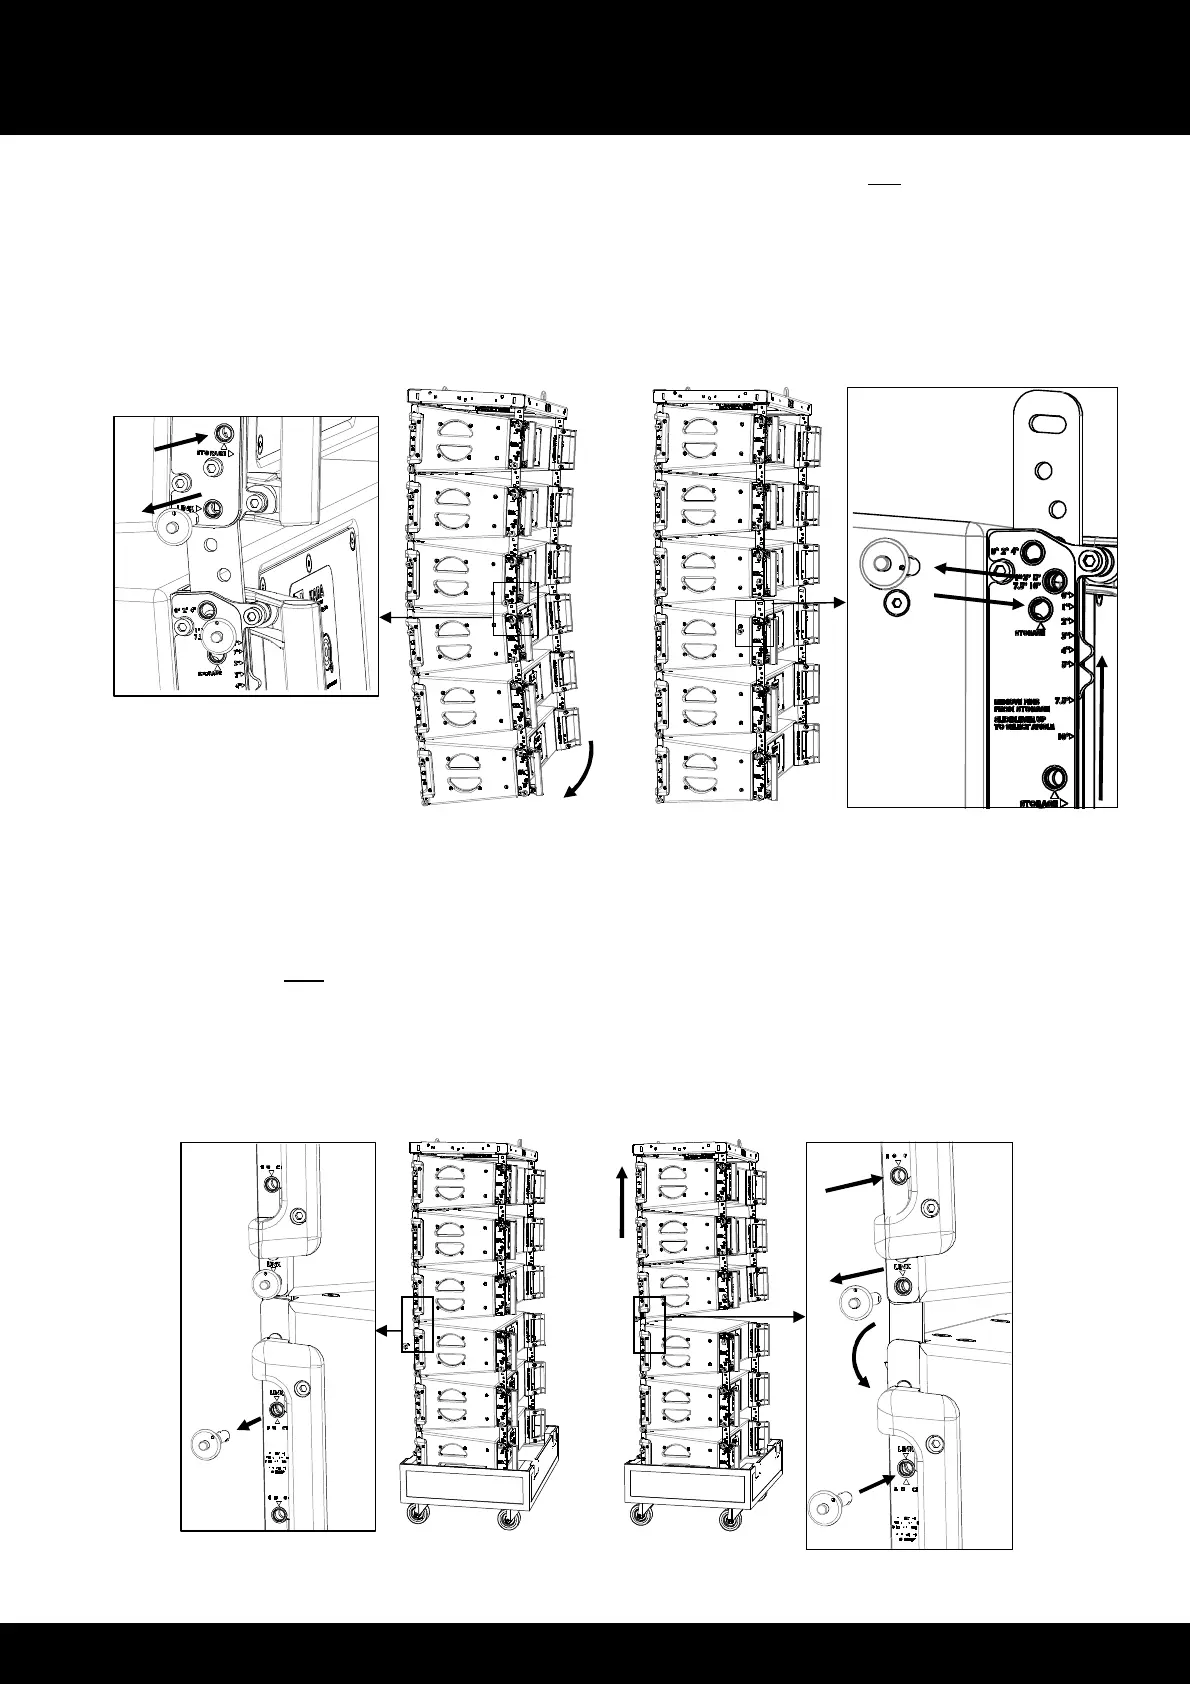
7. With 2 people working simultaneously on each side of the array, disconnect the rear link points between
ARRAY#1 and ARRAY#2 as follows:
a. While grabbing the back handle of KARA#5, remove the KARA#3 rear bottom R-BLP from its link hole and
re-insert it into its storage hole.
b. Rotate ARRAY#2 downwards and position the rear corners into the tray while still suspended from the front
link points.
c. Remove the KARA#4 rear top R-BLP from its angle hole, slide the angle arm so as to align the cursor with the
storage label, and re-insert the R-BLP into its storage hole.
Figure 17: Disconnecting the ARRAY#1 and ARRAY#2 rear link points
8. Lower the array until ARRAY#2 rests in the tray and the front link points between ARRAY#2 and ARRAY#1 are
in contact.
9. Disconnect the front link points between ARRAY#1 and ARRAY#2 as follows:
a. Remove both KARA#4 front top R-BLP from their link holes.
b. Slightly raise ARRAY#1 so that it is no longer in contact with ARRAY#2.
c. Remove both KARA#3 front bottom R-BLP from their link holes and re-insert them into their storage holes.
d. Rotate both KARA#4 front arms down and re-insert both front top R-BLP into their storage holes. Note:
The front top storage and link holes are the same.
Figure 18: Disconnecting the ARRAY#1 and ARRAY#2 front link points
 Loading...