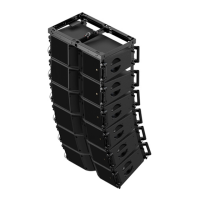
KARA
KARAKARA
KARA
®
®®
®
M
MM
MO
OO
ODULAR
DULARDULAR
DULAR WST
WST WST
WST
®
®®
®
SYSTEM
SYSTEM SYSTEM
SYSTEM
rigging procedures using
rigging procedures using rigging procedures using
rigging procedures using
kara
karakara
kara-
--
-minibu
minibuminibu
minibu
VERSION 1.0
KARA_SRM_EN_1-0
w w w . l - a c o u s t i c s . c o m
60
6060
60
7.2.2 Laser support plate
Replacement kit and tools
KR MBUMPLAS, handheld inclinometer
1
, electric screwdriver with torque selector (N.m or in.lb
f
), T20 Torx
®
bit,
5 mm hex bit, 7 mm hex key, KR LOCKBLUE.
1
Available in the L-ACOUSTICS
®
TECH TOOLCASE (refer to the TECH TOOLCASE Product spec sheet [3.4]).
Laser support plate replacement procedure
1. Put the M-BUMP on a flat horizontal surface (verify with the handheld inclinometer).
2. Remove the laser/inclinometer device from the laser support plate by undoing the four Torx
®
bolts (T20 bit,
7 mm hex key).
3. Remove the old laser support plate from the KARA-MINIBU by undoing both hex screws (5 mm hex bit).
4. Mount the new laser support plate horizontally to the KARA-MINIBU (verify with the handheld inclinometer) by
driving two hex screws (thread-locker, 5 mm hex bit, 5 N.m/45 in.lb
f
).
5. Mount the laser/inclinometer device to the new laser support plate (laser lens towards the M-BUMP slits) by
driving the four Torx
®
bolts (T20 bit, 7 mm hex key, 3 N.m/27 in.lb
f
).
7.2.3 Rubber feet
Replacement kit and tools
KR SB18iPAT, electric screwdriver with torque selector (N.m or in.lb
f
), T30 Torx
®
bit, 10 mm hex key.
Rubber feet replacement procedure
1. Remove the old foot from the KARA-MINIBUEX by undoing the Torx
®
bolt (T30 bit, 10 mm hex key).
2. Mount a new foot on the KARA-MINIBUEX by driving a 35 mm Torx
®
bolt (T30 bit, 10 mm hex key, 3 N.m/27
in.lb
f
).
3. Repeat the procedure for all feet to be replaced.

 Loading...