FLIP
®
01.01.2019
English / Englisch
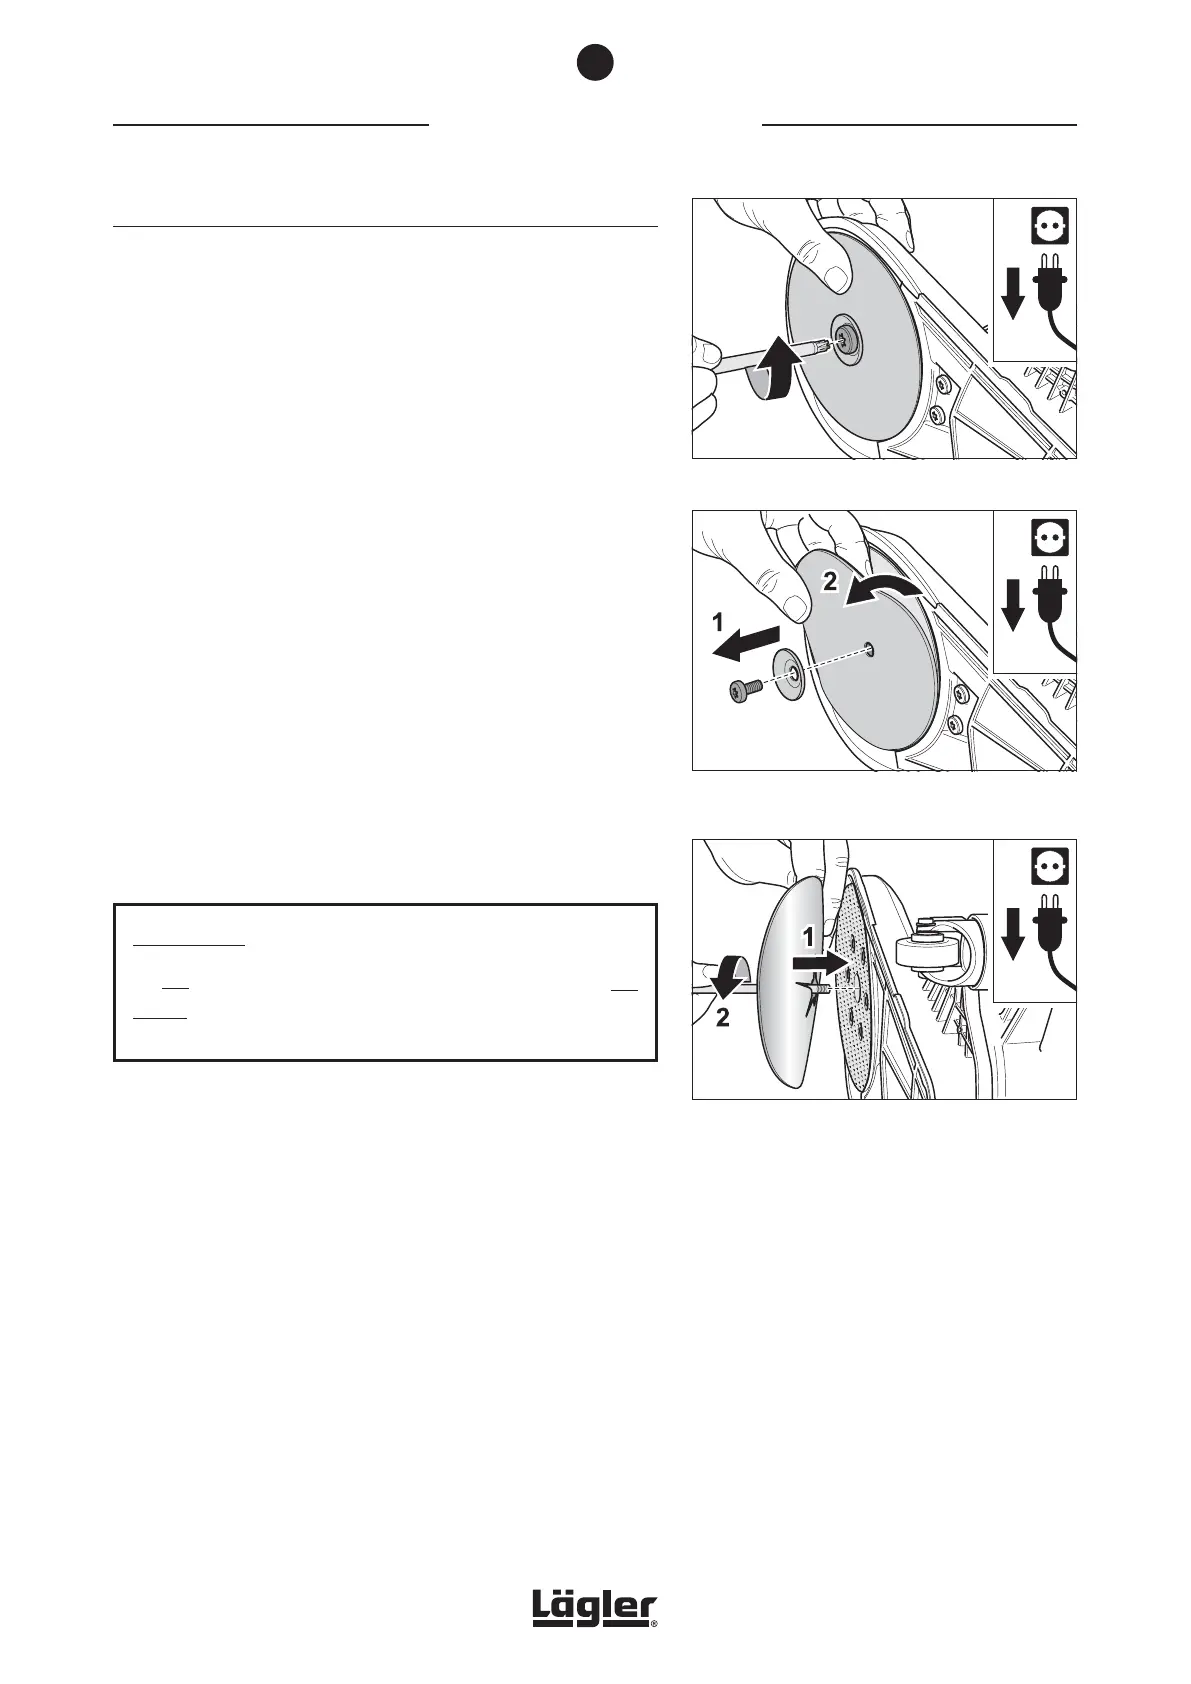
Fig. 16 Remove the screw with the universal spanner.
Fig. 17 Remove the screw and the paper tensioning
disc (1) and remove the sanding disc (2).
Fig. 18 Mount the new sanding disc (1) and tighten the
screw (2).
5.2.2 CONVENTIONAL SANDING DISCS
1 Switch off the machine and pull the power plug out of the
socket!
2 Lay the machine on its side, avoiding damage to the floor
and the machine!
3 Use the universal spanner to remove the screw from the
sanding plate (fig. 16).
4 Remove the screw and paper tensioning disc (fig. 17, 1).
Remove the sanding disc from the sanding plate (fig. 17, 2)
and put all three parts aside.
5 Put on a new sanding disc and insert the screw with the paper
tensioning disc into the hole of the sanding plate (fig. 18, 1).
6 Turn the screw in the sanding plate with the universal spanner
(fig. 18, 2). Make sure that the sanding disc is as centered as
possible on the sanding plate.
7 Tighten the screw with the universal spanner until it is hand-
tight.
ATTENTION!
Do not tighten the screw for attaching the sanding disc too
tightly! The thread of the sanding plate could otherwise be
damaged!
WORKING WITH THE FLIP
®
5
23