FLIP
®
01.01.2019
English / Englisch
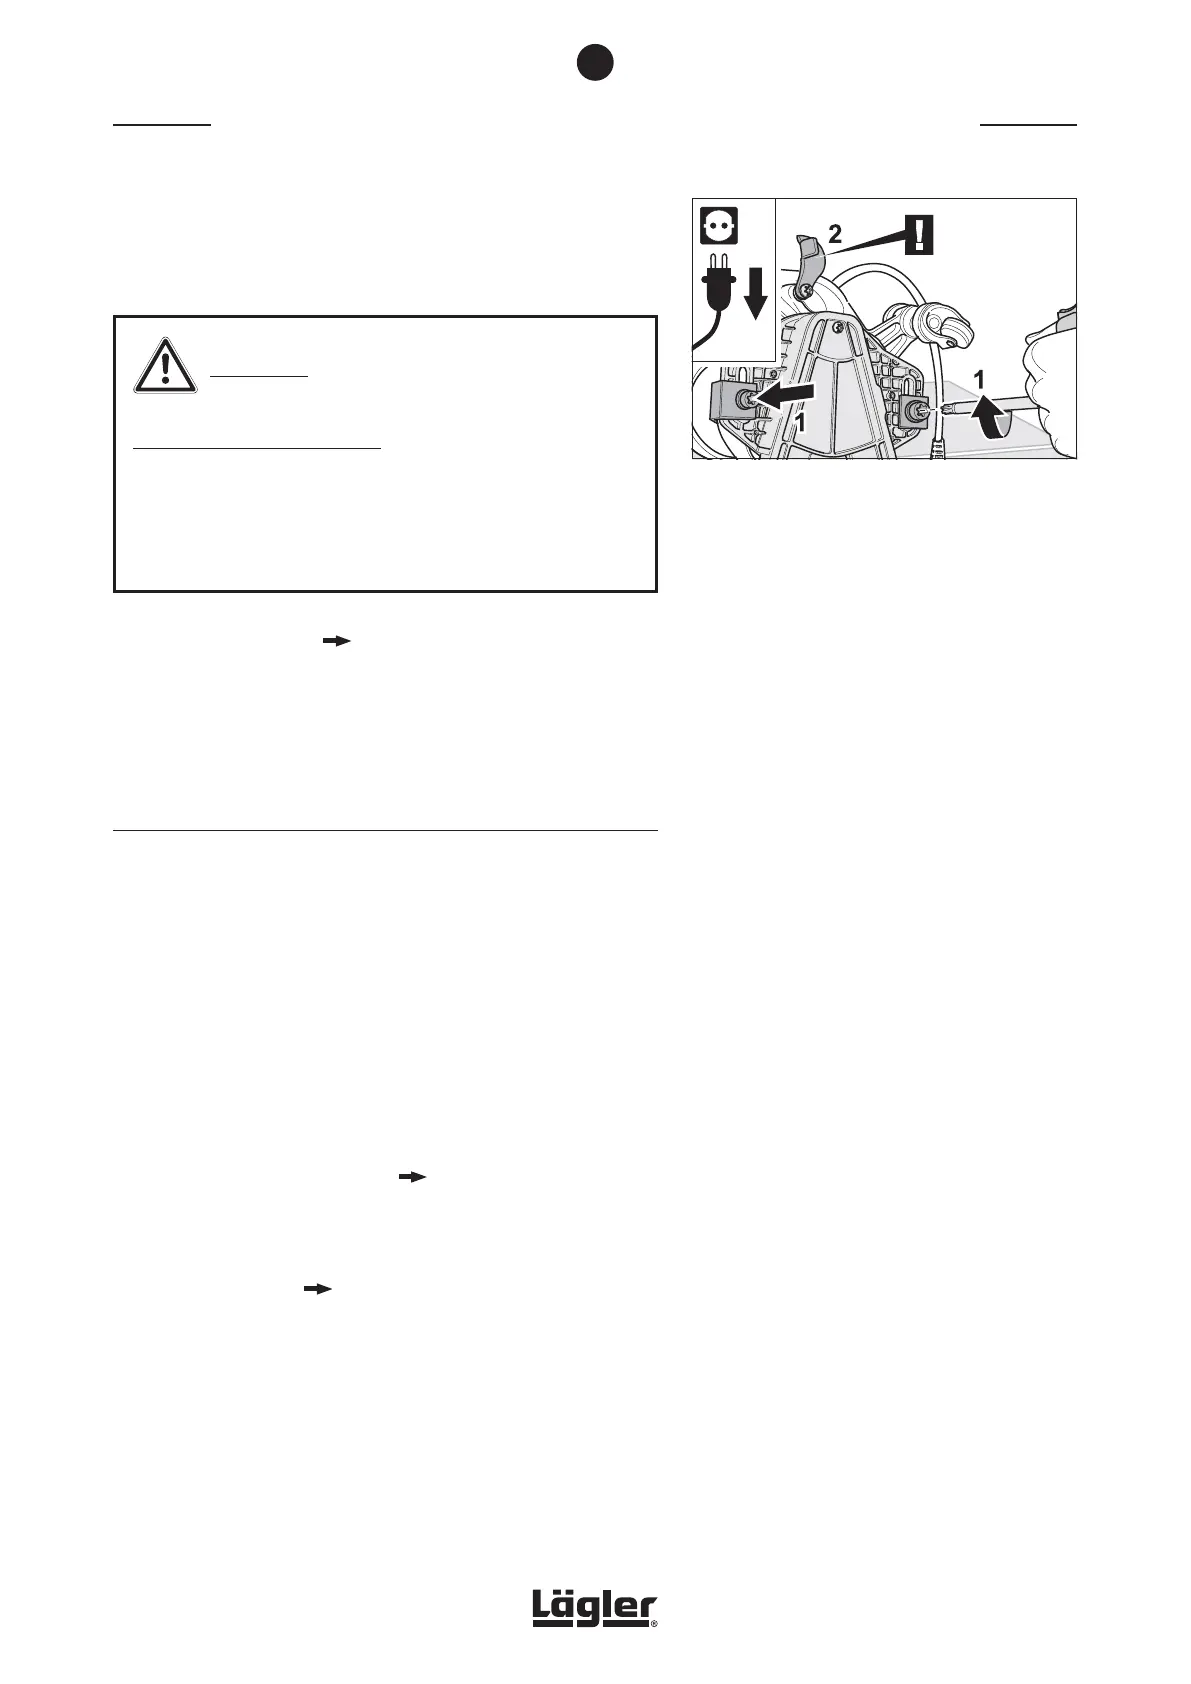
7 Tighten the two screws for connecting the attachment,
placing a washer and guide angle in the respective threads
of the fan housing (fig. 47, 1). Do not tighten the screws yet.
WARNING!
HEALTH RISK caused by dust:
Make sure that the belt tightening plate is not located
between the attachment and the fan housing (fig. 47, 2)!
Otherwise, a significant amount of dust will escape from this
area during sanding!
8 Tighten the V-belt ( Section 7.2, Tightening the V-belt).
Checking the belt tension again after break-in time of a few days
and tighten the V-belt again if necessary!
7.4 REPLACING THE COMPLETE SANDING PLATE
Use only original LÄGLER
®
sanding plates (part number in
Section 11, Spare parts FLIP
®
)!
If it is determined while replacing the V-belt that the sanding plate
pulley is worn-out, the complete sanding plate must be replaced
as follows:
1 Switch off the machine and pull the power plug out of the
socket!
2 Remove the attachment from the machine and dismantle
the complete sanding plate (
Section 7.3.1, Removing the
V-belt).
3 Put the attachment with a new complete sanding plate back
on the machine ( Section 7.3.2, Installing the V-belt).
MAINTENANCE WORK AND REPLACEMENT OF WEARING PARTS
Fig. 47 Turn both screws for connecting the attachment
and place a washer and a guide angle in the
respective thread of the fan housing (1).
Make sure that the belt tightening plate is not
located between the attachment and the fan
housing (2)!
7
33