FLIP
®
01.01.2019
English / Englisch
MAINTENANCE WORK AND REPLACEMENT OF WEARING PARTS
If you want to sand under low radiators or cupboards, you can
completely remove the wall-protecting roller:
1 Switch off the machine and pull the power plug out of the
socket!
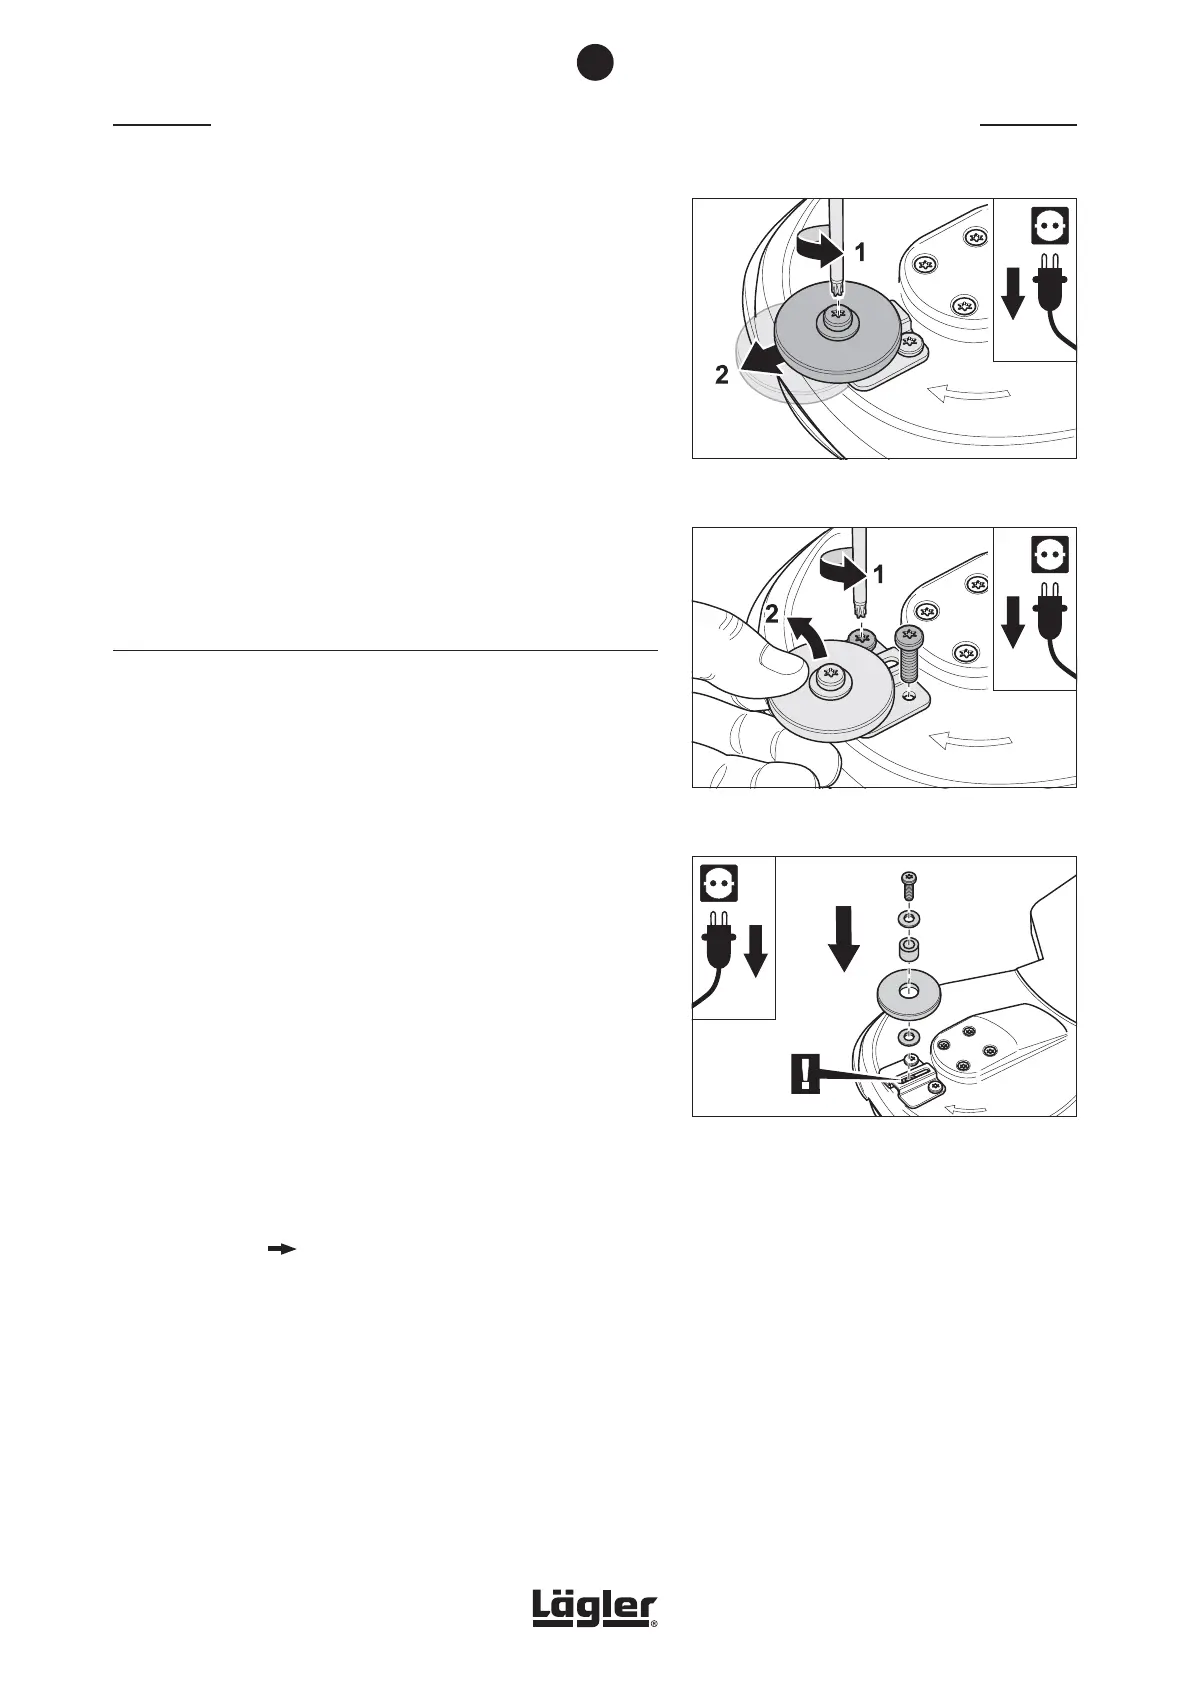
2 Undo the screw in the middle of the wall-protecting roller with
the universal spanner (fig. 71, 1) and push the wall-protecting
roller into the front position (fig. 71, 2).
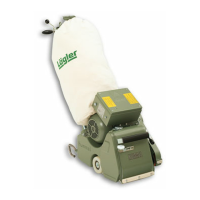
3 Undo the two screws attaching the holder of the wall-
protecting roller to the attachment (fig. 72, 1) and remove
the complete wall-protecting roller (fig. 72, 2).
7.11 REPLACING THE WALL-PROTECTING ROLLER
Use only original LÄGLER
®
wall-protecting rollers (part number in
Section 11, Spare parts FLIP
®
)!
1 Switch off the machine and pull the power plug out of the
socket!
2 Use the universal spanner to undo the screw in the middle
of the wall-protecting roller (fig. 71, 1).
3 Remove the old wall-protecting roller.
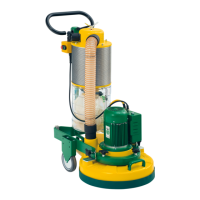
4 Insert the bush in the new wall-protecting roller and place
it on the holder of the wall-protecting roller with a washer
on each side. Ensure that the middle of the roller is located
over the nut in the holder (fig. 73)!
5 Turn the screw through the drill holes in the washer and the
bush into the nut.
6 Adjust the position of the wall-protecting roller according to
your needs ( Section 7.10, Adjusting the wall-protecting
roller).
7
Fig. 72 Undo the fixing screws (1) and remove the com-
plete wall-protecting roller (2).
Fig. 73 Assembly of the wall-protecting roller. Pay atten-
tion to the nut in the holder!
Fig. 71 Undo the screw (1) and push the wall-protecting
roller (2).
43