4. Measure t
o measure and to
continue to the next screen.
Motorised instruments change
automatically to the other face.
Non-motorised instruments
guide t
o the other face.
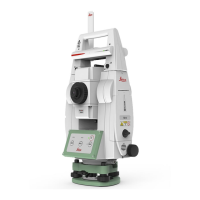
☞
The fine pointing
must be performed
manually in both
faces.
5. Face II measurement
Measure to measure the same target in the other face and to calcu-
late the tilting axis error.
☞
If the error is bigger than the predefined limit, the procedure must
be repeated. The tilting axis measurements of the current run are
then rejected and not averaged with the results from previous runs.
6. Adjustment Status
Number of measurements: Shows the number of runs completed.
One run consists of a measurement in face I and face II.
a T-axis quality (1 σ): shows the standard deviation of the deter-
mined tilting axis error. The standard deviation can be calculated
from the second run onwards.
☞
Measure at least two runs.
7. Next to continue with the check & adjust procedure.
8. Select Add another calibration loop if more runs have to be
added. Next and continue with step 3.
OR
Select Finish the calibration & store the results to finish the cali-
bration process. No more runs can be added later. Next to view the
adjustment results.
9. Select Finish to accept the results. No more runs can be added later.
OR
Select Redo to decline all measurements and to repeat all calibration
runs.
IF the results are THEN
to be stored Next overwrites the old tilting axis error with
the new one.
to be determined again Redo rejects the new determined tilting axis
error and repeats the whole procedure. Refer
to paragraph "Determination of tilting axis
error step-by-step".
Next step
54 Check & Adjust