5.1501.8502.0 A
Operating Instructions 5-11
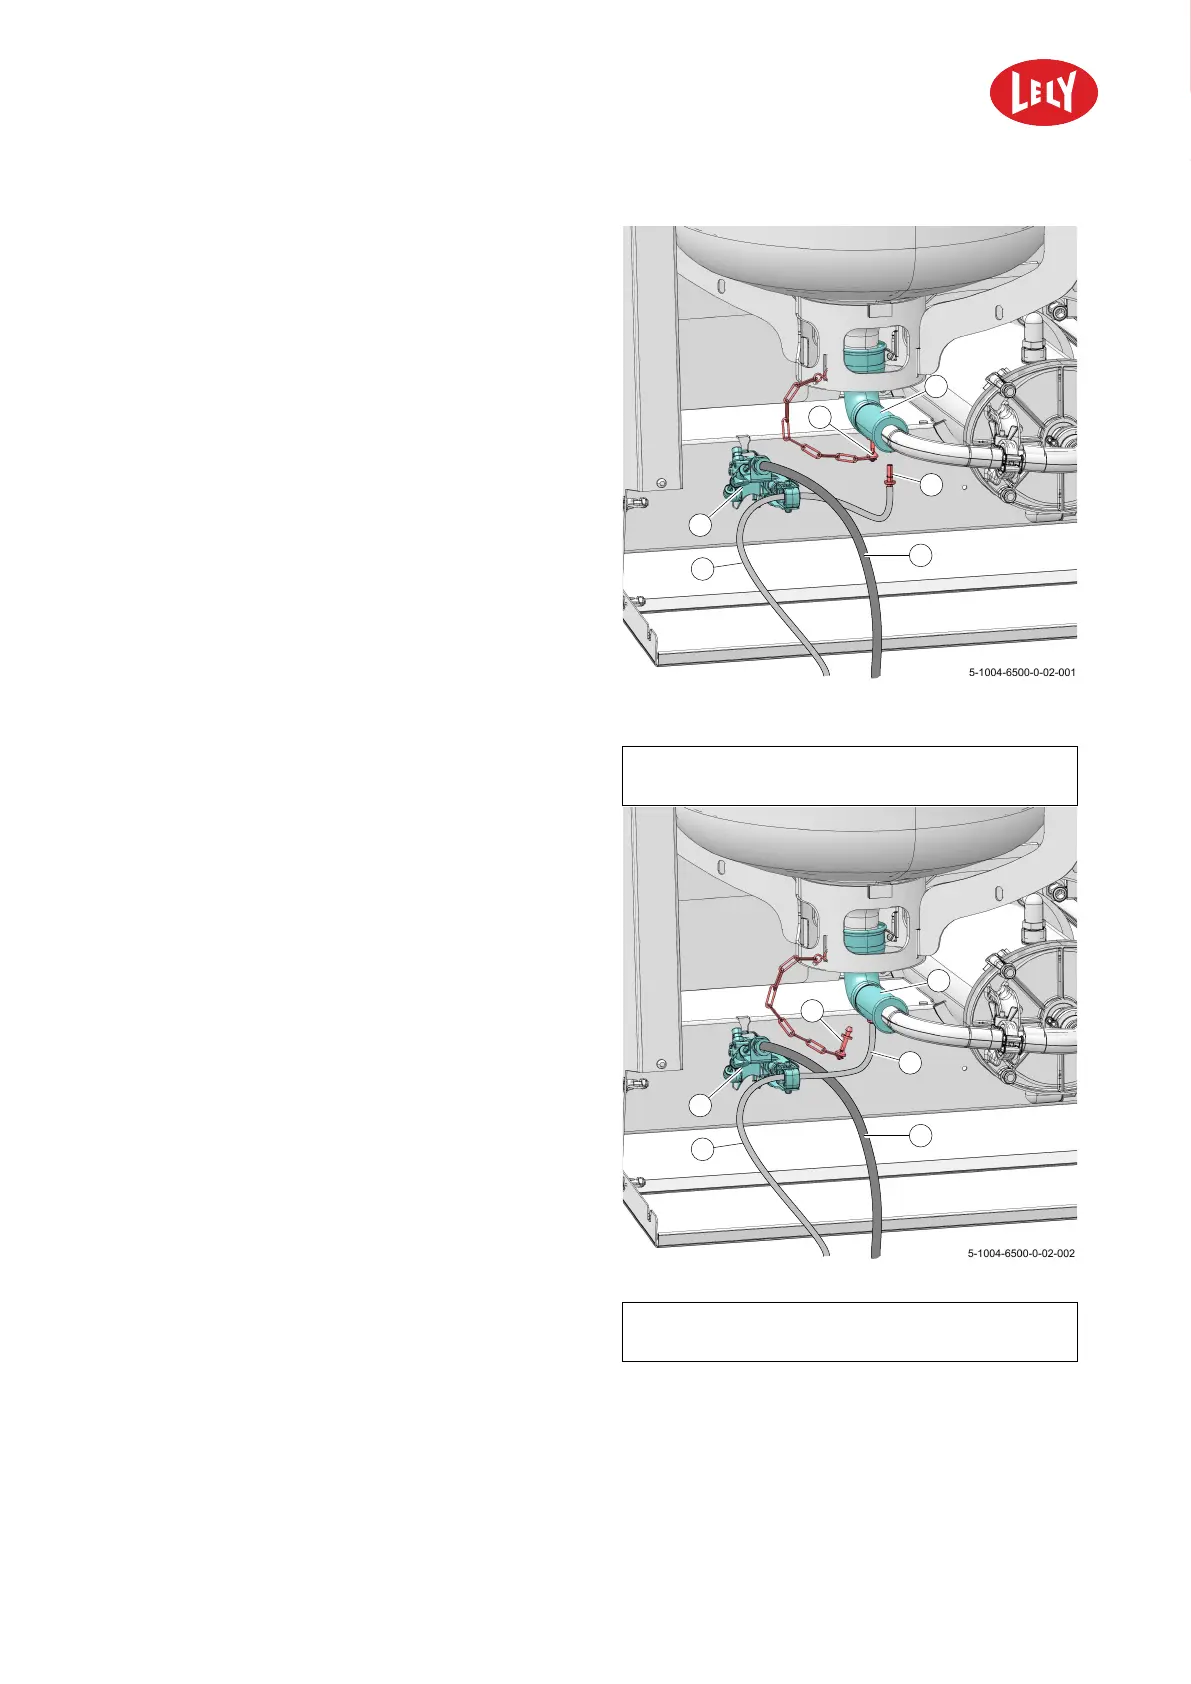
Figure 15. Put the milk tube through the hole of
the sampling cylinder
KEY: 1. Elbow - 2. Plug - 3. Nipple - 4. Tube (compressed air
to Shuttle) - 5. Milk tube (to Shuttle) - 6. Sampling cylinder
5. Put the milk tube (5) through the hole of the
sampling cylinder (3) (Approximately 50 cm (19.7
in)) (see figure 15 on page 5-11).
6. On the E-Link select in the field Valve sampling
button Close.
7. Remove the plug (2) from the elbow (1) (see
figure 15 on page 5-11).
8. Install nipple (3) to the milk tube (5).
Figure 16. Install the milk tube to the elbow
KEY: 1. Elbow - 2. Plug - 3. Nipple - 4. Tube (compressed air
to Shuttle) - 5. Milk tube (to Shuttle) - 6. Sampling cylinder
9. Install the milk tube (5) to the elbow (1) (see
figure 16 on page 5-11).
10. Install tube (4) to the coupling of the sampling
cylinder (3).
11. On the E-Link select button Next.
12. Set:
1. The current rack number.
2. The start and end position.
3. The number of empty bottles for alarm.
4. The fill time for a sample bottle.
13. Select button Next.
5.4.2.2 Astronaut A5
Make the Tab Start milk sampling visible
On the E-Link select:
in n o vato rs in agriculture