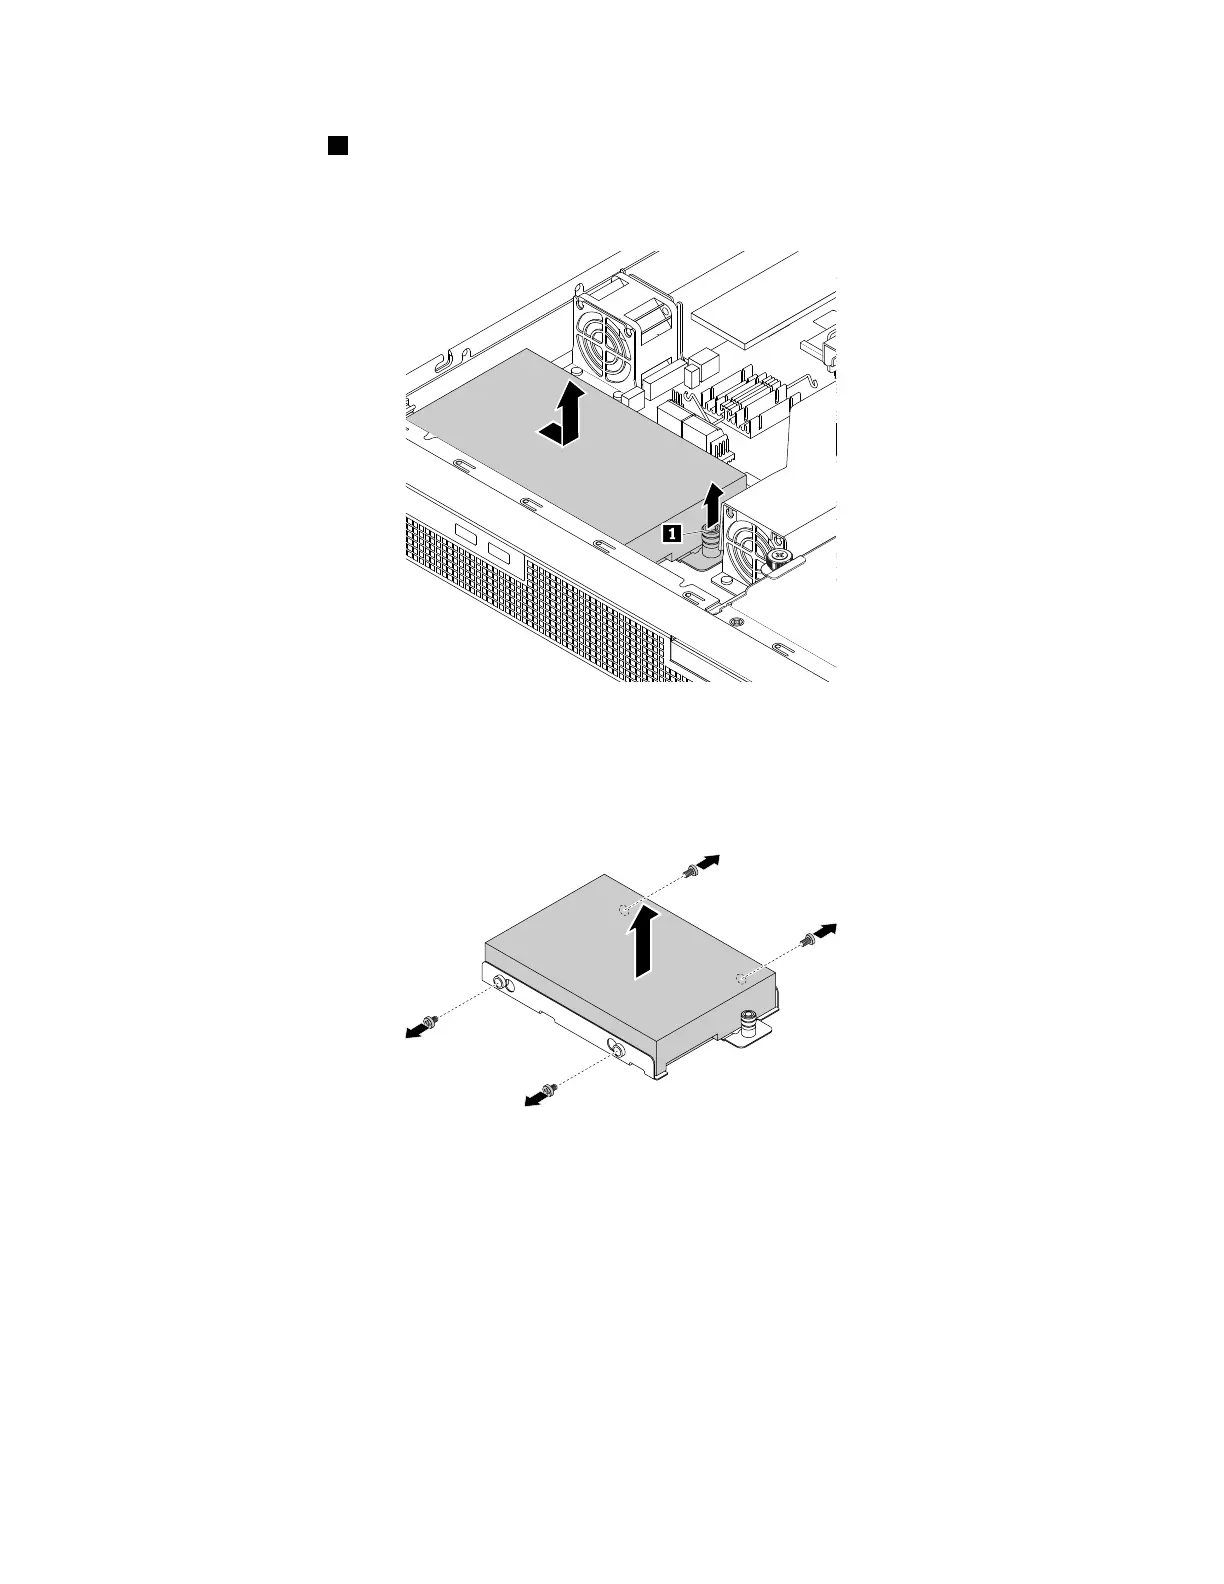
4.Liftthereleasepin1onthe3.5-inchHDDbracket.Meanwhile,slidethe3.5-inchHDDanditsbracket
asshowntoreleasethebracketfromtheserver.Then,liftthe3.5-inchHDDanditsbracketoutof
thechassis.
Figure54.Removinga3.5-inchHDDanditsbracket
5.Removethefourscrewsthatsecurethe3.5-inchHDDtothebracket.Then,liftthe3.5-inchHDDupto
removeitfromthebracket.
Figure55.Removingthe3.5-inchHDDfromthebracket
6.IfyouareinstructedtoreturntheoldHDD,followallpackaginginstructionsanduseanypackaging
materialsthataresuppliedtoyouforshipping.
7.Reinstalltheslim-optical-drivebracketifyouhaveremovedit.See“Installingtheslim-optical-drive
bracket”onpage71.
Tocompletethepartsreplacement,goto“Completingthepartsreplacement”onpage95.
Installinga3.5-inchharddiskdrive
Toinstalla3.5-inchHDD,dothefollowing:
1.Prepareyourserver.See“Preparingyourserverinadvance”onpage47.
76ThinkServerRS160UserGuideandHardwareMaintenanceManual
 Loading...


