User Manual for BPS-2000
www.levitronix.com
PL-4021-00, Rev06, DCO# 21-037
6.2.3 Instructions for Replacement with PFA+PP Pump Housing
1. Power down the pump system and remove the
AC power. Let the motor and pump head cool
down to a workable temperature before the
impeller can be exchanged.
2. Unscrew the lid of the pump head and remove it
along with the sealing ring.
3. Remove the impeller with the Impeller
Exchange Tool. Hook the claws of the Impeller
Exchange Tool into two opposing vanes of the
impeller.
4. Inspect the wet area of the pump head
carefully. In case of material damage, also
replace the pump housing.
5. Place the new impeller into the pump housing
using the Impeller Exchange Tool.
6. If necessary, remove the existing O-Ring and
gently press the new O-Ring into the lid of the
pump casing.
Use always the specified O-Ring type. If necessary,
consult the Levitronix
®
Technical Service Department.
Do NOT twist or roll the O-Ring and avoid to adding
scratches or particles as this may cause leaking.
7. Align the PFA lid with the PP lid of the
reinforcing casing and assure the PFA
alignment pin fits in to the according hole of the
PP lid.
8. Press the lid with the O-ring flush into the
bottom of the pump casing. Check if the screw
holes of the PP reinforcing lid are properly
aligned with the thread holes of the PP
reinforcing base and that the arrow of the PP lid
is showing to the outlet.
Do not use the pump head screws to press the lid into
the pump housing bottom. This might lead to
distortions of the O-ring, which affects the sealing and
hydraulic performance.
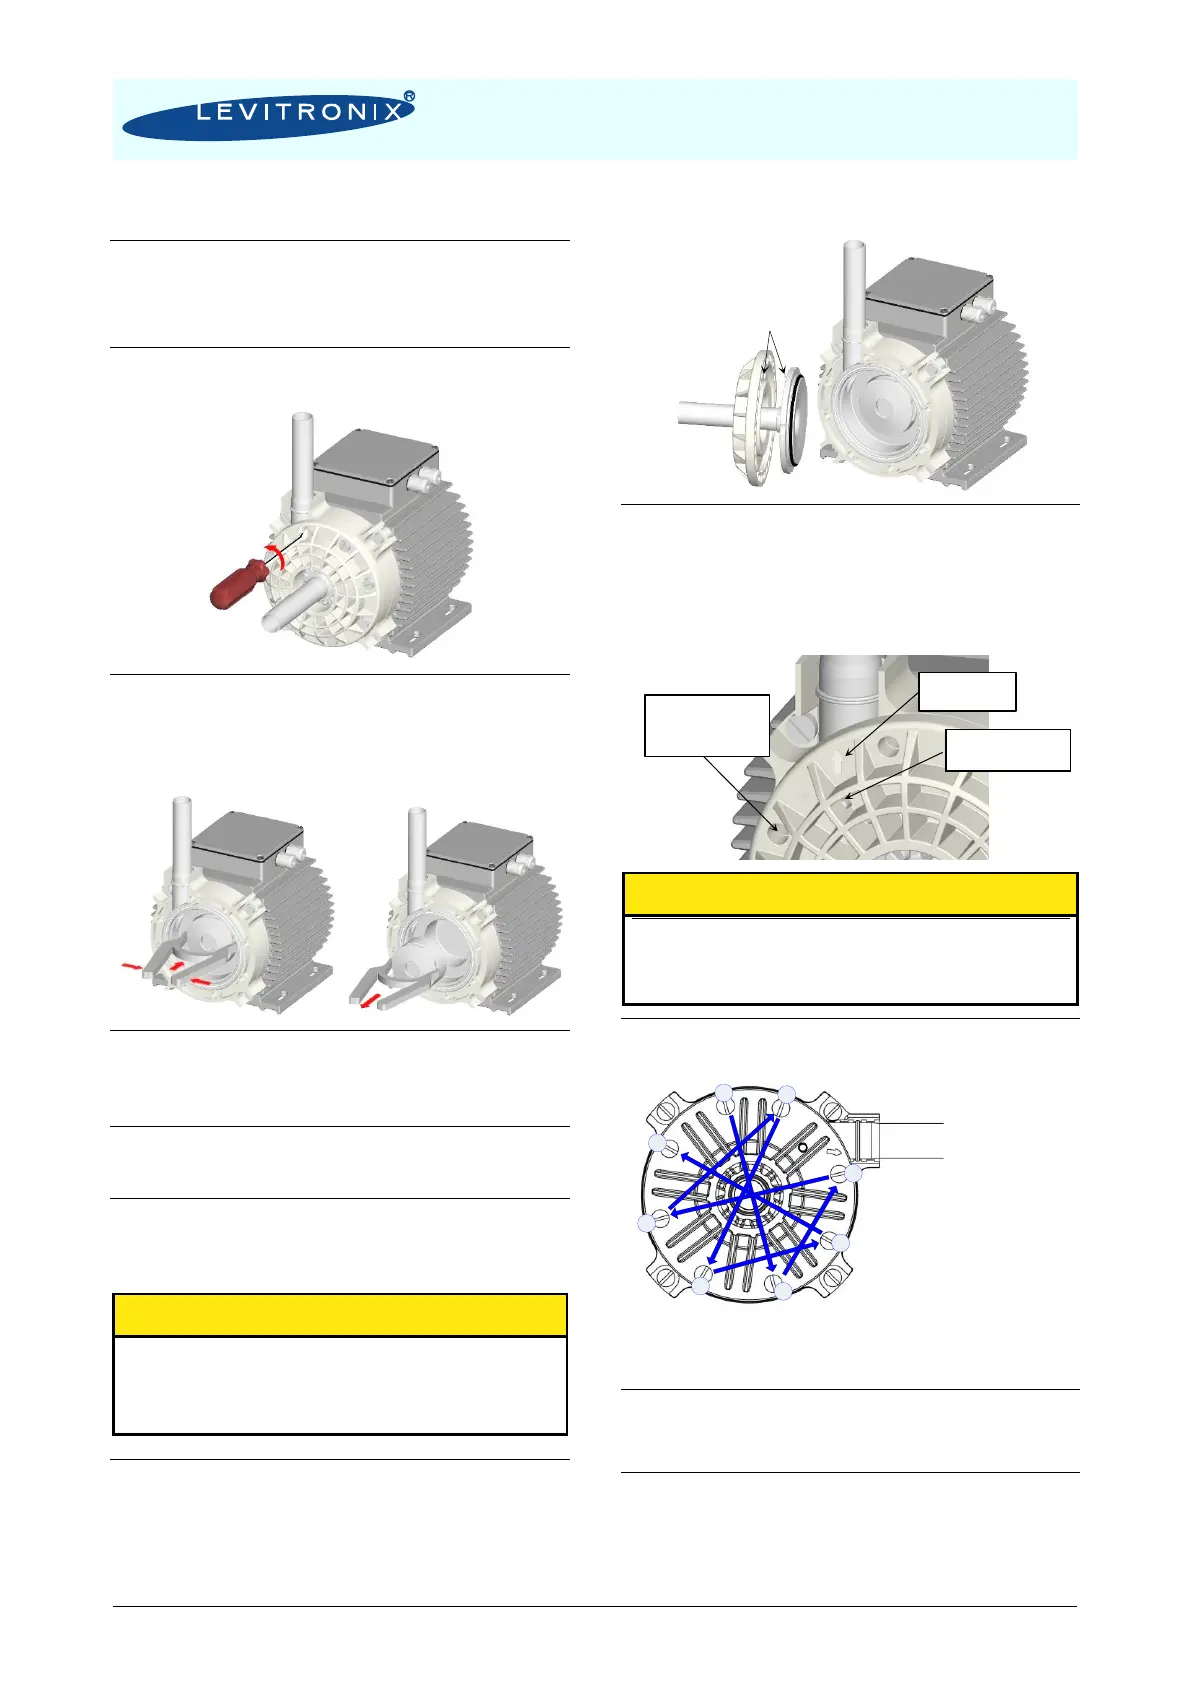
9. Tighten the 8 pump housing screws by
following torque increasing sequences:
Note: These are typical values for the standard pump head LPP-
2000.22. Refer to the relevant pump head specification drawings for
other configurations, which may have different values.
10. Start up the system and check if the impeller is
rotating properly and the pump head doesn’t
leak.
11. If the pump head leaks make sure the lid and
the O-Ring are properly pressed into the bottom
of the pump casing. It may be necessary to
change the O-Ring if it has been damaged.
Fit PFA lid pin
into PP lid hole
PP lid holes
aligned with thread
holes of PP base
PFA lid pin
fits into PP lid hole
Tightening Sequence A: 100 Ncm
Tightening Sequence B: 250 Ncm
Tightening Sequence C: 250 Ncm
Tightening Sequence D: 250 Ncm