Rev: 06.14.2016
Page 21
IN-WALL® Slide-out Service Manual
7. Measure from the bottom gear rack (center to center)
to the next gear rack and align that rack so that it
matches the measurement you took off of the system
during step 2. This will ensure that the racks are
installed parallel and square. Put a screw in each end
of the gear rack to hold it in place until you align all
the gear racks.
8. Once you align and secure all the gear racks, put all
the screws into the gear racks.
9. Attach the jumper wires to the motor in top of the
slide column and then to the cordless screw gun
battery. Actuate the motor to move the slide column
in towards the coach. Stop the column when it is still
a few inches away from the unit. Remove the jumper
cable.
10. Make sure the motor cable is tucked into the top of
the slide column.
11. Remove the 2x4 block.
12. Push the slide room in by hand until the slide column
is flush with the side wall of the coach.
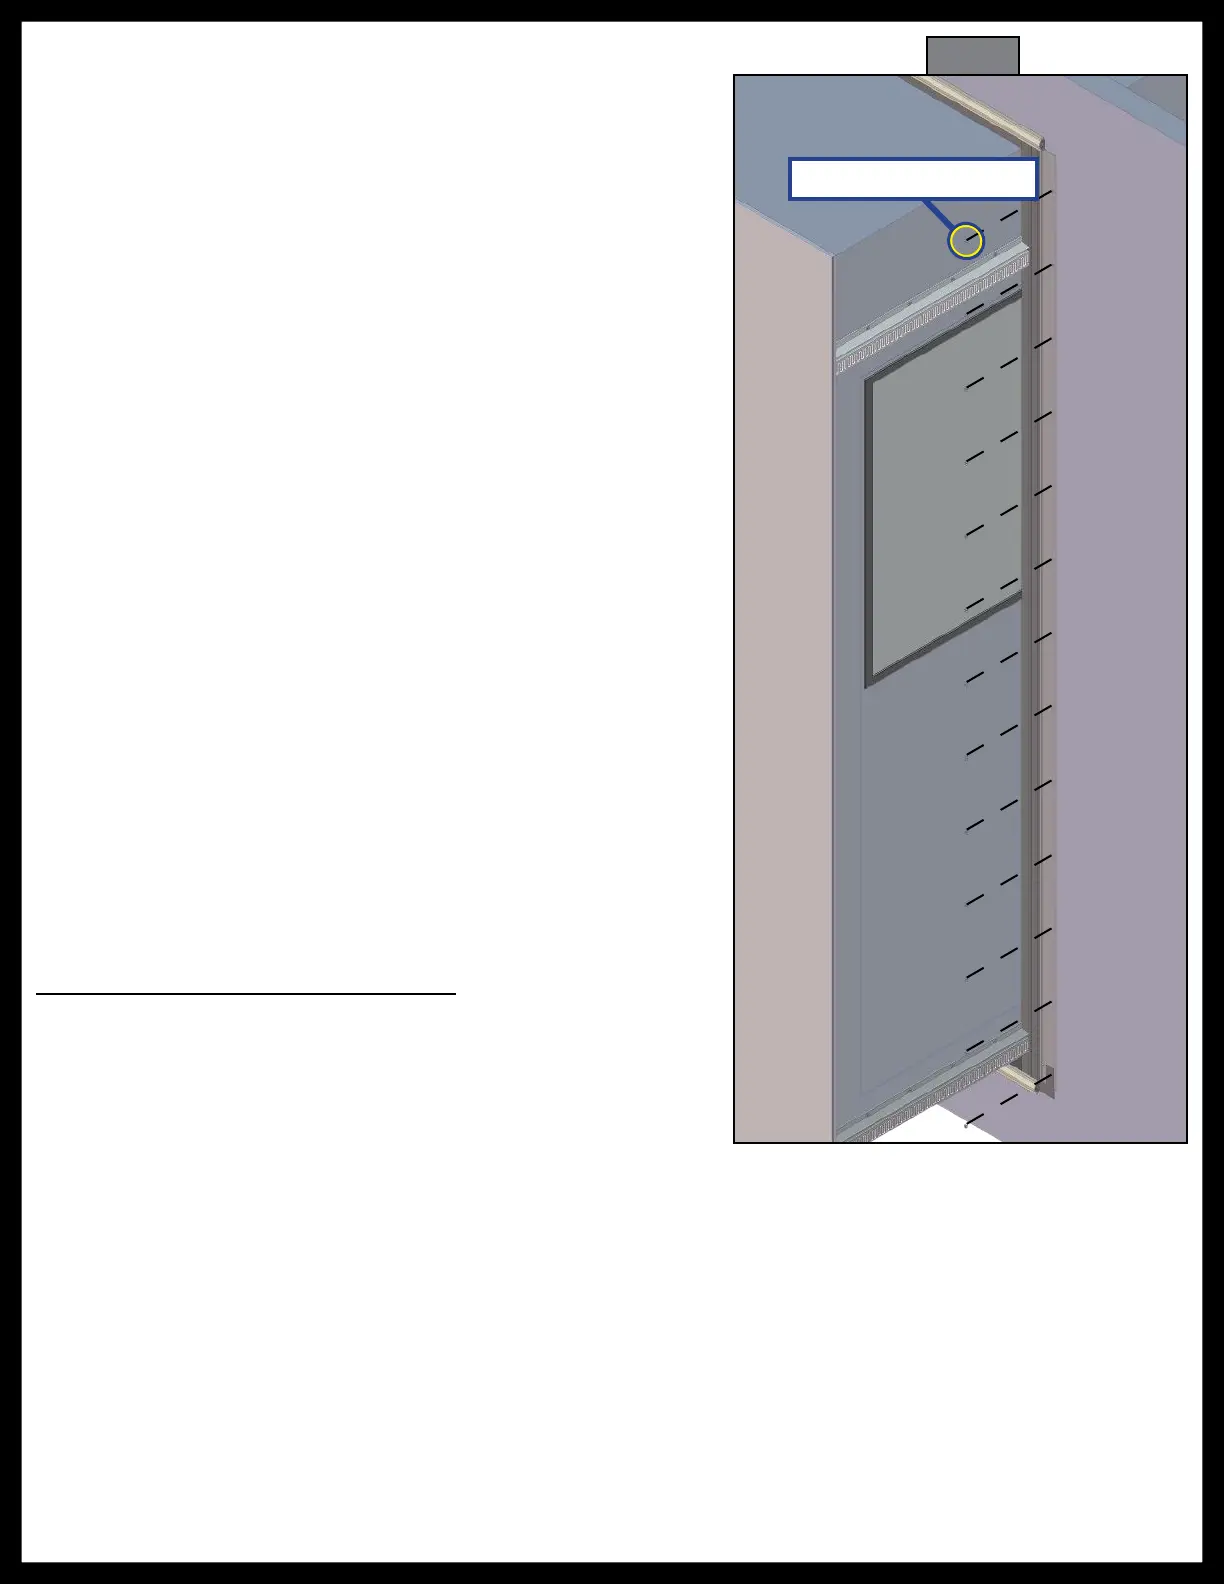
13. Screw the slide column into the side wall by placing
a screw in the column by each rack and in the middle
of the column to ensure the rack is straight, then fill in
remaining screws (Fig. 42). Remove the floor jack.
14. From the inside of the coach, connect the wiring
harness to the motor cable.
15. Repeat this process for the other side of the slide
room (if required).
16. Once you have completed both sides of the slide
room, synchronize the slide system motors (See
procedure below).
Synchronizing The Slide-Out Motors
1. Fully extend the slide room using the switch. Keep
the switch engaged until the motors shut down on
their own.
2. Retract the room 1-2 inches.
3. Repeat steps 1 and 2 until both motors shut down at
the same time. In many cases, two or three repetitions
are necessary to re-sync the system.
4. Fully extend and then retract the room. Again,
always let the motors shut down on their own before
releasing the switch.
Fig. 42
#10 Pan Head Screws

 Loading...