Rev: 06.14.2016
Page 14
IN-WALL® Slide-out Service Manual
Motor Replacement
Tools Required
• Drill or cordless screw gun
• Fast-bonding adhesive
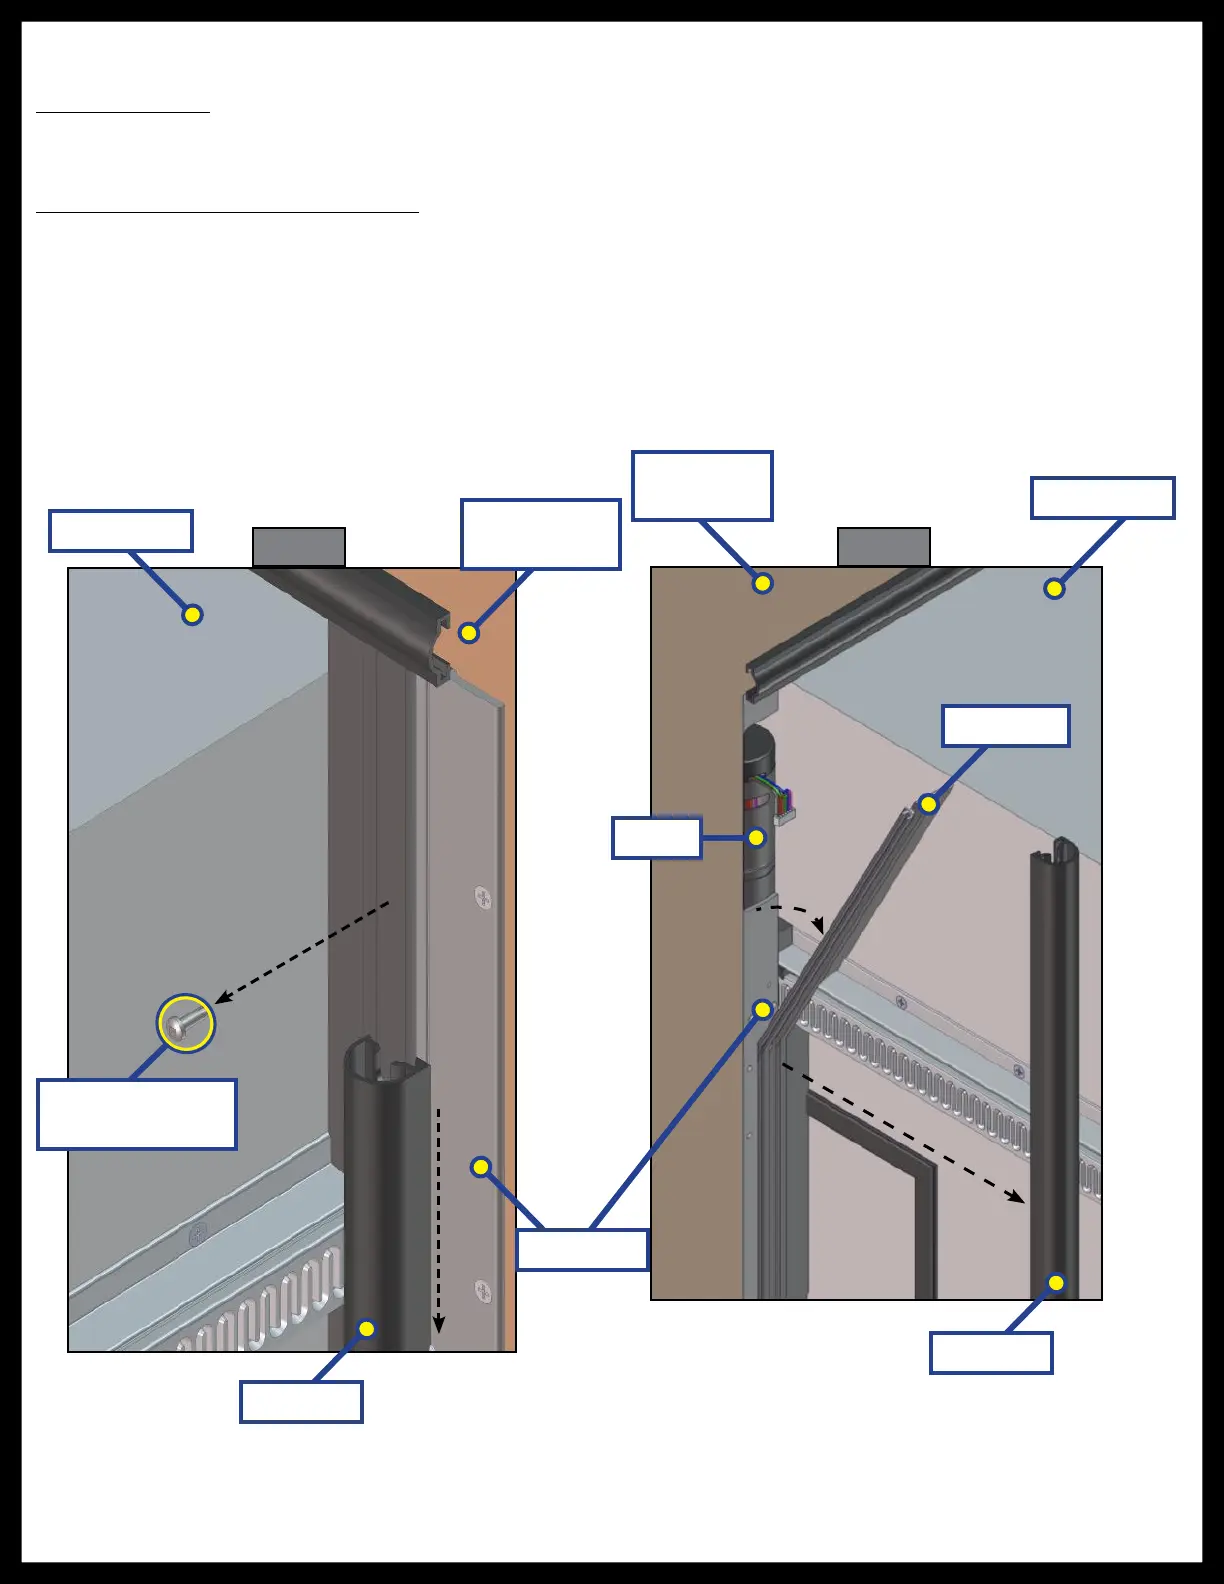
With Motor Notch (Current Style)
NOTE: There MUST be access to both the interior and exterior of the coach to perform this procedure.
1. Extend the slide-out to halfway out of the coach.
2. On the exterior, slide the bulb seal down to access the motor retention screw (Fig. 26).
3. Remove the motor retention screw (Fig. 26).
4. Inside the coach, remove the bulb seal from the wipe seal (Fig. 27.
5. Peel back the wipe seal and disconnect the wiring harness from the motor (Fig. 27).
Fig. 26 Fig. 27
Slide Room
Slide Room
Outside Wall
of Coach
Motor Retention
Screw
Bulb Seal
Bulb Seal
H-Column
Inside Wall
of Coach
Motor
Wipe Seal

 Loading...