78 79
ENEN
Installing a tire on a wheel
1. Follow the instructions in the Wheels section
of this chapter to check the rim, rim tape and tire.
Check the inside of the tire as well.
• When replacing the tire or inner tube, make sure
to use the same size, or consult your retailer for
advice on compatible sizes. Size is indicated on the
tire sidewalls.
2. Inate the inner tube until it starts to take shape.
3. Place the tube in the tire.
4. Insert the valve stem into the hole in the rim.
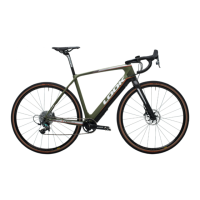
5. Using only your hands, t the rst tire bead into
the rim (Figure 35). Start at the valve stem.
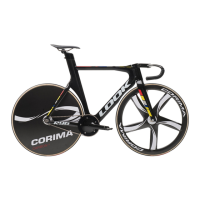
6. Push the tire and inner tube over so that the tube
is inside the rim (Figure 36).
7. Using only your hands, t the second tire bead
into the rim. Start at the valve stem.
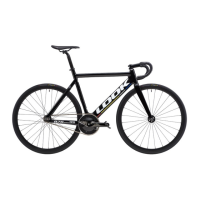
8. Take care not to pinch the tube between the tire
and the rim (Figure 37).
9. Push the valve base into the tire to ensure it
doesn’t get trapped between the bead and the rim.
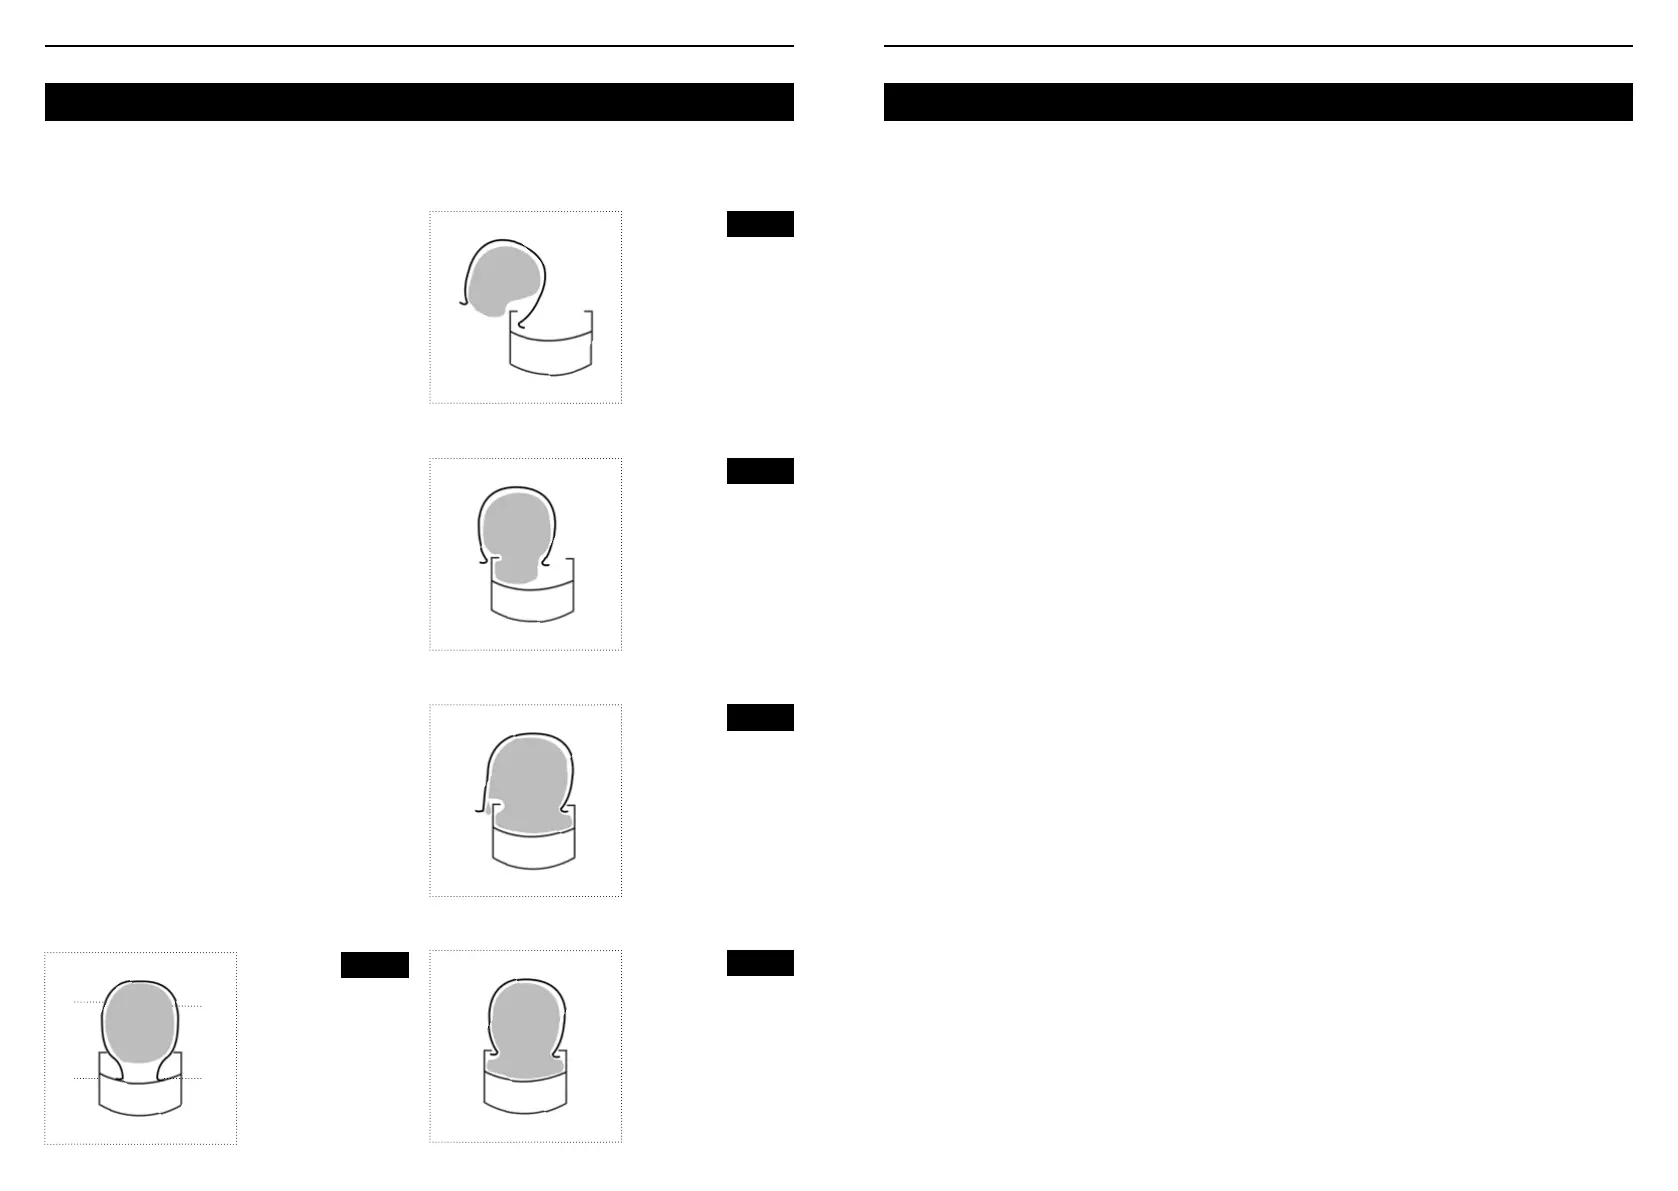
10. Inate to tire to about half the recommended
pressure and check that the tire beads t snugly into
the rim (Figure 38).
11. Deate the tire again. This will prevent any
pinching of the inner tube.
12. Inate the tire to the pressure recommended on
the sidewalls. Do not exceed the maximum ination
pressure.
Fig. 35
Fig. 36
Fig. 37
Fig. 38
Fig. 34
First tire bead
and inner tube
outside the rim
First bead pushed
into the rim,
inner tube
in the rim
Inner tube pinched
between the tire and
the rim
Tire beads in the
hooked rim edge,
with inner tube
in the rim
Tire beads in the rim
base
1.Tire
2.Inner tube
3.Rim
4.Bead
1
3
2
4
Suspension
The suspension on your bicycle can be adjusted to
your weight, riding style and personal preference.
Every suspension system is different. For
instructions on suspension adjustment, refer to the
manufacturer’s guidelines or ask your retailer for
advice.
Avoid full compression of the suspension. When
this happens, movement stops suddenly and could
cause a loss of control of the bike.
Be aware that any adjustment of the suspension
affects the braking and cornering behavior of the
bike. If the suspension has been modied, ride your
bicycle in a safe area until you are familiar with the
new handling.
Check the bolts on all parts of the suspension once
a month : mounting and pivot bolts.
Accessories
In additions to the parts and components discussed
in this chapter, your bicycle may be equipped with
accessories such as mudguards, lights, a luggage
rack or a chain guard. Every month, ensure all
accessories are securely fastened. If a part is loose
or misaligned, adjust or tighten it, or visit your
retailer for a service.
Installing a lightbulb
The bulb wattage and volts are usually indicated
on it. When buying a replacement bulb, take the old
bulb with you to ensure you buy the right bulb for
your light.
1. Locate the lens clamping screw at the back of the
light.
2. Turn the screw counterclockwise to loosen and
remove it.
3. Rotate the lens a quarter turn clockwise and
remove from the bulb mount.
4. Turn the bulb counterclockwise to loosen and
remove it.
• Take care not to break the bulb or move the cable
at the base of the bulb mount.
5. Screw in the new bulb without tightening
excessively.
6. Place the glass on the bulb mount and rotate a
quarter turn counterclockwise.
7. Replace the clamping screw at the back of the
light and tighten.
Check the new bulb is working properly. If it does not
light up, ensure the cables are in the right place and
the new bulb isn’t damaged.
 Loading...